Create a Project
This part of the tutorial describes how to customize a predefined Cognex Designer work flow, and how to create a simplified vision application using image processing with VisionPro tools. Perform the following steps to do so:
- Ensure you have attached your VisionPro dongle into your PC.
- Launch Cognex Designer. The Cognex Designer splash screen appears, followed by the Launch Page, as seen below.
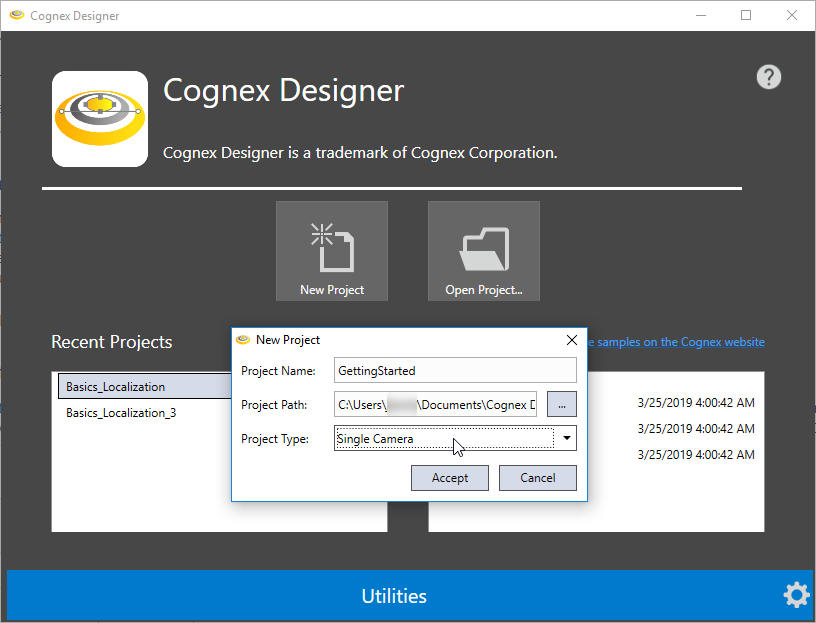
- On the Launch Page, click the New Project tile. The New Project dialog appears.
- Fill the dialog settings as follows:
- Project Name: Specify the name of the configured project here. In this example, the project name is GettingStarted.
- Project Path: Specify the location where the project files will be stored. In this example, do not modify this setting, so that the project will be saved to the default location, which is the Projects folder of Cognex Designer:
- <X>:\Users\<user name>\Documents\Cognex Designer\Projects
- Project Type: Select Single Camera from the drop-down menu.
-
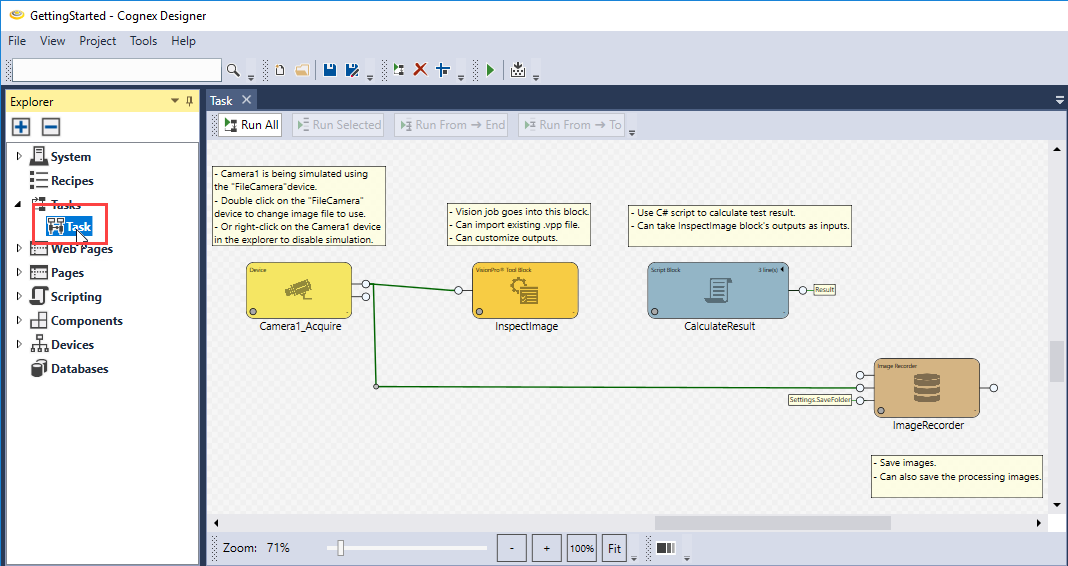
Once all settings are configured, click Accept. The Cognex Designer splash screen appears again and the GUI opens to a predefined Task window containing a single-camera task workflow. If the Task window does not open automatically, double-click Task in the Explorer pane to open the Task tab as seen below.