Installing a Filter
Perform the following steps to install an optical filter in the front cover.
Observe the following constraints on the filter:
- Diameter (Ø): 12.3mm<Ø<12.7mm
- Thickness (t): 1.6mm<t<2mm
-
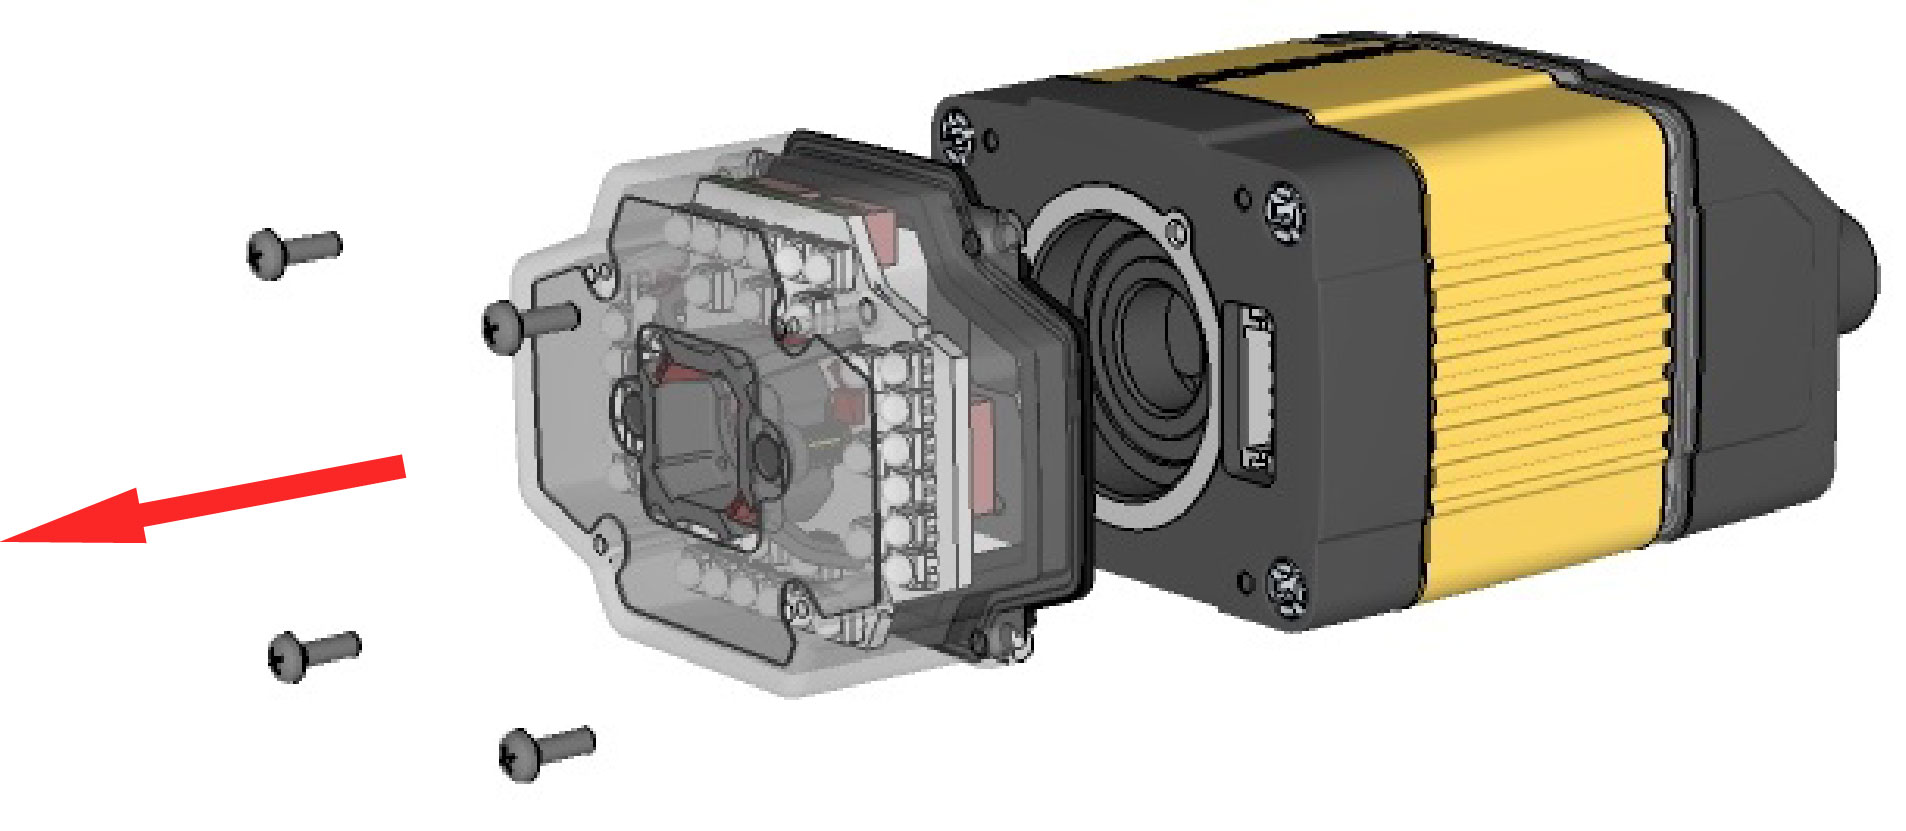
First, remove the front cover: unscrew the four M3 screws and take off the LED cover.
-
Take off the rubber seal, remove the two smaller screws, and remove the PCB.
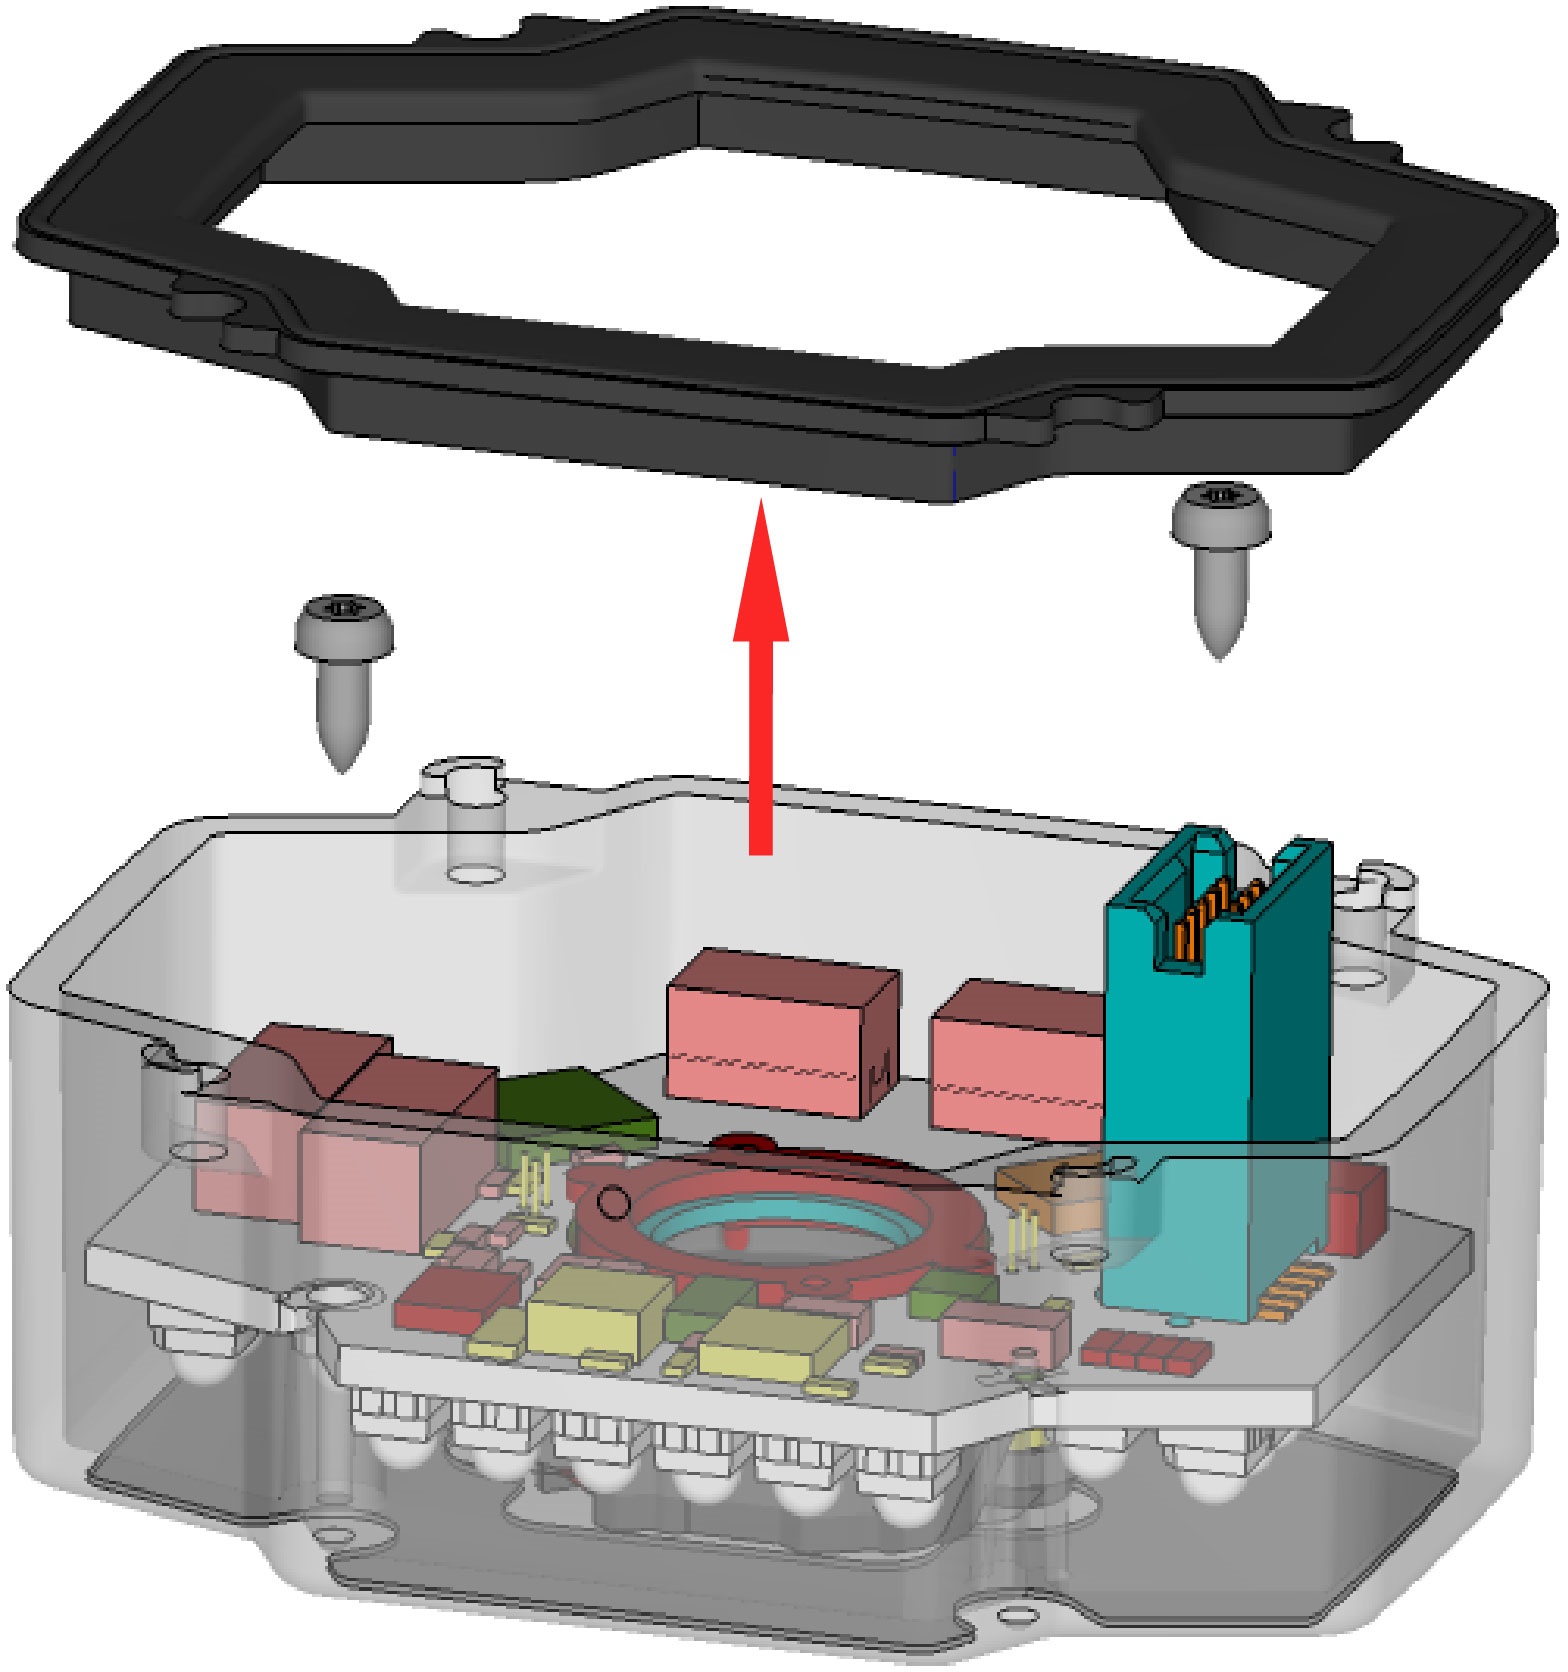 Note: Use a T6 Torx screwdriver.WARNING: Make sure that no electrostatic charges are applied to the PCB. (For example, wear ESD shoes.)
 -
Working from the front of the PCB, press the legs of the filter holder gently together and pull off the clip.
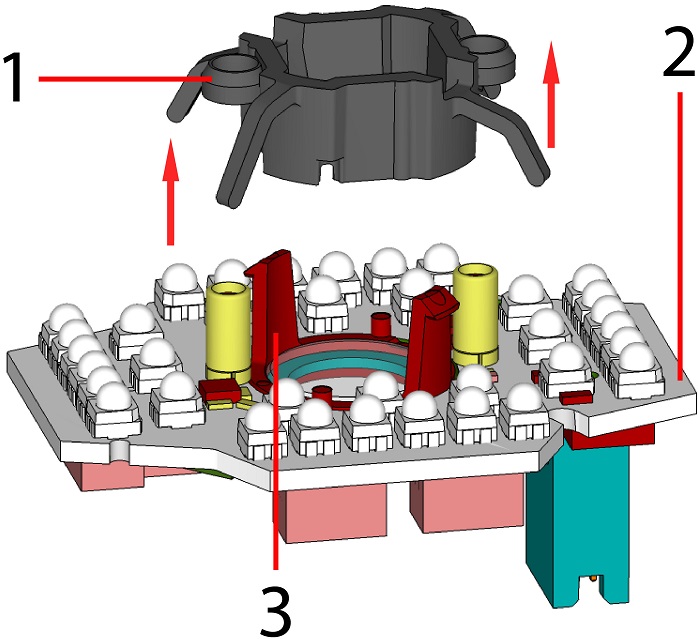
1 Filter retaining clip 2 LED PCB 3 Filter holder -
Insert first the filter glass, then the soft spacer (which was removed from its place between the filter holder and the filter retaining clip) into the filter holder. A pair of tweezers may be helpful.
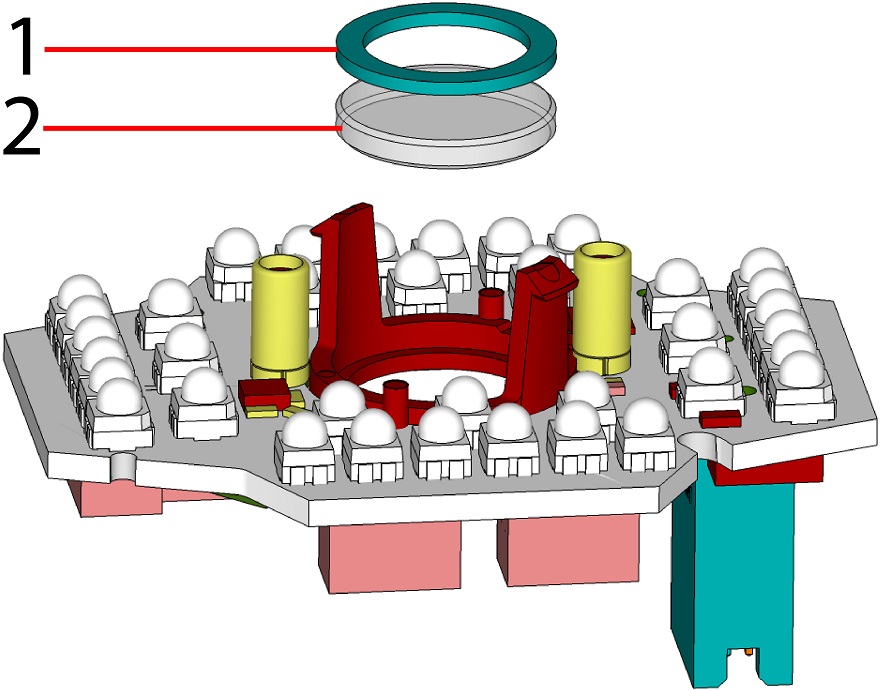
1 Soft spacer 2 Filter glass -
Snap fit the filter retaining clip onto the legs of the filter holder. Ensure that the laser modules slide into the laser guides and the orientation pin fits into the filter retaining clip.
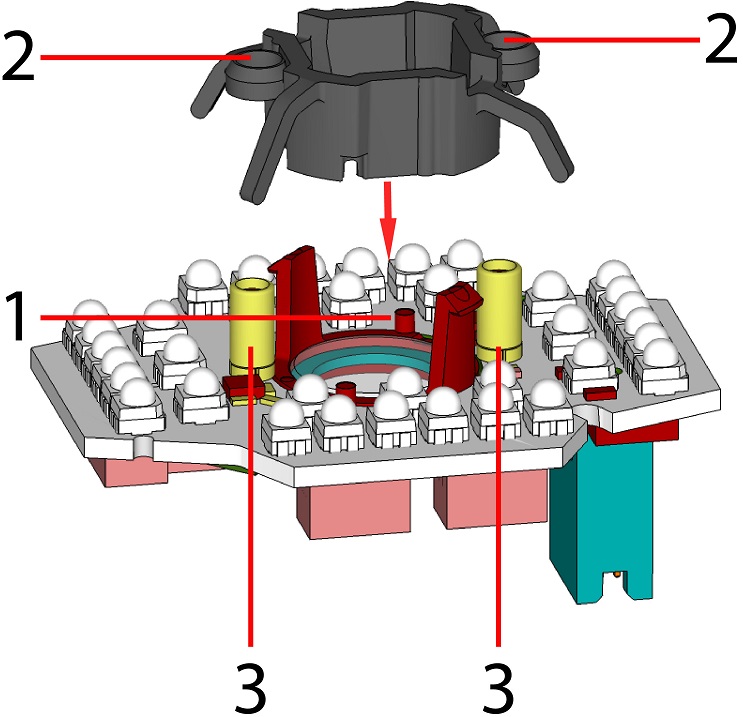
1 Orientation pin 2 Laser guide 3 Laser module Check that the snap hooks are correctly positioned and fully engaged.
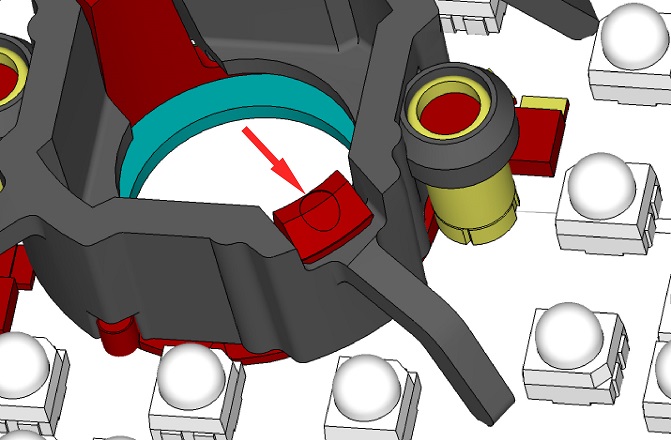
-
Insert the PCB with the filter retaining clip and the filter holder back into the front cover. Ensure that the hole in the PCB meets the orientation pin in the front cover. Fix the PCB with two Torx 6 screws of size 2.0x5 mm.
Note: Use a torque of 8-10Ncm (11-14 oz-in).
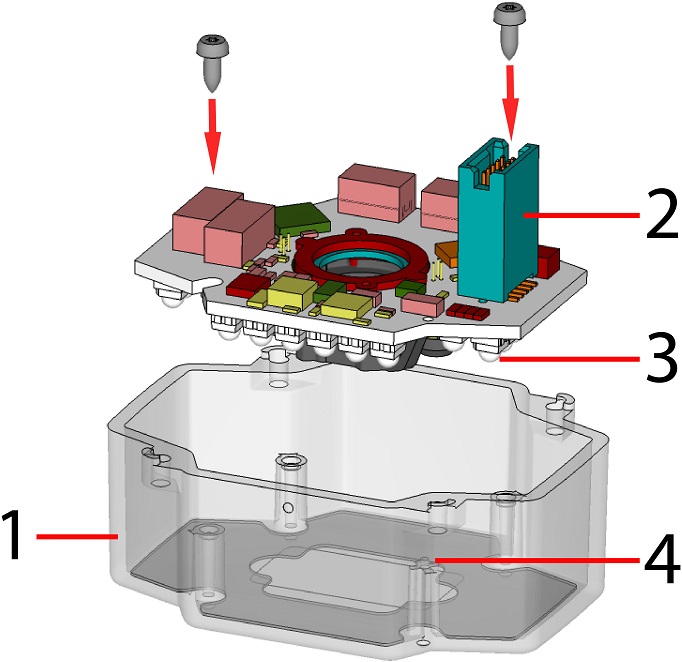
1 LED cover 2 PCB with filter holder and filter retaining clip 3 Notch in PCB 4 Orientation pin -
Insert the rubber seal.
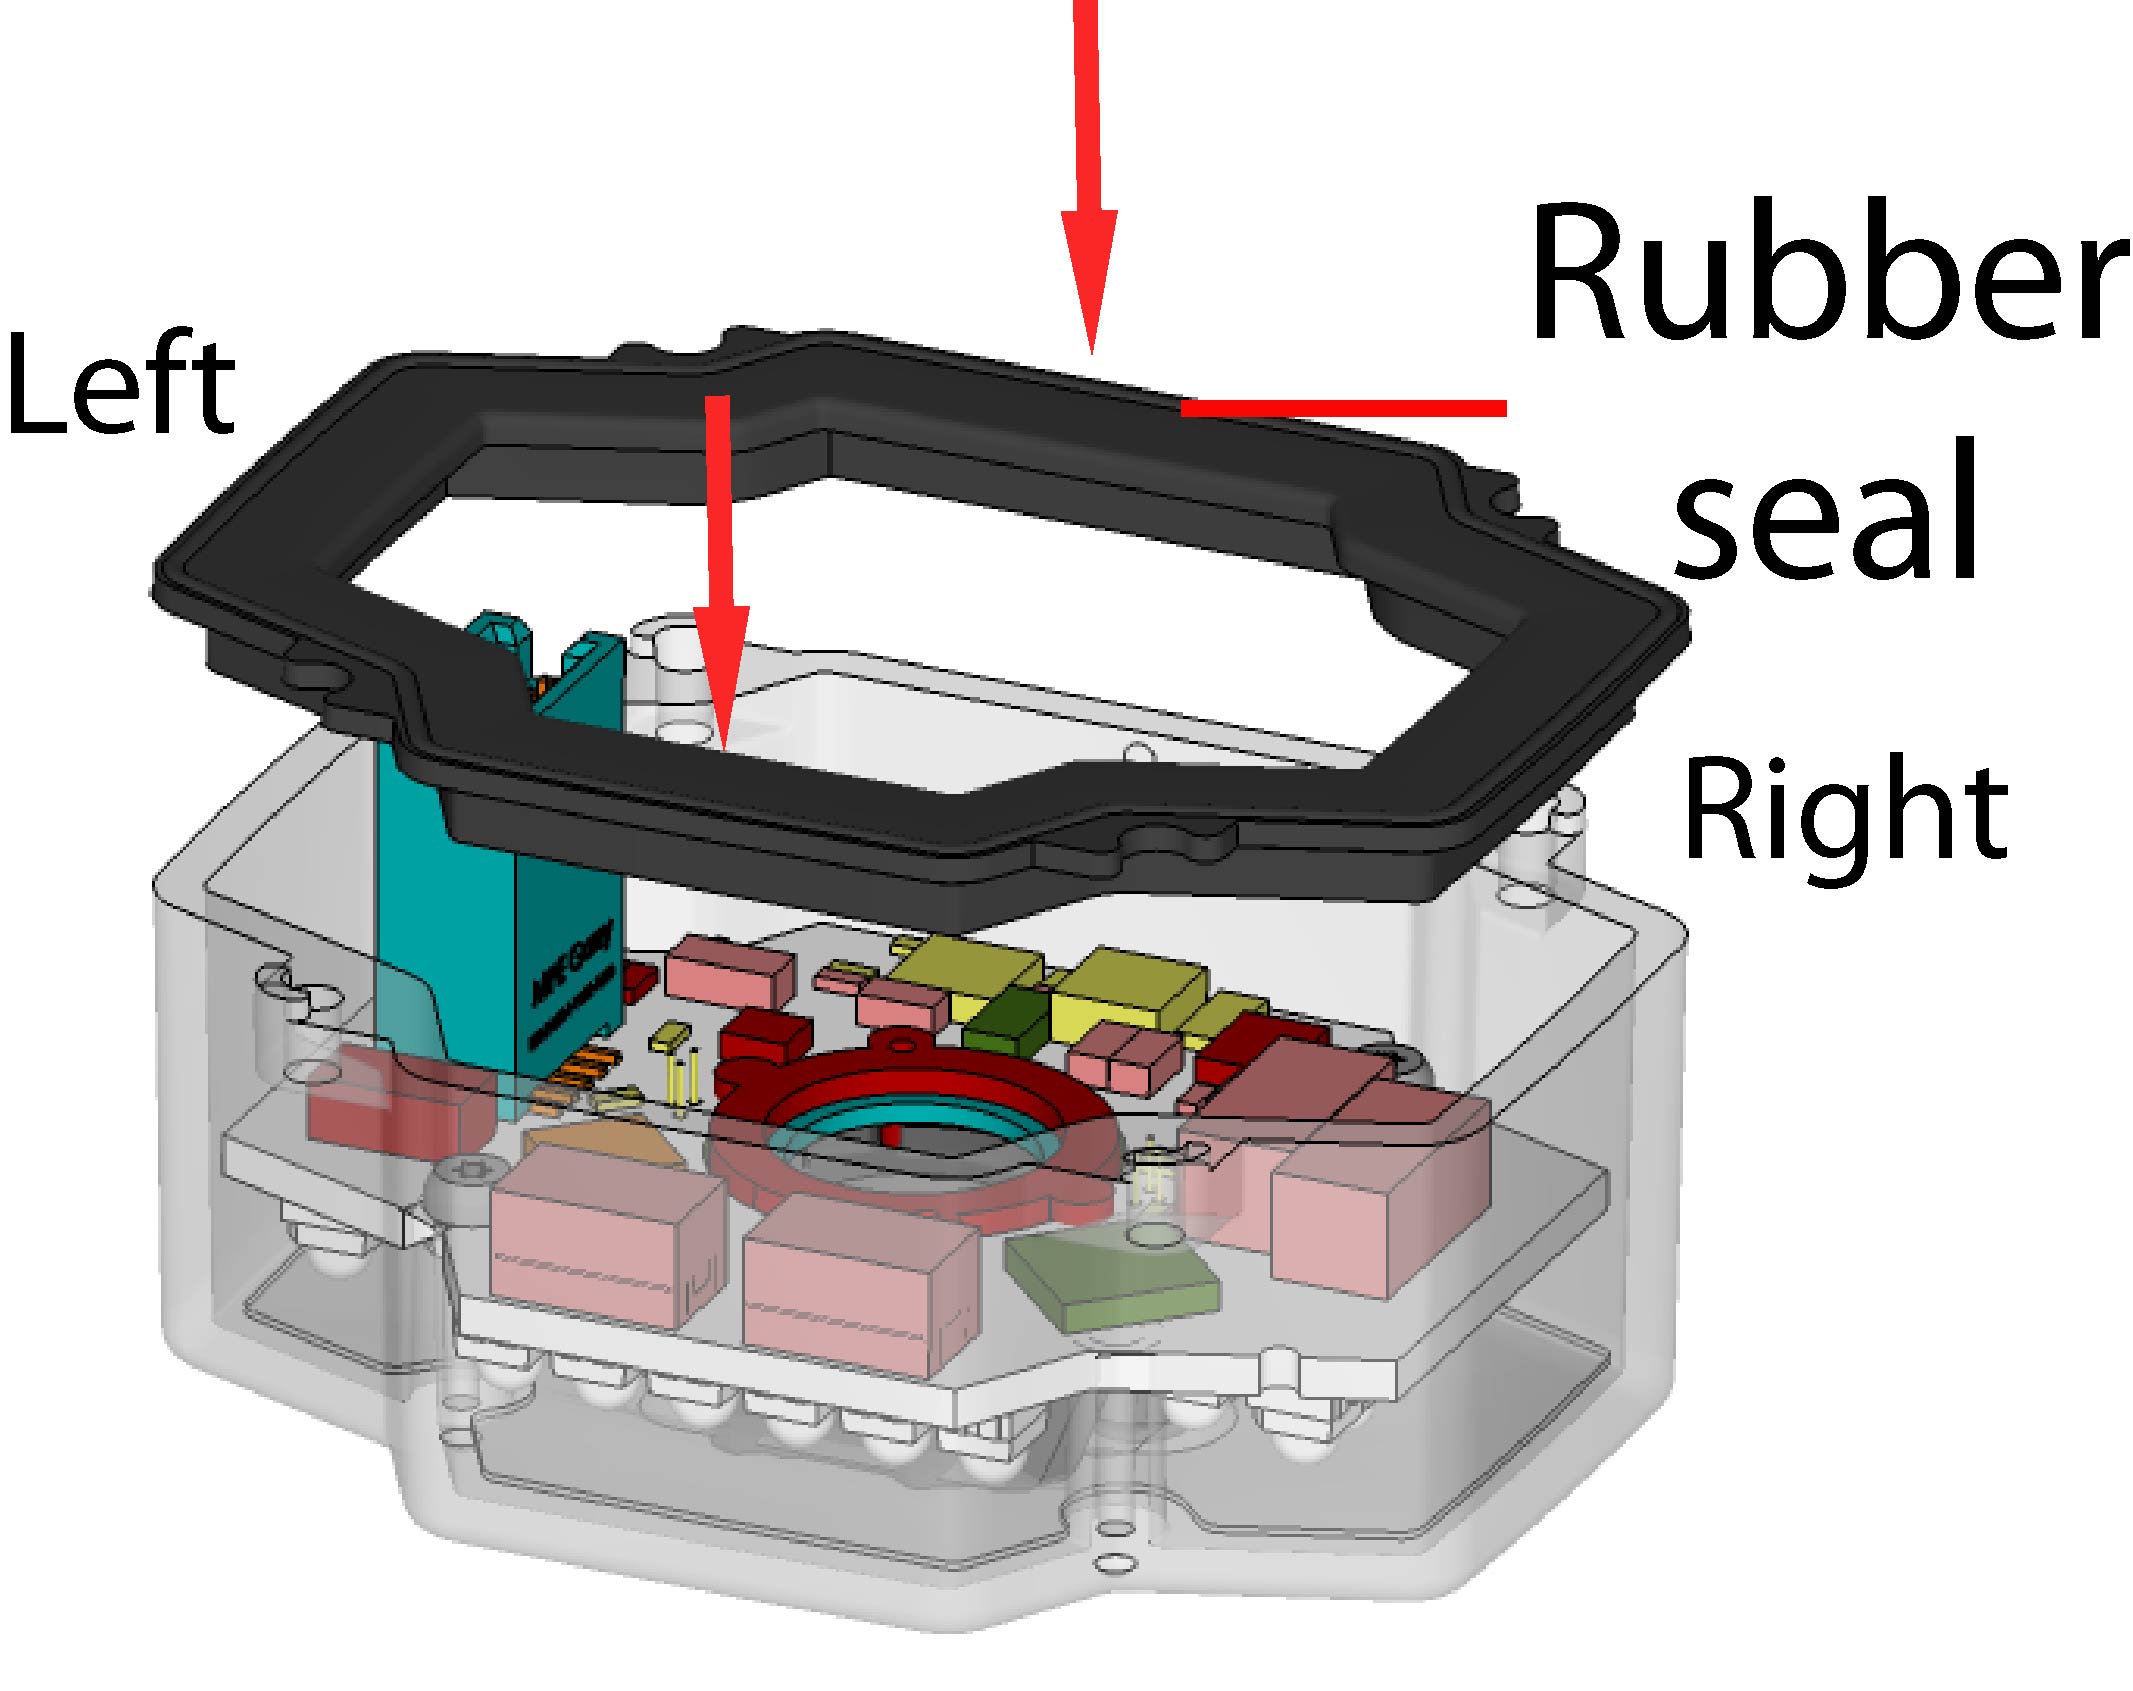
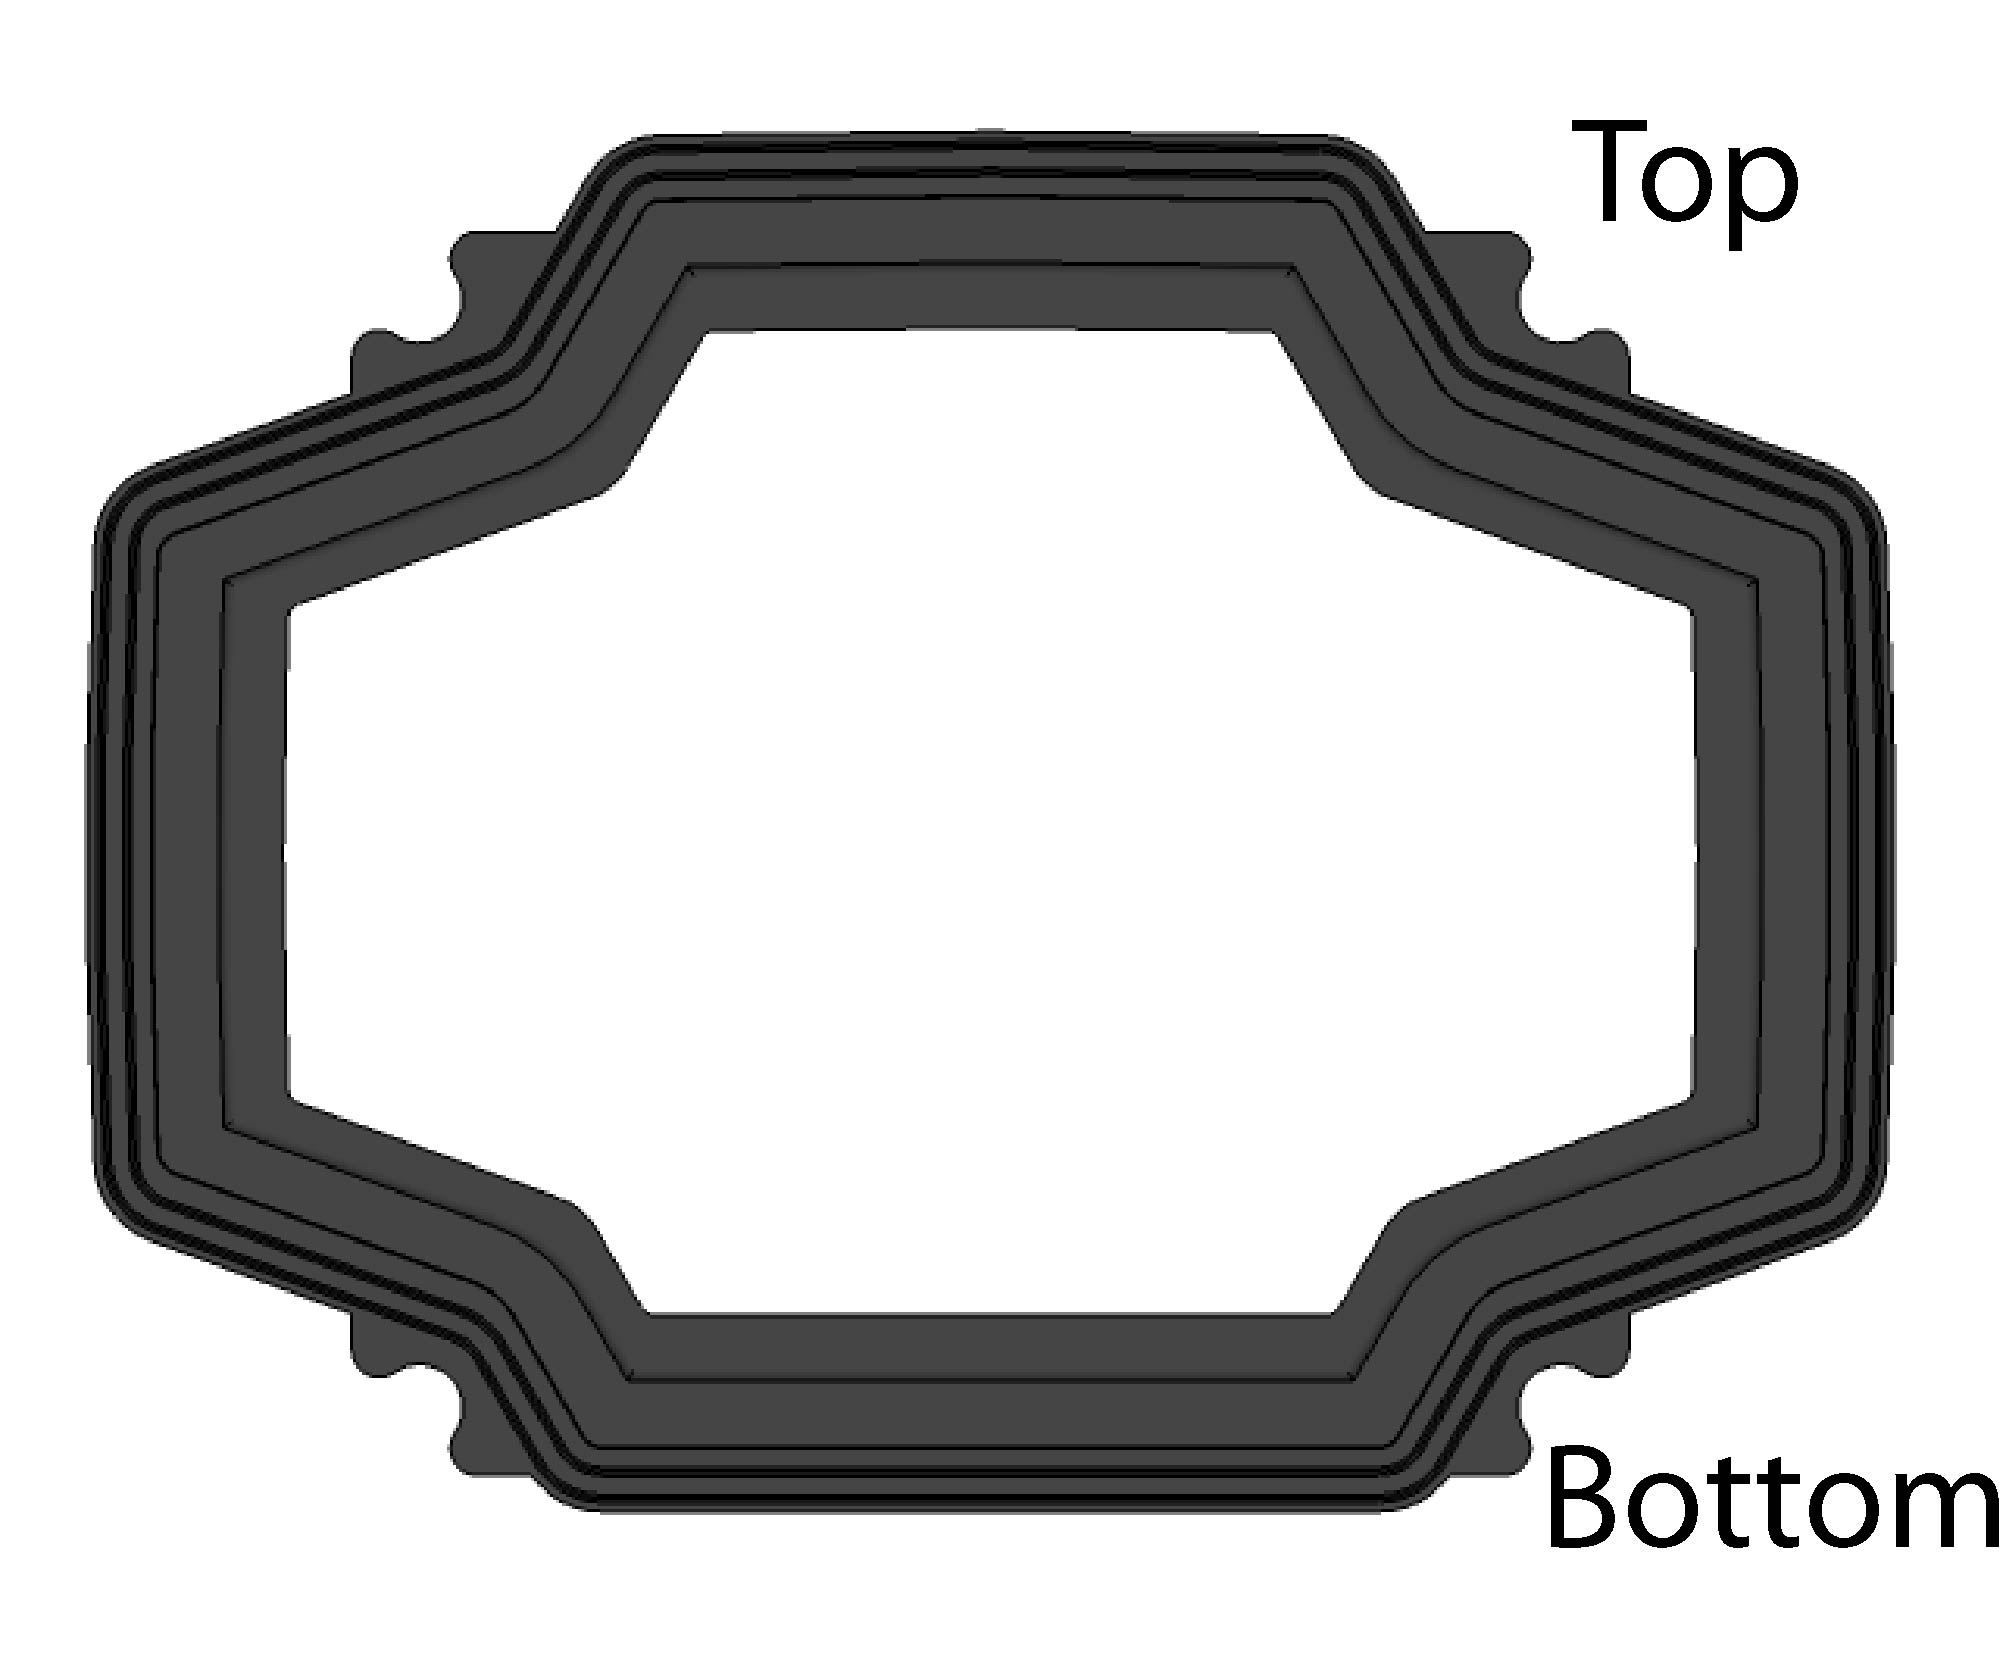
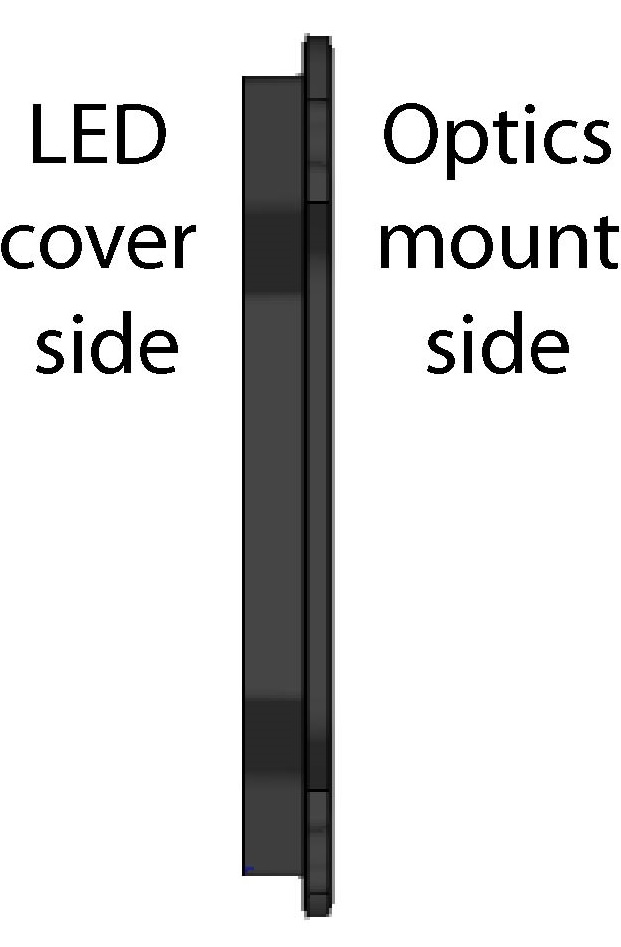 Note: The seal can only be installed in the correct orientation.
 -
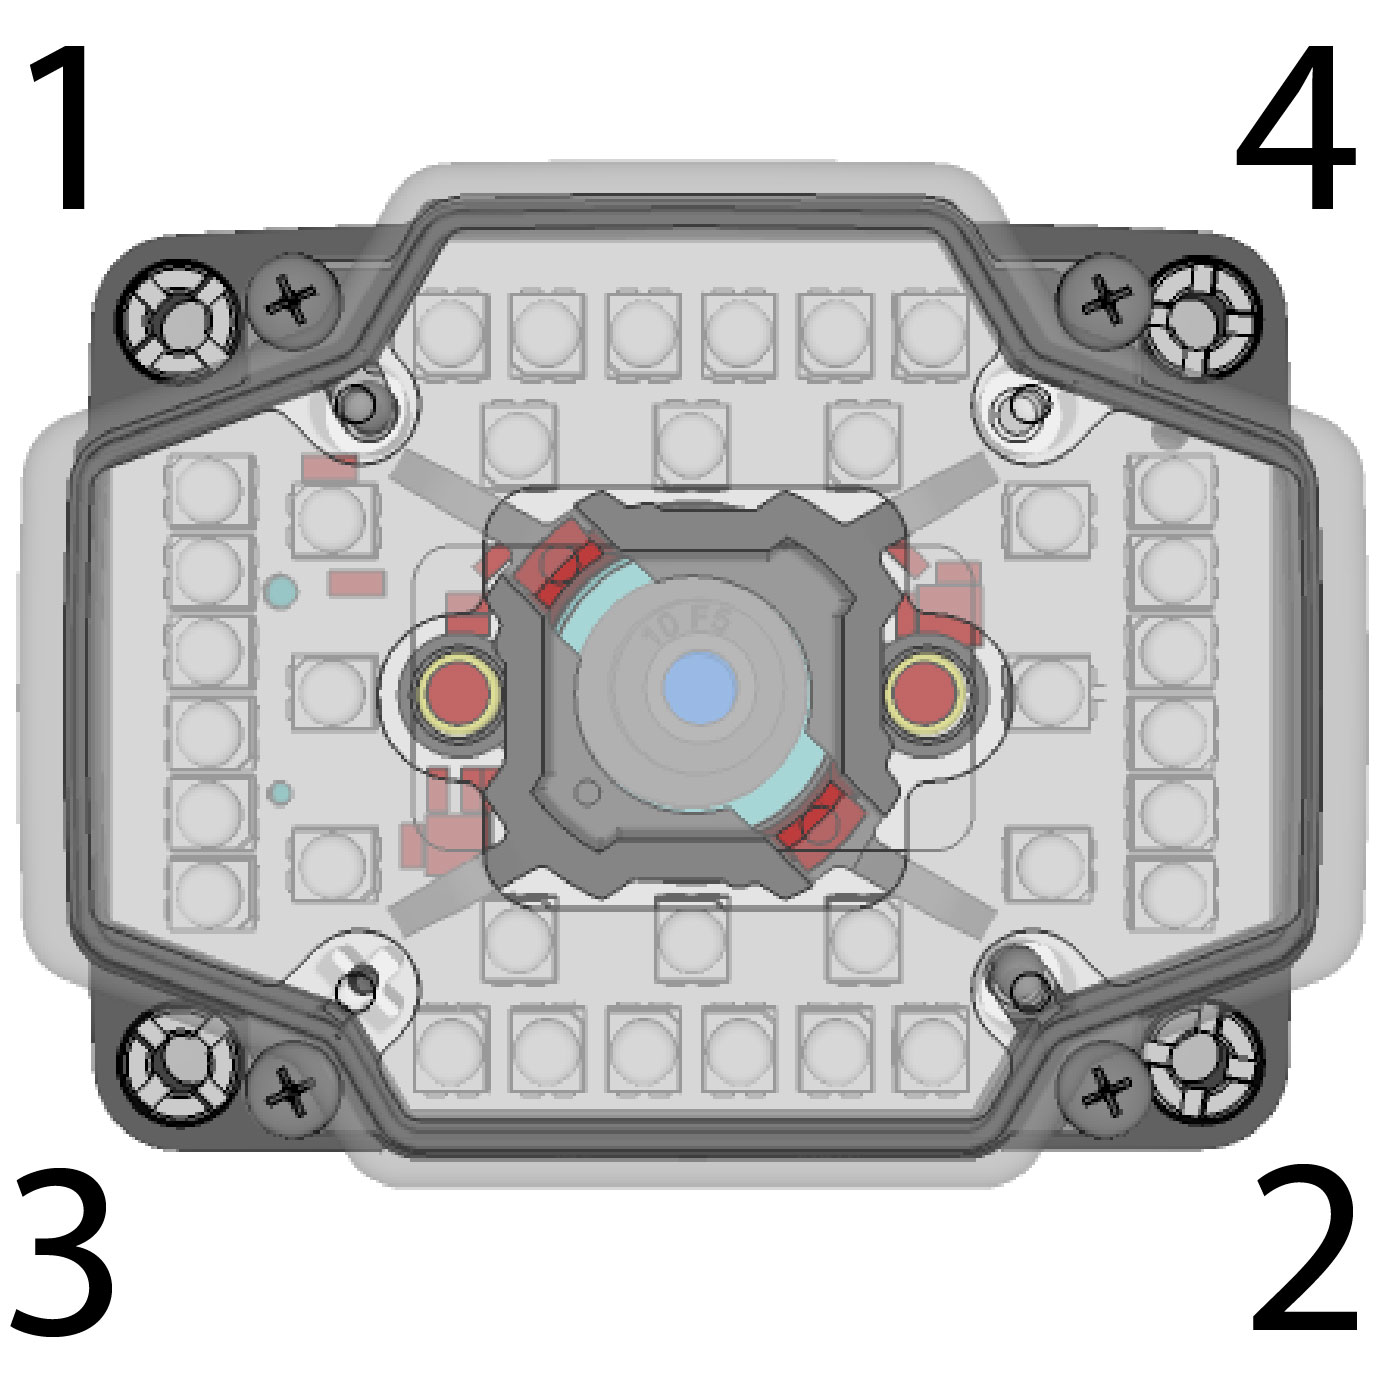
Remount the front cover. Observing the tightening sequence below, tighten all four screws to 9 Ncm using a torque wrench.
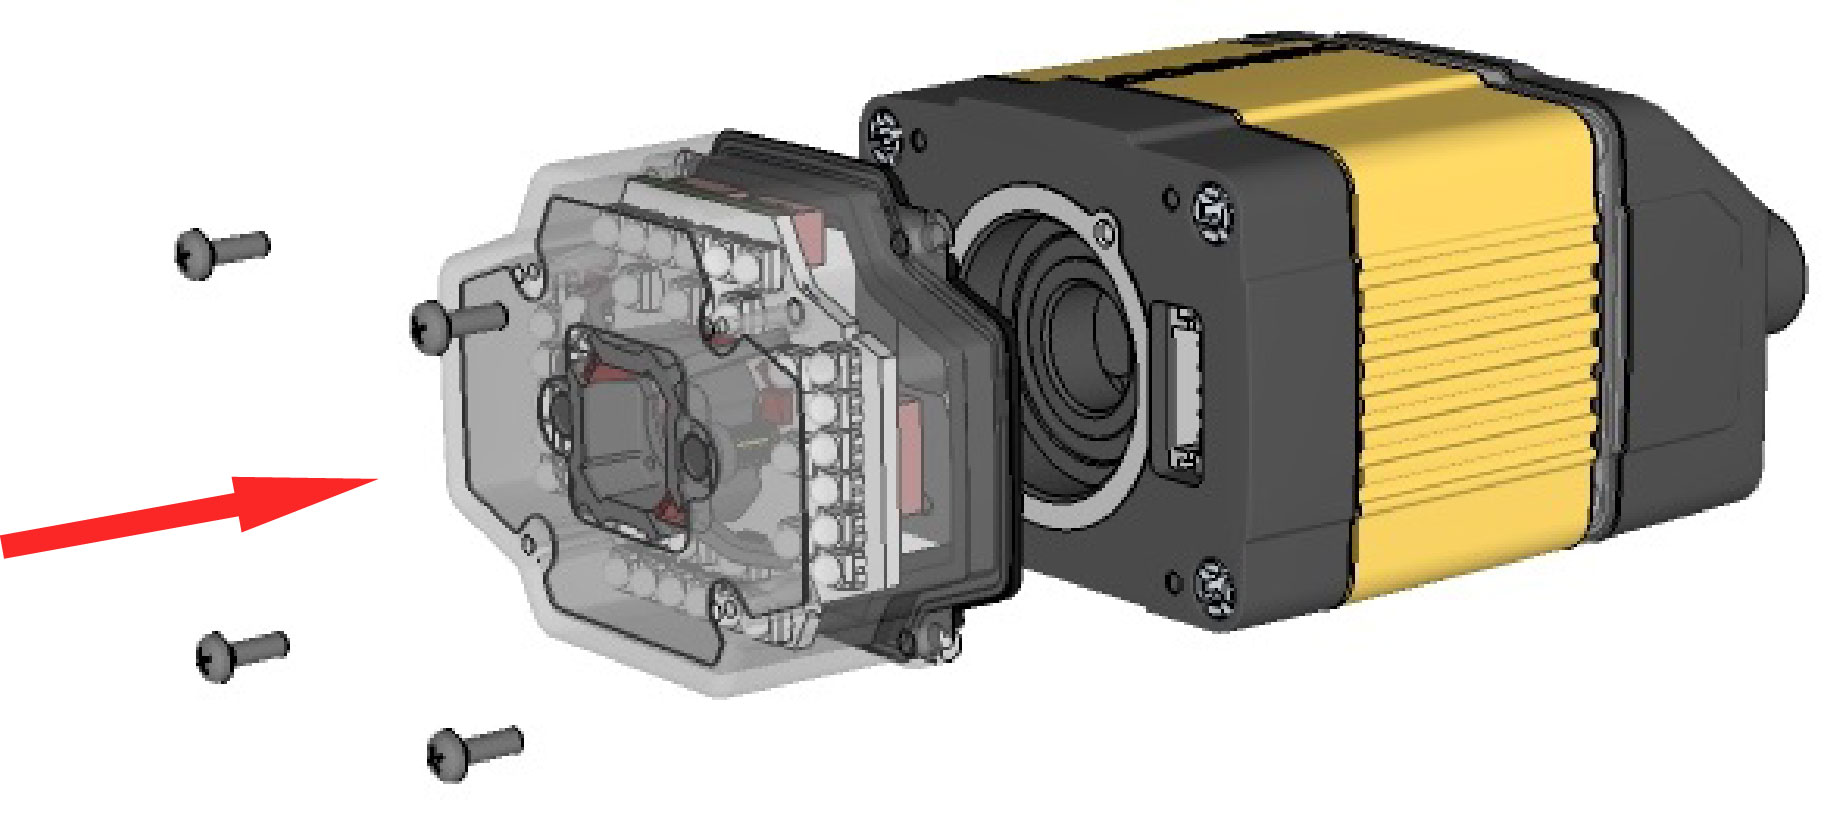
PHILLIPS PAN HEAD M2 X 6MM
Note: Tighten in sequence. Torque limit: 9 Ncm (0.8 in-lbs).