Replacing a 10.3 mm Lens
To remove and replace a 10.3 mm lens of a DataMan 300 or 360 series reader, perform the following steps:
WARNING: Disconnect the DataMan reader from power before continuing.
CAUTION: Do not leave the image sensor exposed to the environment.
Note: The following steps describe service procedures for both the DataMan 300 and the 360 readers, but the images show only the DataMan 360.
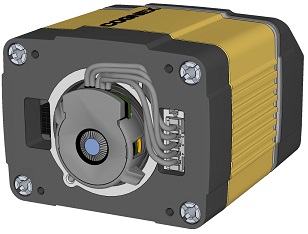
- Remove and retain the four screws at the corners of the front cover.
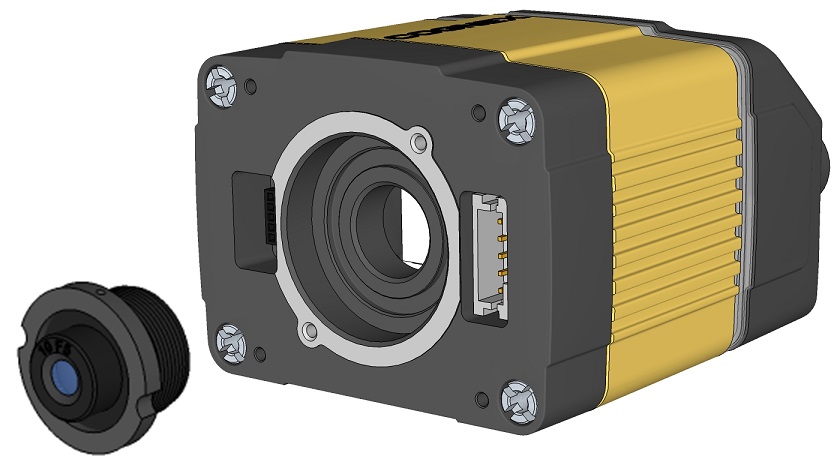
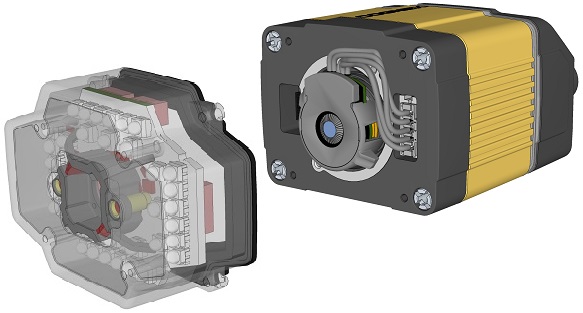
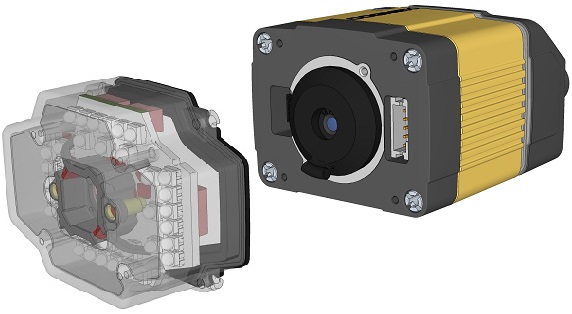
- Remove the front cover. The first image shows a reader with a liquid lens attached to the 10.3 mm lens. The second image shows a reader with a 10.3 mm lens only.
- If you have a liquid lens module attached to your 10.3 mm lens, carefully disconnect the liquid lens module cable. If you only have a 10.3 mm lens inserted, jump to step 5 of this procedure.
- Loosen the lens locking ring and withdraw the module.
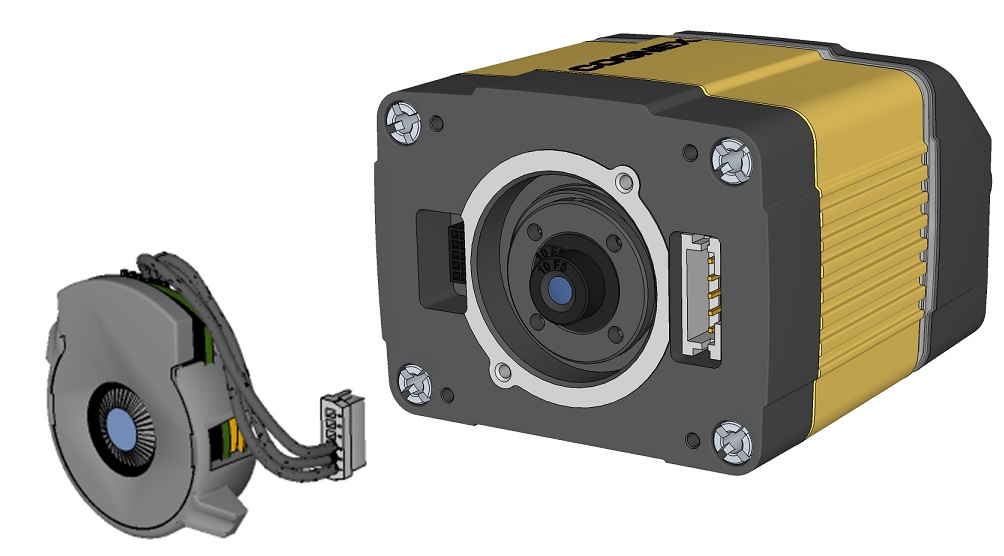
When reinstalling the module, observe the following precautions:
- Make sure that the liquid lens cable is not pinched, pulled or crimped during installation.
- Loosen the locking ring and withdraw the lens.

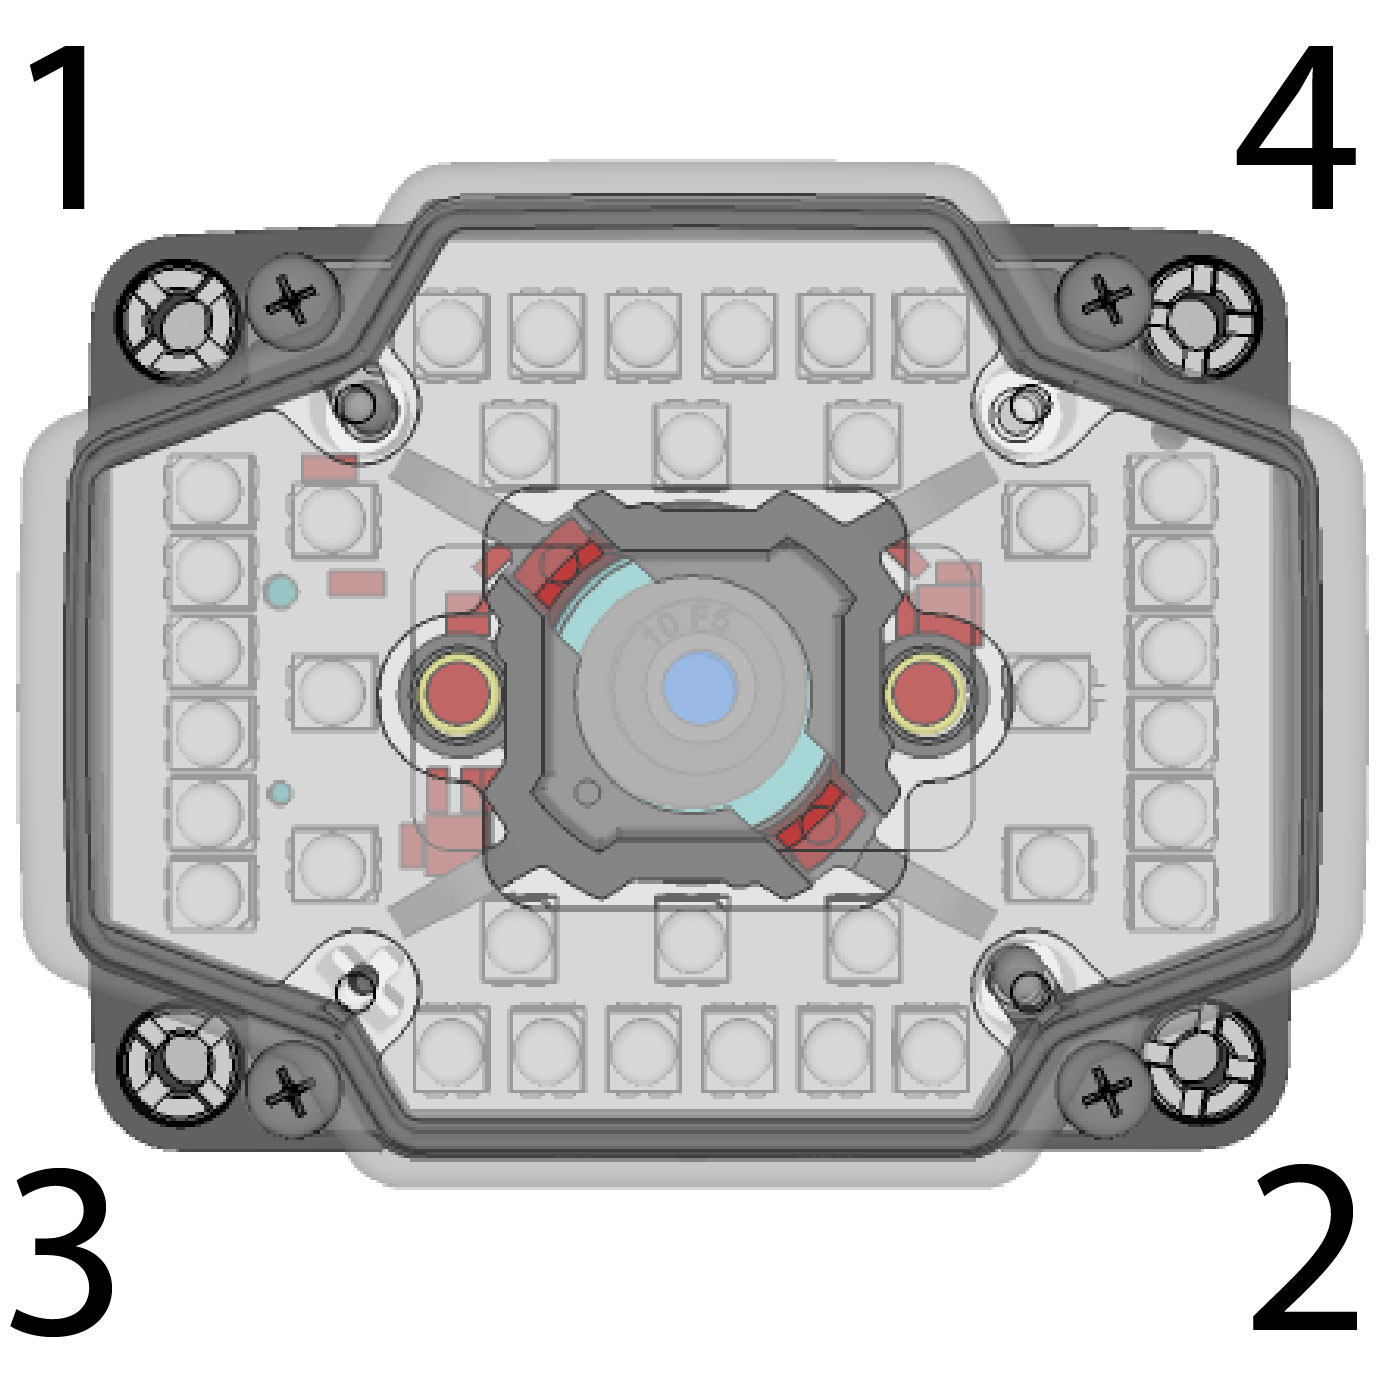
When reattaching the front cover, tighten the screws in the sequence shown below and observe a torque limit of 9 N-cm (0.8 Lb-In).
|
|

|
|
|
WARNING: Do not pinch or pull the cable.
|
|