Configure the OCRMax Function
The OCRMax function, using a Region of Interest (ROI) as an input, through a process called segmentation, divides a line of text into images of individual characters. This topic provides an overview of how the function works (both training and run-time) and how best to set the Segmentation parameters to achieve proper segmentation.
Use the OCRMax Function
The operation of the OCRMax function involves two phases: train-time and run-time.
- Train-time involves loading multiple images of the characters that will be read, extracting them from the image, segmenting them and creating a trained font database of characters.
- Run-time involves placing the In-Sight vision system Online, acquiring images and extracting and classifying characters based on the trained font database.
Load Training Images
- Select Record/Playback Options from the Image Menu.
- The Record/Playback Options dialog should automatically open with the Playback tab presented; if not, click on the Playback tab.
- From the Playback Folder section, press the Browse button to launch the Browse for Folder dialog. Navigate to the directory containing the training images and press the OK button to continue.
- The Playback Folder should now display the directory specified, and the Image Count indicates the number of images in the directory. Press the OK button in the Record/Playback Options dialog to continue.
Train the OCRMax Function
-
Load the first training image.
-
Insert the OCRMax function into the Spreadsheet.
-
From the General tab, double-click the Region parameter to enter interactive graphics mode to position the function’s ROI over the line of text to be read. When configuring the ROI, ensure that it accounts for any angular rotation and/or skew.
-
The function will automatically create character regions around the text that the function determines to be characters, based on the default settings in the Segmentation tab.
-
If the function has not correctly drawn the character regions around the text, there are two options:
- Use the Auto-Tune dialog and allow the OCRMax function to automatically calculate the optimal segmentation settings. The Auto-Tune dialog combines the segmentation and training phases into one step. Follow the instructions in the Auto-Tune dialog topic to successfully segment and train a font database.
- Go to the Segmentation tab and adjust the parameters manually until the text is correctly enclosed within individual character regions. Follow the Segmentation Process to successfully segment all of the characters in the image database prior to training.
Manually Train After Segmentation
-
Once the text has been segmented, the characters are ready to be trained and added to the font.
-
Re-load the first training image.
-
Go to the Train Font tab and enter the exact text string to be trained, and then press the Train button.
Note: Once a font database has been created, additional characters can be added to the font using the Add New Characters to Font and Add Individual Characters to Font options. - The characters will be added and stored in the function’s OCRMax data structure.
- Load the next training image and repeat steps 2 through 5 until all the necessary character instances have been trained.
Run the OCRMax Function
Before the OCRMax function is placed Online, the function's Inspection Mode should be set, determining if the function will simply read text within its ROI at run-time, or if it will be programmed to read and verify that the correct string was read. During run-time, the In-Sight vision system will be placed Online and acquire images as defined by the job. When an image is acquired, the text string in the image will be automatically segmented based on the Segmentation parameters, and the characters will be compared against the trained instances of the characters. The function's results will be output via the OCRMax Vision Data Access functions, and the Results tab provides additional information about the characters.
In order to achieve the best success during run-time, the parameter settings used in both the train-time and run-time should be the same. However, at times it may be necessary to adjust a parameter because a failure is now occurring on a new set of images. If the parameter change does not produce any notable changes to the appearance of the characters already successfully trained, it may be unnecessary to re-train. If, however, the parameter change does affect the previously trained characters, re-training will be necessary. Although changing parameters may affect the character regions, some parameters are more likely to do so.
Altering any of the following parameters after training will very likely necessitate re-training:
The following parameters may require re-training if they result in changes to characters, such as trimming or splitting:
The following parameters may require re-training if they result in different angle and/or skew values (e.g. if the characters have some slight previously uncorrected skew, and the Skew Range parameter is later increased to properly de-skew the characters):
Segmentation Overview
The OCRMax function performs Optical Character Recognition through a six-stage process.
- Refine Line: Placing the ROI determines the line of text's location, angle and skew. The OCRMax function will take this input image and rectify the image so that the line of characters are horizontal and have no skew.
- Normalize: The line of text within the ROI is normalized, which allows the image to be binarized using a single threshold value.
- Binarize: A threshold is determined that binarizes the normalized image into text and background.
- Fragment: The function then performs blob analysis on the binarized image, creating character fragments.
- Group: Character fragments are grouped together to create a character.
- Analyze: Optionally, additional analysis may be performed to determine more optimal groupings before forming the final characters.
Segmentation Process
The following list places the OCRMax parameter with the step of the process that it affects, and also includes troubleshooting advice for each step in the process.
Refine Line
Determining the rotation and skew of the line of text is affected by the orientation of the ROI, and the values specified in the Angle Range and Skew Range parameters. In applications where the rotation and/or skew of the line of text is consistent across images, it is faster and more accurate to specify the Character Polarity, Angle Range and Skew Range, rather than to allow the function to compute those values.
Troubleshooting
The purpose of the Refine Line stage is to determine the correct angle and skew values for the line of characters. The OCRMax function will automatically create character regions around the areas it believes contains characters, based on the default Segmentation parameters, once the Region is placed over the area. If the character regions do not have the expected appearance within the Region, try adjusting the Angle Range and/or Skew Range until they appear to have the correct angle and/or skew in the image. Make sure to adjust the angle and/or skew so that the characters are properly adjusted for the needed angle and/or skew, prior to training the characters.
If the Region contains extraneous, strong features, such as a label edge, the OCRMax function may compute incorrect angle and/or skew values. Try to ensure that the Region only contains the line of text.
Normalize
In the normalized image, a greyscale value of 128 is the value that is nominally the threshold between dark and light values; e.g. if the Character Polarity is Black on White, greyscale values less than 128 would be text and greyscale values greater than or equal to 128 would be background. However, the greyscale threshold value may be changed in the Binarize stage.
Troubleshooting
The purpose of the Normalize stage is to process the image area within the Region for binarization (splitting into text and background), using a single binarization threshold, creating a normalized image. In the normalized image (which can be viewed by setting the Output Image Graphic parameter to Normalized Image), depending on the polarity of the text (Black on White or White on Black), all of the text should appear either uniformly dark and the background uniformly light, or vice versa. Also viewing the binarized image (which can be viewed by setting the Output Image Graphic parameter to Binarized Image) can be helpful in determining the accuracy of the normalized image; if significant areas of the background are incorrectly binarized as text, the problem is often in the Normalization stage (though it may still be tied to the Binarization stage).
If the background appears fairly uniform and the text contrast is consistent, the default Global Normalization Mode option will probably work. When there are variations in appearance of the background, such as one side being darker than the other, or the top being lighter than the bottom, try using either the Local or Local Advanced Normalization Mode options. If the text itself has an inconsistent contrast, such as some characters being noticeably fainter than others, the Local Advanced option will be required. However, the Local Advanced option may sometimes amplify background noise (e.g. spots or speckles). If Local Advanced amplifies the noise more than helps to define the text, try the Local option, instead.
In addition to the Normalization Mode parameter, the Use Stroke Width Filter parameter affects the normalized image. The Use Stroke Width Filter is designed to eliminate strokes that are significantly narrower than the rest of the text, since such strokes are often just noise. This parameter also eliminates general, low-contrast background variations. However, in some cases, the parameter may incorrectly eliminate actual text strokes, in which case it should be disabled. This problem typically occurs when the stroke widths of the characters vary, and/or when some parts of the characters are fainter (i.e. lower contrast) than the rest of the characters.
Finally, Character Polarity also affects normalization. Usually the OCRMax algorithm can determine the correct text polarity, but it is preferable to set the polarity, when possible. Incorrect character polarity may be influenced by non-text features being included within the Region containing the text. Positioning and reconfiguring the Region to exclude the non-text features should rectify the issue.
Binarize
Binarization applies a threshold to the normalized image in order to produce an image with only two greyscale values: Black (0) is background and White (255).
Troubleshooting
The purpose of the Binarize stage is to binarize the normalized image such that text features are given a greyscale value of 255, and all of the background features are assigned a greyscale value of 0 (regardless of the specified Character Polarity). The resulting image is a Binarized image (which can be viewed by setting the Output Image Graphic parameter to Binarized Image). Binarization simply applies a single threshold to the normalized image, using the Binarization Threshold parameter.
If the binarized image appears inverted, i.e. the text has a greyscale value of 0 and a background of 255, then the text polarity is incorrect. This can occur when the Character Polarity parameter has been configured incorrectly; either the Auto setting has determined the wrong polarity, or it was set to Black on White when it is actually white on black, or vice-versa. Incorrectly determining the text polarity is often caused by the Region containing non-text features, or the Region touches the tops and/or bottoms of the characters; in these cases, simply re-positioning the Region to exclude those features generally resolves the issue.
If the binarized image has the correct polarity, but includes either too much or too little text, then adjust the Binarization Threshold. Decreasing the parameter causes less of the image to be considered as text, while increasing it causes more of the image to be considered as text. Most commonly, the Binarization Threshold will need to be set lower than the default value of 50 when there is significant background texture or noise.
Typical values to try beyond the default are 40 and 30. It is unusual to need a setting below 25, and very rare to need a value greater than 50. If changing the value helps, but has not quite resolved the issue, attempt a more refined value (e.g. 32.5); sometimes a change of as little as .1 may help.
Also note that some problems with the binarized image may actually be problems with the normalized image. See the Normalize section for more details, but having large blocks of background being binarized as text often results from an incorrect Normalization Mode parameter setting (particularly when using the Global option), and having pieces of text binarized as background, regardless of the Binarization Threshold, often results from the Use Stroke Width Filter parameter enabled.
It is also not unusual for some small specks of noise to be binarized as text; such specks can be eliminated in the Fragment stage.
Fragment
- Minimum Character Fragment Size
- Character Fragment Contrast Threshold
- Ignore Border Fragments
- Maximum Fragment Distance to Mainline
Using the binarized image as an input, fragments are formed from connected sets of pixels in a form of blob analysis. Each set of connected pixels is considered as one fragment. The fragments will eventually be grouped together to form characters, so this stage is important in removing fragments that are only noise or non-text features.
Troubleshooting
The purpose of the Fragment stage is to determine which previously binarized text pixels are actually text pixels. The binarized image is processed using connectivity analysis (also known as blob analysis) to form connected fragments (i.e. blobs); the Fragment stage determines whether or not to keep or reject each fragment. The kept fragments will be used to construct the characters.
By utilizing the Show Diagnostics parameter and closely viewing the character regions, it may be possible to infer which fragments were kept or rejected. Review the data in the Diagnostics tab, as well, to help determine which fragments were being kept or rejected.
Fragments may be rejected because they are too small, their contrast is too low, they intersect the border of the Region, and/or they appear to be placed outside (i.e. either too far above or below) the mainline of characters. A given fragment may be rejected for one or more of the preceding reasons, so it may be necessary to adjust more than one parameter. Sometimes the problem may be that a piece of text is being rejected, while other times it may be that a piece of noise was binarized as text; either problem can typically be handled by setting appropriate parameters for this stage.
If a small text fragment is being rejected, try decreasing the Minimum Character Fragment Size parameter in order to keep the fragment. The number of pixels is the number of connected pixels in the binarized image. Similarly, if a small piece of noise is being kept, try increasing the parameter value.
If a text fragment that touches the border of the Region (i.e. one or more pixels is at the exact top, bottom, left or right of the binarized image) is being rejected, disable the Ignore Border Fragments parameter to keep it. Similarly, if a piece of noise that touches the border of the Region is being included, enable the Ignore Border Fragments parameter to reject it.
If a character region is too short (i.e if the top and/or bottom of the character is cut off), then the problem may be that the fragments at the top and/or bottom of the character were rejected because they appeared to be outside the mainline of the rest of the characters, taken as a whole. This situation arises most often when the printing is somewhat erratic vertically (with some characters printed too high or too low), or when the printing drifts (e.g. where most of the text is on a straight line, but the characters at one end of the line are printed successively lower and lower, or higher and higher). In these cases, try increasing the Maximum Fragment Distance to Mainline parameter to allow including fragments outside that mainline. Turn on the Show Diagnostics parameter to graphically display the placement of the mainline around the characters. The distance is specified as a percentage of the estimated height of the mainline, so, if the rejected fragments are slightly beyond the fragments of others that were kept, try a relatively small value, such as 2 or 5%. If fragments far off the mainline were rejected (which may occur if the line of text begins with a capital letter, followed by lowercase letters, for example), try a larger value, such as 30%.
Finally, if a text fragment was rejected, but none of the previous three conditions applies, the fragment was rejected due to its low contrast. Decrease the Character Fragment Contrast Threshold parameter value in order to keep the fragment. The contrast of a fragment is measured using the greyscale values in the normalized image, relative to the value used as the binarization threshold. For example, if the Binarization Threshold parameter was set to 50, then the binarization threshold is equivalent to a greyscale value of 128, and if all the pixels of a fragment in the normalized image were 100, then that fragment's contrast would be 128.
Group
- Character Fragment Merge Mode (1)
- Minimum Character Fragment Overlap (1)
- Min Inter-Character Gap (1)
- Max Intra-Character Gap (1)
- Minimum Character Size (4)
- Minimum Character Width (4)
- Minimum Character Height (4)
- Maximum Character Height (3)
- Maximum Character Width (1, 2)
- Minimum Character Aspect Ratio (1, 2)
- Character Width Type (2)
All of the character fragments that were kept during the Fragment stage are then grouped together to form characters. In applications with simple, solid-stroke fonts (the fonts are not broken up into smaller pieces), each character may be composed of a single character fragment. Applications that incorporate dot-matrix text, each character may contain multiple character fragments.
The Group stage is comprised of the four following types of operations (the list of parameters are number coded to indicate which types of operations affect which parameter):
- Merging two or more character fragments to form a character.
- Splitting a character fragment or a group of character fragments into two or more (new) character fragments.
- Trimming a character fragment either vertically or horizontally to make a smaller character fragment.
- Discarding groups of character fragments.
Troubleshooting
The purpose of the Group stage is take individual fragments and group them together to form whole characters by either merging fragments together and/or splitting them apart. This stage may also discard sets of fragments altogether, as well. The results of the Group stage are graphically displayed as the character regions that enclose the marks (dot-peen, ink jet, etc.) that create the character.
Merging: Merging one or more fragments into a single character is performed by examining the horizontal placement of the fragments, specifically whether or not the fragments overlap, if they have a gap between them and how large of an overlap or gap exists (if present). Merging will not create characters larger than the maximum character width.
The main parameter that affects how fragments are merged is the Character Fragment Merge Mode parameter. If the parameter is set to Require Overlap, then fragments are required to overlap horizontally by at least one pixel or more (depending on the Minimum Character Fragment Overlap parameter setting) to be merged together. This setting is typically useful when characters may be "kerned" together, e.g. the characters "AV" are sometimes printed such that the rightmost part of the "A" overlaps the leftmost part of the "V." If the parameter is set to either Set Min Inter-Character Gap or Set Min Inter-Character Gap/Max Intra-Character Gap, then some horizontal gap separating each pair of characters will be expected.
For dot-matrix print, at least for cases where the dots are clearly separate, rather than overlapping, it is often useful to use either Set Min Inter-Character Gap or Set Min Inter-Character Gap/Max Intra-Character Gap in order to allow the OCRMax function to distinguish between the gaps that occur between two characters (the inter-character gap) and the gaps that may occur between the dots of a single character (the intra-character gap). Ideally, all the inter-character gaps will be larger than any intra-character gaps, in which case using the Set Min Inter-Character Gap setting may be used, with the value set to the smallest gap that can occur between two separate characters.
Splitting: Splitting a single, wide fragment into one or more separate characters is accomplished by specifying the maximum character width allowed for a single character using the Maximum Character Width parameter (i.e. the width of the widest character in the font, which is typically the "M" or "W" in an alphanumeric font). Any fragment that is wider than the specified maximum width will then either be trimmed to the maximum width, or split into multiple pieces that are each no wider than the maximum width. Wide fragments typically occur when two or more characters are so close together that they touch, or when two or more characters are connected by noise or by a non-text stroke.
The maximum character width can also be set indirectly by enabling the Use Minimum Character Aspect Ratio parameter and setting the Minimum Character Aspect Ratio parameter. When setting this value, the width is equal to the line height, divided by the Minimum Character Aspect Ratio value (the line height can be inferred by viewing the Diagnostics tab and examining the values returned by the Accepted Characters and Rejected Characters Minimum and Maximum Height values). If both the Minimum Character Aspect Ratio and Maximum Character Width parameters are enabled, the smaller width value will be used.
How a character is split depends on the Character Width Type parameter. If the parameter is set to Fixed, then the too-wide fragment will be split into approximately equal-sized pieces (this setting is appropriate when all the characters are expected to have the same width). If the parameter is set to Variable or Auto, the OCRMax function will determine the optimal splitting into pieces that may or may not be equal-sized (this setting is appropriate when the characters may have different fonts, as is common with proportional text).
Trimming: Characters and/or fragments that are too tall may be trimmed. This typically needs to occur when noise or non-text strokes are connected to the tops and/or bottoms of characters. To enable vertical trimming, activate the Use Maximum Character Height parameter and specify an appropriate value in the Maximum Character Height parameter. Problems may arise, however, if the text is not all printed on a straight line; in such situations, it may be necessary to increase the value of the Maximum Character Height parameter to a value that is larger than the actual height of the characters (although the results may still not be ideal).
Discarding: The process of discarding fragments is possibly the easiest to address of the various Group stage operations. Once a set of fragments has been grouped together, that whole set can be discarded if it is too small in width, height and/or total number of binarized pixels. So, if an actual character is being entirely discarded, decrease the Minimum Character Width, Minimum Character Height and/or Minimum Character Size parameters until the character is kept. Similarly, if some non-text features are being incorrectly reported as characters, increase one or more of the previous parameters until the non-text feature is discarded.
Analyze
The Group stage forms sets of character fragments from individual fragments, and often these sets are the correct final characters. However, sometimes a more sophisticated analysis is required to segment the characters correctly, especially when the distance between characters is no larger than the distance between separate pieces of a character (e.g. dots in a dot-matrix print). In other cases it may simply be easier to achieve correct segmentation through the use of the Analyze stage parameters than the Group stage parameters.
Troubleshooting
The purpose of the Analyze stage is to group together fragments to form characters, based on "Global" information about the all of the fragments within the ROI, rather than "Local" information , based on a few fragments. The default setting of the Segmentation Analysis Mode parameter is Standard, which applies the "Global" analysis, whereas the Minimal setting only performs the "Local" analysis, which is equivalent to the Group stage.
The most common problem associated with this stage is when two or more characters are reported as a single character. At times, this problem can be simply addressed by setting the Segmentation Analysis Mode parameter to Minimal. However, if the Standard option is needed, the problem can generally be addressed by specifying one or more constraints on the width and/or spacing of the characters.
To prevent two or more characters from being merged, specify a smaller maximum character width using the Maximum Character Width parameter and/or the Minimum Character Aspect Ratio parameter. Please see the Group stage for more information about these techniques.
Specifying the pitch between two characters may also be set, using the Minimum Pitch parameter. The pitch is measured as the distance between corresponding parts of two characters, as specified by the Character Pitch Type and Character Pitch Position parameters.
Although setting the Character Pitch Type and Character Pitch Position parameters may be helpful, it is generally not necessary. The one exception to this guideline is the following: If the Character Pitch Type parameter is set to Auto, the OCRMax function may make a choice that would be appropriate for a fixed-pitch font, but would be inappropriate for a proportional-pitch font. Specifically, the function may incorrectly group two narrow characters together. Setting the parameter to Proportional should correct this particular problem.
Achieve Optimal Run-time Performance
Typically, the performance of OCR applications is judged by the read rate, which is the percentage of characters that are correctly read.
The best way to achieve optimal read rates is to acquire a large number of images of real parts (including both good and bad parts), manually grade the images (e.g. a person looks at the image and enters the correct text in a text file that can be referenced later for verification), and then measure the read rate over the entire database for each set of parameters being evaluated. Also, when training, use between 1 and 4 instances of each character, if possible.
High Read Rate Rules
The following are general rules in regards to achieving high read rates:
- The more images, the better.
- The higher the read rate needed by the application, more images will be required to achieve and verify the desired read rate.
- As a guideline, try to use at least 10x the number of total characters (or strings, if strings are the criteria for defining the read rate) than would be needed for the error rate. Do not include characters used to train the font in the count. For example, if the target read rate is 99%, then ideally there should be no more than 1 wrong character per 100 characters (thus, 10*100 = 1,000 characters needed to measure the read rate). If the target read rate is 99.9%, use no fewer than 10,000 characters.
- An even more conservative guideline is to use the above number of character for each type of character. This is usually only necessary when experimentation shows that a particular type of character happens to be much more likely to fail than other characters. (Alternatively, it may suffice to simply have enough instances of those problematic characters.) For example, if the set of characters contains the digits 0 through 9, and the target read rate is 99%, then ideally there should be 1,000 images of each digit.
Recommended Character and Region Sizes
The following are general guidelines to observe to achieve the best character segmentation results.
Character Size
Ideally, the larger characters in a font (e.g. an "M") should be about 20-40 pixels high. If the large characters are less than about 8-10 pixels high, segmentation may work, but classification is likely to prove difficult. If the large characters are much taller than 40 pixels, segmentation will generally be slower than necessary, with no benefit to the read rate.
If the characters appear larger than the recommended value and execution time is an issue, the best approach may be to change either or both the position of the In-Sight vision system and its lens, to make the characters smaller. If those options are not feasible, another consideration would be to use smoothing and subsampling to reduce the image size (e.g. using a NeighborFilter function with the Operation parameter set to Low Pass). However, if the characters are closely spaced horizontally, such that making the characters smaller would blur the gaps between the characters, it will probably be necessary to use the characters at their original size.
Character Stroke Width
Ideally, the stroke width of each character (or the diameter of the dots in dot-matrix print) should be at least 3 pixels (preferably 4). Larger stroke widths are acceptable.
Region Size
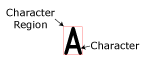
The Region should always completely enclose all of the characters to be read, while also containing a small amount of the background surrounding the text. When possible, it should not contain any other strong features, such as additional lines of text or label edges.
Ideally, the Region should be extended by at least half the width of the widest character (e.g. an "M") on the right and left, while extending at least a stroke width on the top and bottom.
The Region can be made to extend across the entire image area, which can be a viable solution in applications where the text varies in position and is not easily fixtured. However, if there is significant background noise or extraneous features, creating a smaller Region would be the better option to reduce the likelihood that the noise or features could be segmented as text.
Increase Segmentation Speed
The main factor affecting the execution time of the OCRMax function is the size of the Region and size of the characters. Additionally, some Segmentation parameters have a significant impact on the execution time, and in some cases, it is possible to choose faster options without significantly reducing the read rate.
Region and Character Size
In general, the execution time of the segmentation process increases with the size of the Region and the characters. Using a Region that encloses the characters fairly tightly will make segmentation faster. Similarly, using smaller characters (i.e. by changing the position/optics of the In-Sight vision system or subsampling the image) will make segmentation faster.
Parameters Affecting Speed
The following parameters have a significant effect on segmentation speed, and in some applications, it may be possible to choose a faster setting without an unacceptable decrease in the read rate.
-
Character Polarity: Using the Auto parameter setting will force the OCRMax function to spend time determining the correct polarity of the text. In most applications, the text always has a consistent polarity. Specifying the polarity (as either Black on White or Black on White) will make the function run faster.
-
Angle Range and Skew Range: Specifying a non-zero number for either/both of these parameters will force the OCRMax function to spend time determining the correct angle/skew of the text. If the text in different images always has a consistent angle and/or skew, or if the Region can be fixtured, specifying those values by configuring the Region is preferable to setting non-zero values in these parameters. However, if that is not possible, attempt to use the smallest possible values.
-
Normalization Mode: The different operations perform at significantly different speeds; the following are the fastest to slowest operations: None, Global, Local and Local Advanced.
-
Use Stroke Width Filter: Specifying this parameter to remove narrow non-text strokes, or to remove low-contrast background variations, can take a significant amount of time. Disabling this parameter will make the OCRMax function execute faster.
-
Segmentation Analysis Mode: Setting this parameter to Minimal instead of the default Standard setting will make the function execute faster. However, the speed difference in most applications will be relatively small.
Note: For more information about the OCRMax function, see OCRMax, OCRMaxAutoTune, OCRMaxSettings, and OCV/OCR.