Print Dialog
The Print dialog allows you to select a specific printer and print data.
-
On the File Menu, click Print or press CTRL+P.
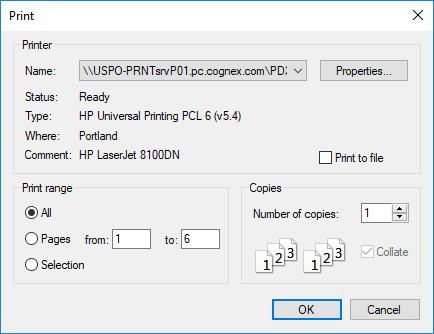
- Select a printer from the Name drop-down list. Information about the selected printer is also displayed.
-
Specify the Print Range.
Note:- If you choose Pages, you must also enter the page numbers you want.
- If you choose Selection, only cells that are highlighted will be printed.
- Specifies the number of Copies to be printed. If Collate is selected, a complete copy of the document is printed before the first page of the next copy is printed.
Note:
- The size of the printed data is based on the percentage selected in the Sheet Zoom dialog.
- To add a new printer to the list of printers, select Printer... from the Page Setup dialog.
- When printing a Custom View or user-created dialog, the printout will automatically be reduced to fit the view on a single page.
- Some older printer drivers may not print correctly. If this problem is encountered, try updating the printer driver from the manufacturer of the printer. If after updating the driver the problem persists, the printer may not support all of the features that In-Sight Explorer requires for printing. As an alternative, you can copy the visible portion of the screen to the clipboard (by pressing CTRL+SHIFT+C or ALT+PRINTSCREEN), paste it to another application that supports images, and print it from that application.