Install the Cognex Network Server Software
-
Download the Cognex Network Server software from the Cognex support site: support.cognex.com/downloads/in-sight/software-firmware.
- Run the Cognex Network Server installer you just downloaded.
-
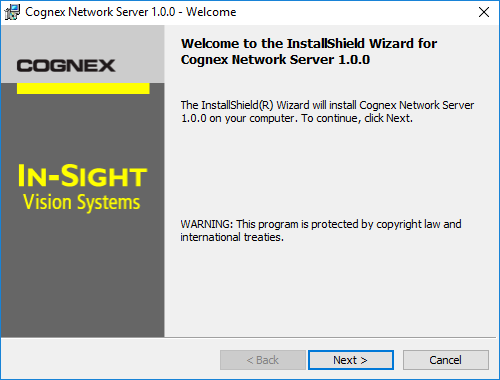
Click Next on the Welcome to the InstallShield Wizard for Cognex Network Server dialog.
-
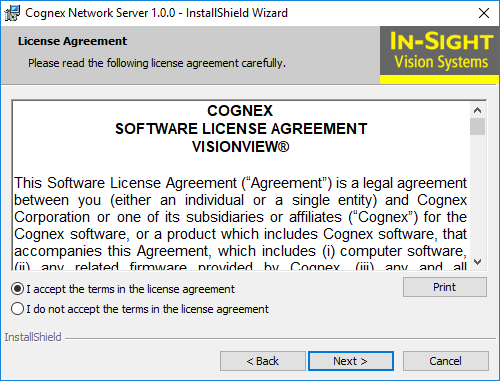
Accept the terms and click Next.
-
Click Next to install the Cognex Network Server to the default location C:\Program Files (x86)\Cognex\Cognex Network Server x.x.x
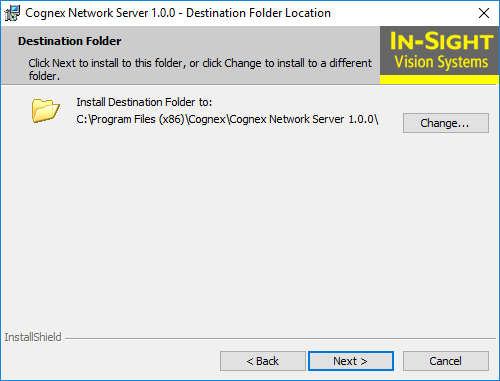
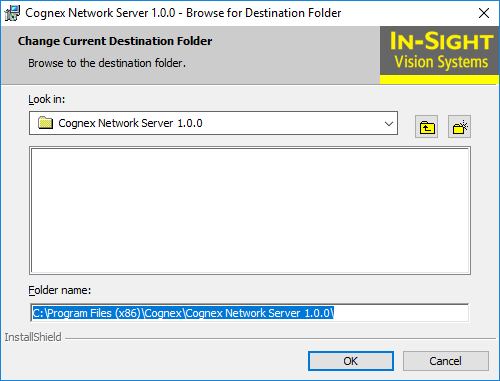
If you want to install the Cognex Network Server to a different folder, click the Change button to open the Browser for Destination Folder dialog. Specify a new installation destination folder, then click OK to confirm.
-
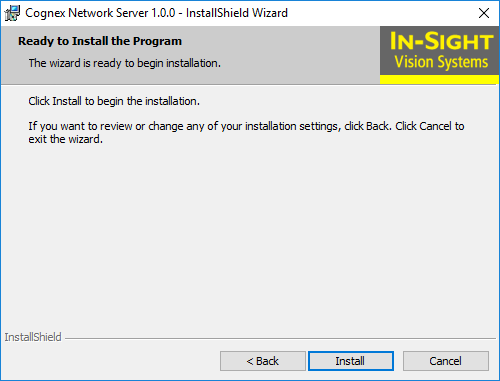
Click Install to begin the installation.
-
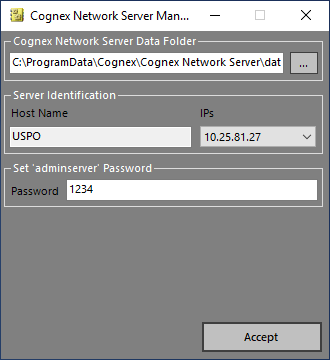
When prompted, specify the Cognex Network Server Data Folder and the 'adminserver' password in the Cognex Network Server dialog.
By default, the Cognex Network Server Data Folder is C:\ProgramData\Cognex\Cognex Network Server\data, and the default password is 1234. The Host Name and the IP address will be auto-populated in the Server Identification field. You will need the Host Name (or the IP address) and Password to configure the HTTPS mode in the In-Sight Explorer HMI Settings dialog.
Once finished, click Accept to start configuring the Cognex Network Server and creating the server certificate.
-
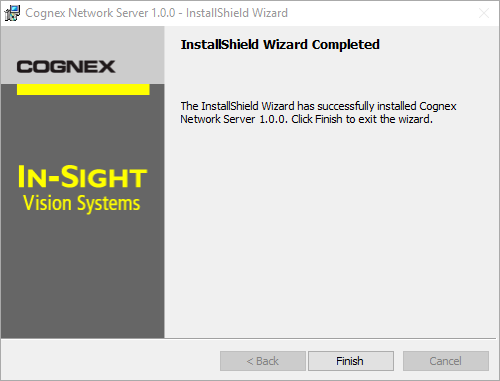
Click Finish to exit the installation wizard.