Add, Load, Save or Delete Spreadsheet Configurations through Web Pages
If the job is Online, you can update, save or delete the contents of the spreadsheet by binding the appropriate recipe $ functions or button click commands to an applicable WebPage User Input element (such as a Button). The easiest way to do this is assigning a Recipe System Click Command to a Button. Perform the following steps to do so:
- Open a WebPage in the Web Page Editor if it is not open already. To do so, either click the View > Web Pages menu in the Menu Bar, or click the Web Pages tab of the Job Browser. Afterwards, double-click the Web Page you want to open in the Web Page Editor.
- Once the WebPage opens in the Web Page Editor, open the web page editor's Toolbox. To do so, either click the View > Toolbox menu in the Menu Bar, or click the Toolbox tab of the Job Browser.
-
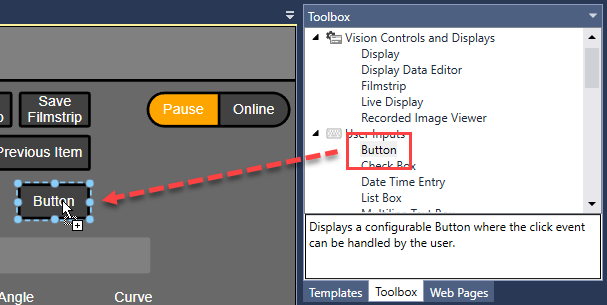
Drag-and-drop a Button from the Toolbox onto the Web Page.
-
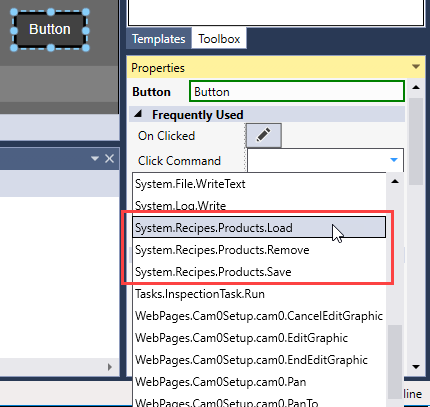
Left-click the Button to select it, and then expand the Click Command drop-down list in the Properties window.
-
Select one of the following click commands, depending on the planned use of the Button:
- System.Recipes.Products.Load: The Button will load the spreadsheet configuration specified with the configurationName property (appearing below the Click Command drop-down list).
- System.Recipes.Products.Remove: The Button will delete the spreadsheet configuration specified with the configurationName property (appearing below the Click Command drop-down list).
- System.Recipes.Products.Save: The button will overwrite the spreadsheet configuration specified with the configurationName property with the current contents of the spreadsheet, along with the provided description (also appearing below the Click Command drop-down list).
Tip: You can also add the current spreadsheet configuration to the job as a new recipe with the Save click command by specifying a new name in the configurationName property. - Customize the appearance of the Button as needed by changing the value of its Text property, assigning an Icon to it, or modifying its various Color properties.
- Once you are done configuring the Button, save the job with the
 (Save) button, or with the File > Save option of the Menu Bar. The Button will be then available for use when the job is set Online.