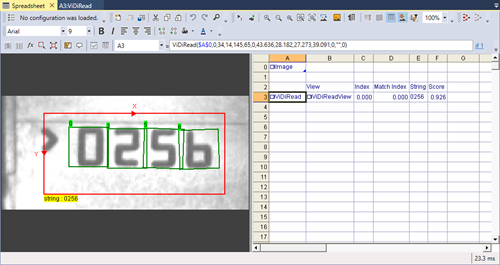
How to Train the ViDiRead Function
While in most instances the ViDiRead function will be able to read text using its pre-trained library, it may be necessary for more difficult characters to train the tool. After running through your training images and determining that the ViDiRead function needs to be trained on additional characters, perform the following:
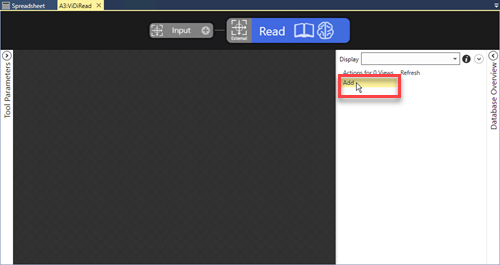
- Open the ViDiRead function's property sheet and press the Open ViDi Editor button.
-
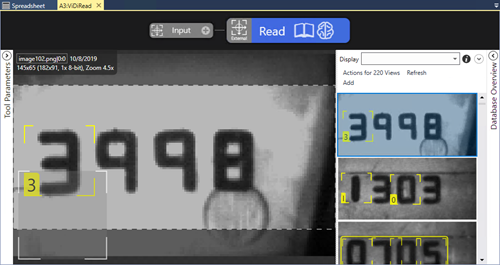
Within the ViDi Editor, from the View Browser, press the Add button and navigate to the directory containing the training and testing images for your application.
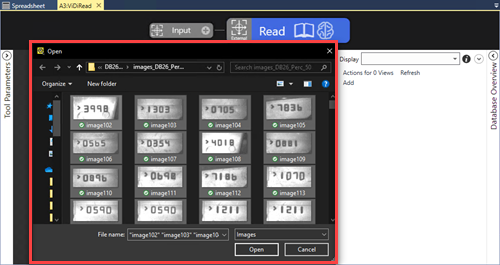
- Load your training and testing images.
-
The tool will then update the views to use the Region parameter settings of the ViDiRead function.
-
All of the regions for the tool will have been updated based on the Region parameter of the ViDiRead function.
-
Place the Feature Size graphic (located in the lower left hand corner of the image) and re-size it to the size of the characters in the image.
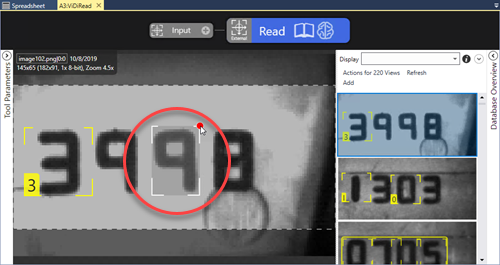 Note: For more information about the Feature Size parameter, refer to the Blue Read Tool – Feature Size topic.
 -
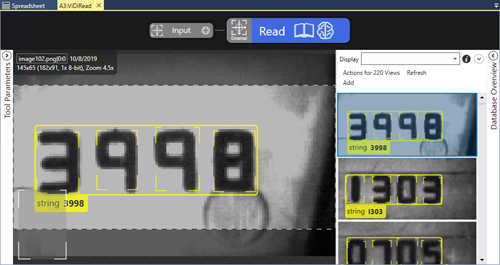
Press the Book icon to process all of the images based on the new feature size setting.

-
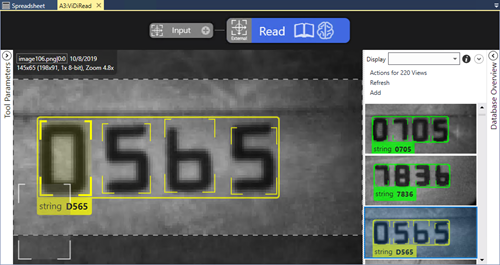
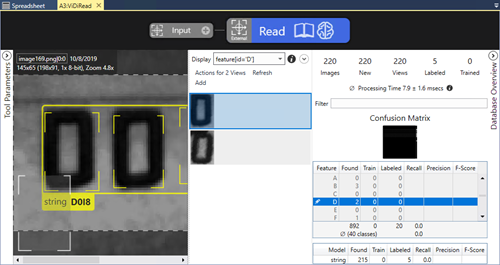
After processing, the Read tool will apply markings (yellow color coding) to the characters.
-
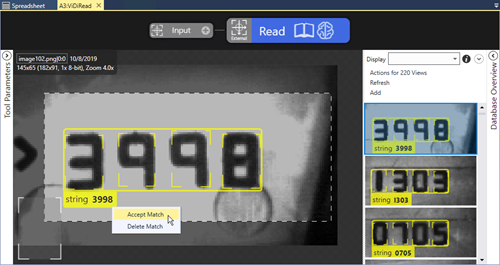
Go through each image and accurately label all of the images. Accurately labeling each image is essential to having a well trained tool, since you are providing the tool with the "ground truth" of each character.
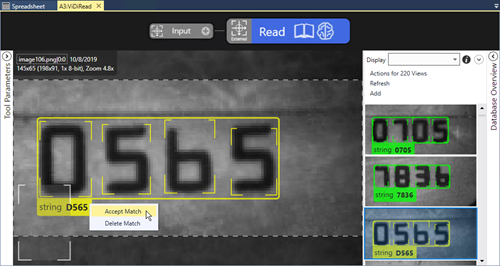
To label an image, you can use one of two methods:
-
Select the string, right-click and select Accept Match.
-
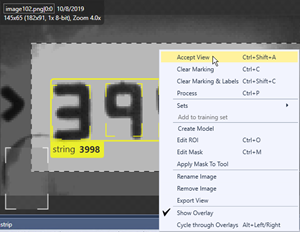
Within the Image Display Area, right-click and select Accept View.
-
-
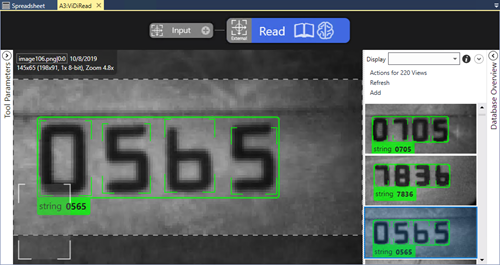
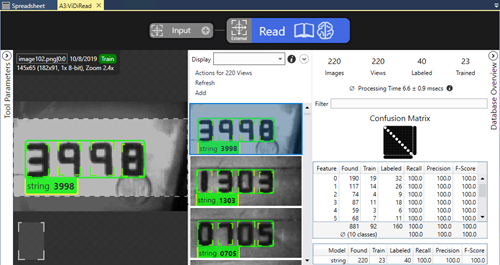
Once the view has been accepted, the marking will be converted to a label (green color code).

-
If you encounter images that contain an incorrect marking, perform the following to create the correct label:
-
Convert the image to a label (using either of the methods described in Step 12).
-
The marking will be converted to a label.

-
Correct the mislabeled character (in this example, the correction is being made in the character marking).

-
The view will now be correctly labeled.
Note:Alternatively, you can also expand the Database Overview and go through each character instance, using the steps above.
-
-
There are now two options to proceed.
- Once you have labeled at least one instance of each character you expect to encounter, you can train the tool. This method is referred to as "bootstrapping". Then you will have to review the markings and repeat the steps above. The bootstrapping method can be faster when you have a large set of images to label.
- Alternatively, you can go through all of the images and ensure that each is accurately labeled before training.
-
To train the tool, perform the following:
-
Press the Brain icon to initiate training.

-
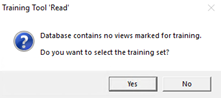
If this is the first time that the tool has been trained, the Training Tool 'Read' dialog will appear. Press OK to continue.
-
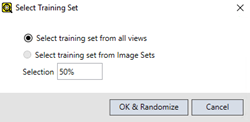
The Select Training Set dialog will appear. Use the default settings for the initial training, and press OK & Randomize to continue.
-
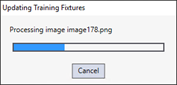
The tool will begin the training of the network.
 Note: The time to train depends on the number of images in your training set and the GPU being used to perform the training.
-
-
Once the tool has been trained, carefully review the results in each image to ensure that each image was marked correctly. If any images were incorrectly marked, repeat Step 14 and retrain the tool.
-
With the tool trained, you can now return to the spreadsheet and add images to your Filmstrip control and review the results. If you encounter characters that are not read correctly, add the image to the training set and retrain the tool.