Configure Discrete Output Details
The Output Details dialog is used to configure individual output line parameters with the Discrete I/O Settings dialog.
-
From the Settings menu of the Menu Bar, click Discrete I/O Settings.
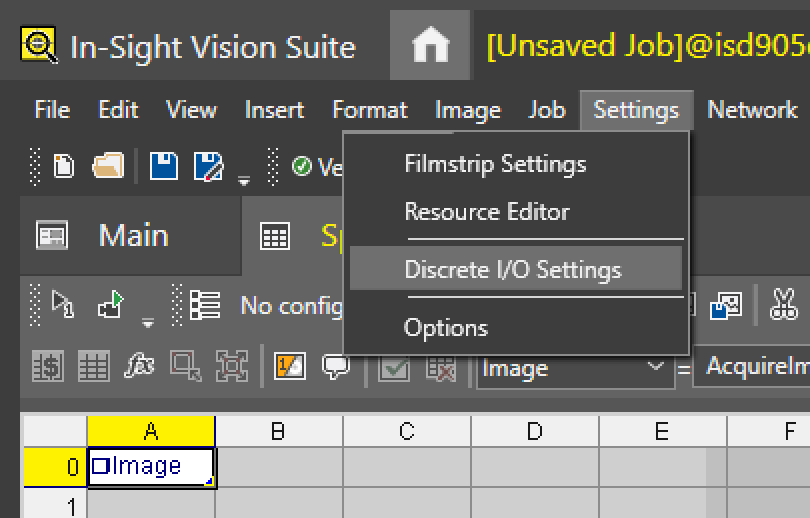
The Discrete I/O settings dialog then appears.
-
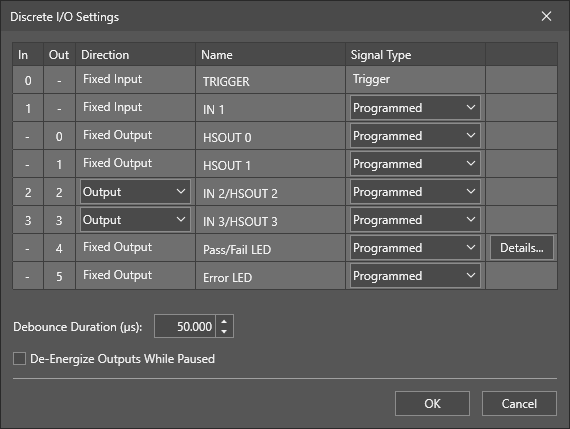
Choose an output line, and click its Details... button.
Note: With the exception of the Pass/Fail LED output line, the Details... button is unavailable if the Signal Type of the output line is set to High, Low, Online, or Busy.The contents of the Output Details dialog vary depending on the output line Signal Type:
Signal Type Output Details Dialog Programmed (Default) 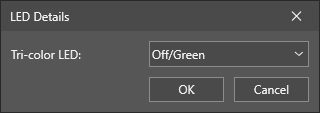
-
Tri-Color LED: Configures the behavior of tri-color LED lines (Off/Green, Off/Red, Red/Green; default = Off/Green).
Note: The Tri-Color LED control is only available on the Pass/Fail LED output line.
High
Low
Online
Busy
-
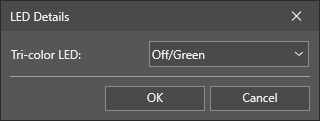
Tri-color LED: Configures the behavior of the tri-color LED lines of the vision system for the configured output line signal. The available values are Off/Green, Off/Red, and Red/Green.
Note: The LED Details dialog is only available for the Pass/Fail LED output line.
Acquisition Start
Acquisition End
Acquisition Missed
Job Load OK
Job Load Fail
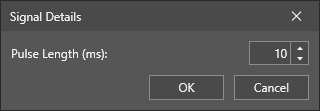
- Pulse Length (ms): Duration of an output pulse (1 - 1000, default = 10).
Job Completed 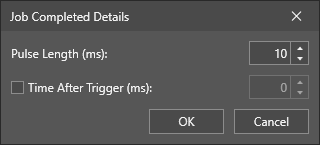
- Pulse Length (ms): Duration of an output pulse (1 - 1000, default = 10).
- Time After Trigger (ms): When this checkbox is selected, the output will be fired no earlier than the specified amount of time (0 - 10000, default = 0) after the actual acquisition starts. If the time specified for the Time After Trigger has already expired by the time the job completes, the output is fired immediately. If the time specified for the Time After Trigger has not expired by the time the job completes, the output is fired after the specified amount of time.
Strobe/Light Control Trigger 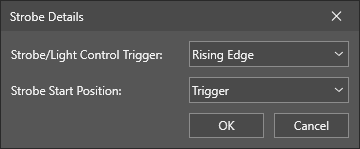
-
Strobe/Light Control Trigger: The rising or falling edge of the signal can be used to trigger a strobe.
- NPN Configuration: If set to Rising Edge, the signal is HIGH when the image sensor is being exposed, otherwise the signal is LOW. If set to Falling Edge, the signal is LOW when the image sensor is being exposed, otherwise the signal is HIGH. Always pulsed for the duration of the exposure. The Exposure time must be 0.50 ms greater than the strobe pulse duration specified on the external strobe device.
- PNP Configuration: If set to Rising Edge, the signal is LOW when the image sensor is being exposed, otherwise the signal is HIGH. If set to Falling Edge, the signal is HIGH when the image sensor is being exposed, otherwise the signal is LOW. Always pulsed for the duration of the exposure. Always pulsed for the duration of the exposure. The Exposure time must be 0.50 ms greater than the strobe pulse duration specified on the external strobe device.
-
Strobe Start Position: Specifies when the strobe should pulse.
- Acquisition Start: Specifies that the strobe will pulse as the vision system begins its acquisition.
- Trigger: Specifies that the strobe will pulse upon receiving a camera trigger event.
-