Red Analyze Tool – Unsupervised Mode
When the Red Analyze tool is in Unsupervised mode, the focus is on teaching the network what a good part looks like. Therefore, during training, the primary focus is on presenting good/passing images of your part (including any and all acceptable variations). However, it is also important to include labeled failing images during the testing and validation phases. This will allow you to determine how accurately the tool is detecting defects after it has been trained.
Then, during runtime, a part is presented and the tool compares it against what it was taught and finds that it deviates, it will indicate that it thinks that the part is bad.
In Unsupervised mode, the process for training the tool is:
- Collect images that represent the full range of passing and acceptable variations of your part.
-
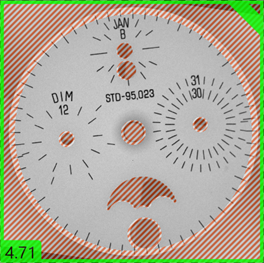
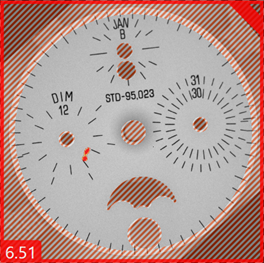
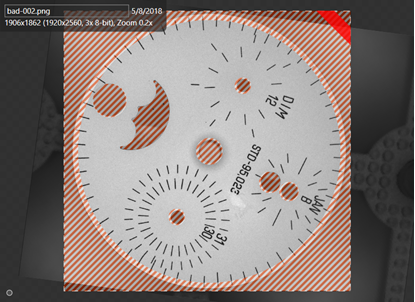
Label the images as Good by clicking each image in your Training Set, or using the Label Views option from the Actions for N Views menu in the View Browser. A single click equals a "Good" image (denoted by a green stripe in the upper-right corner).
Note: Clicking twice equals a "Bad" image (denoted by a red stripe in the upper-right corner). However, this label should only be applied to the validation set."Good" Label "Bad" Label 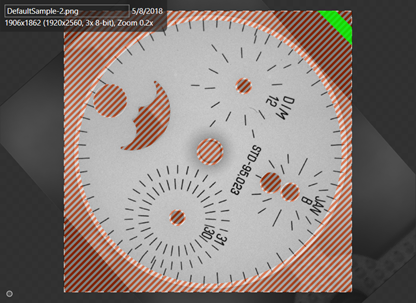
- Train the tool.
-
Validate the tool by presenting images that contain known defects, which you have labeled as Bad, to determine the tool's accuracy.
"Good" Marking "Bad" Marking