Mount VisionView Web Panel to Custom Bracket
-
Cut the screw holes into the bracket. Refer to the following image for the locations of the holes. The values are provided in millimeters.
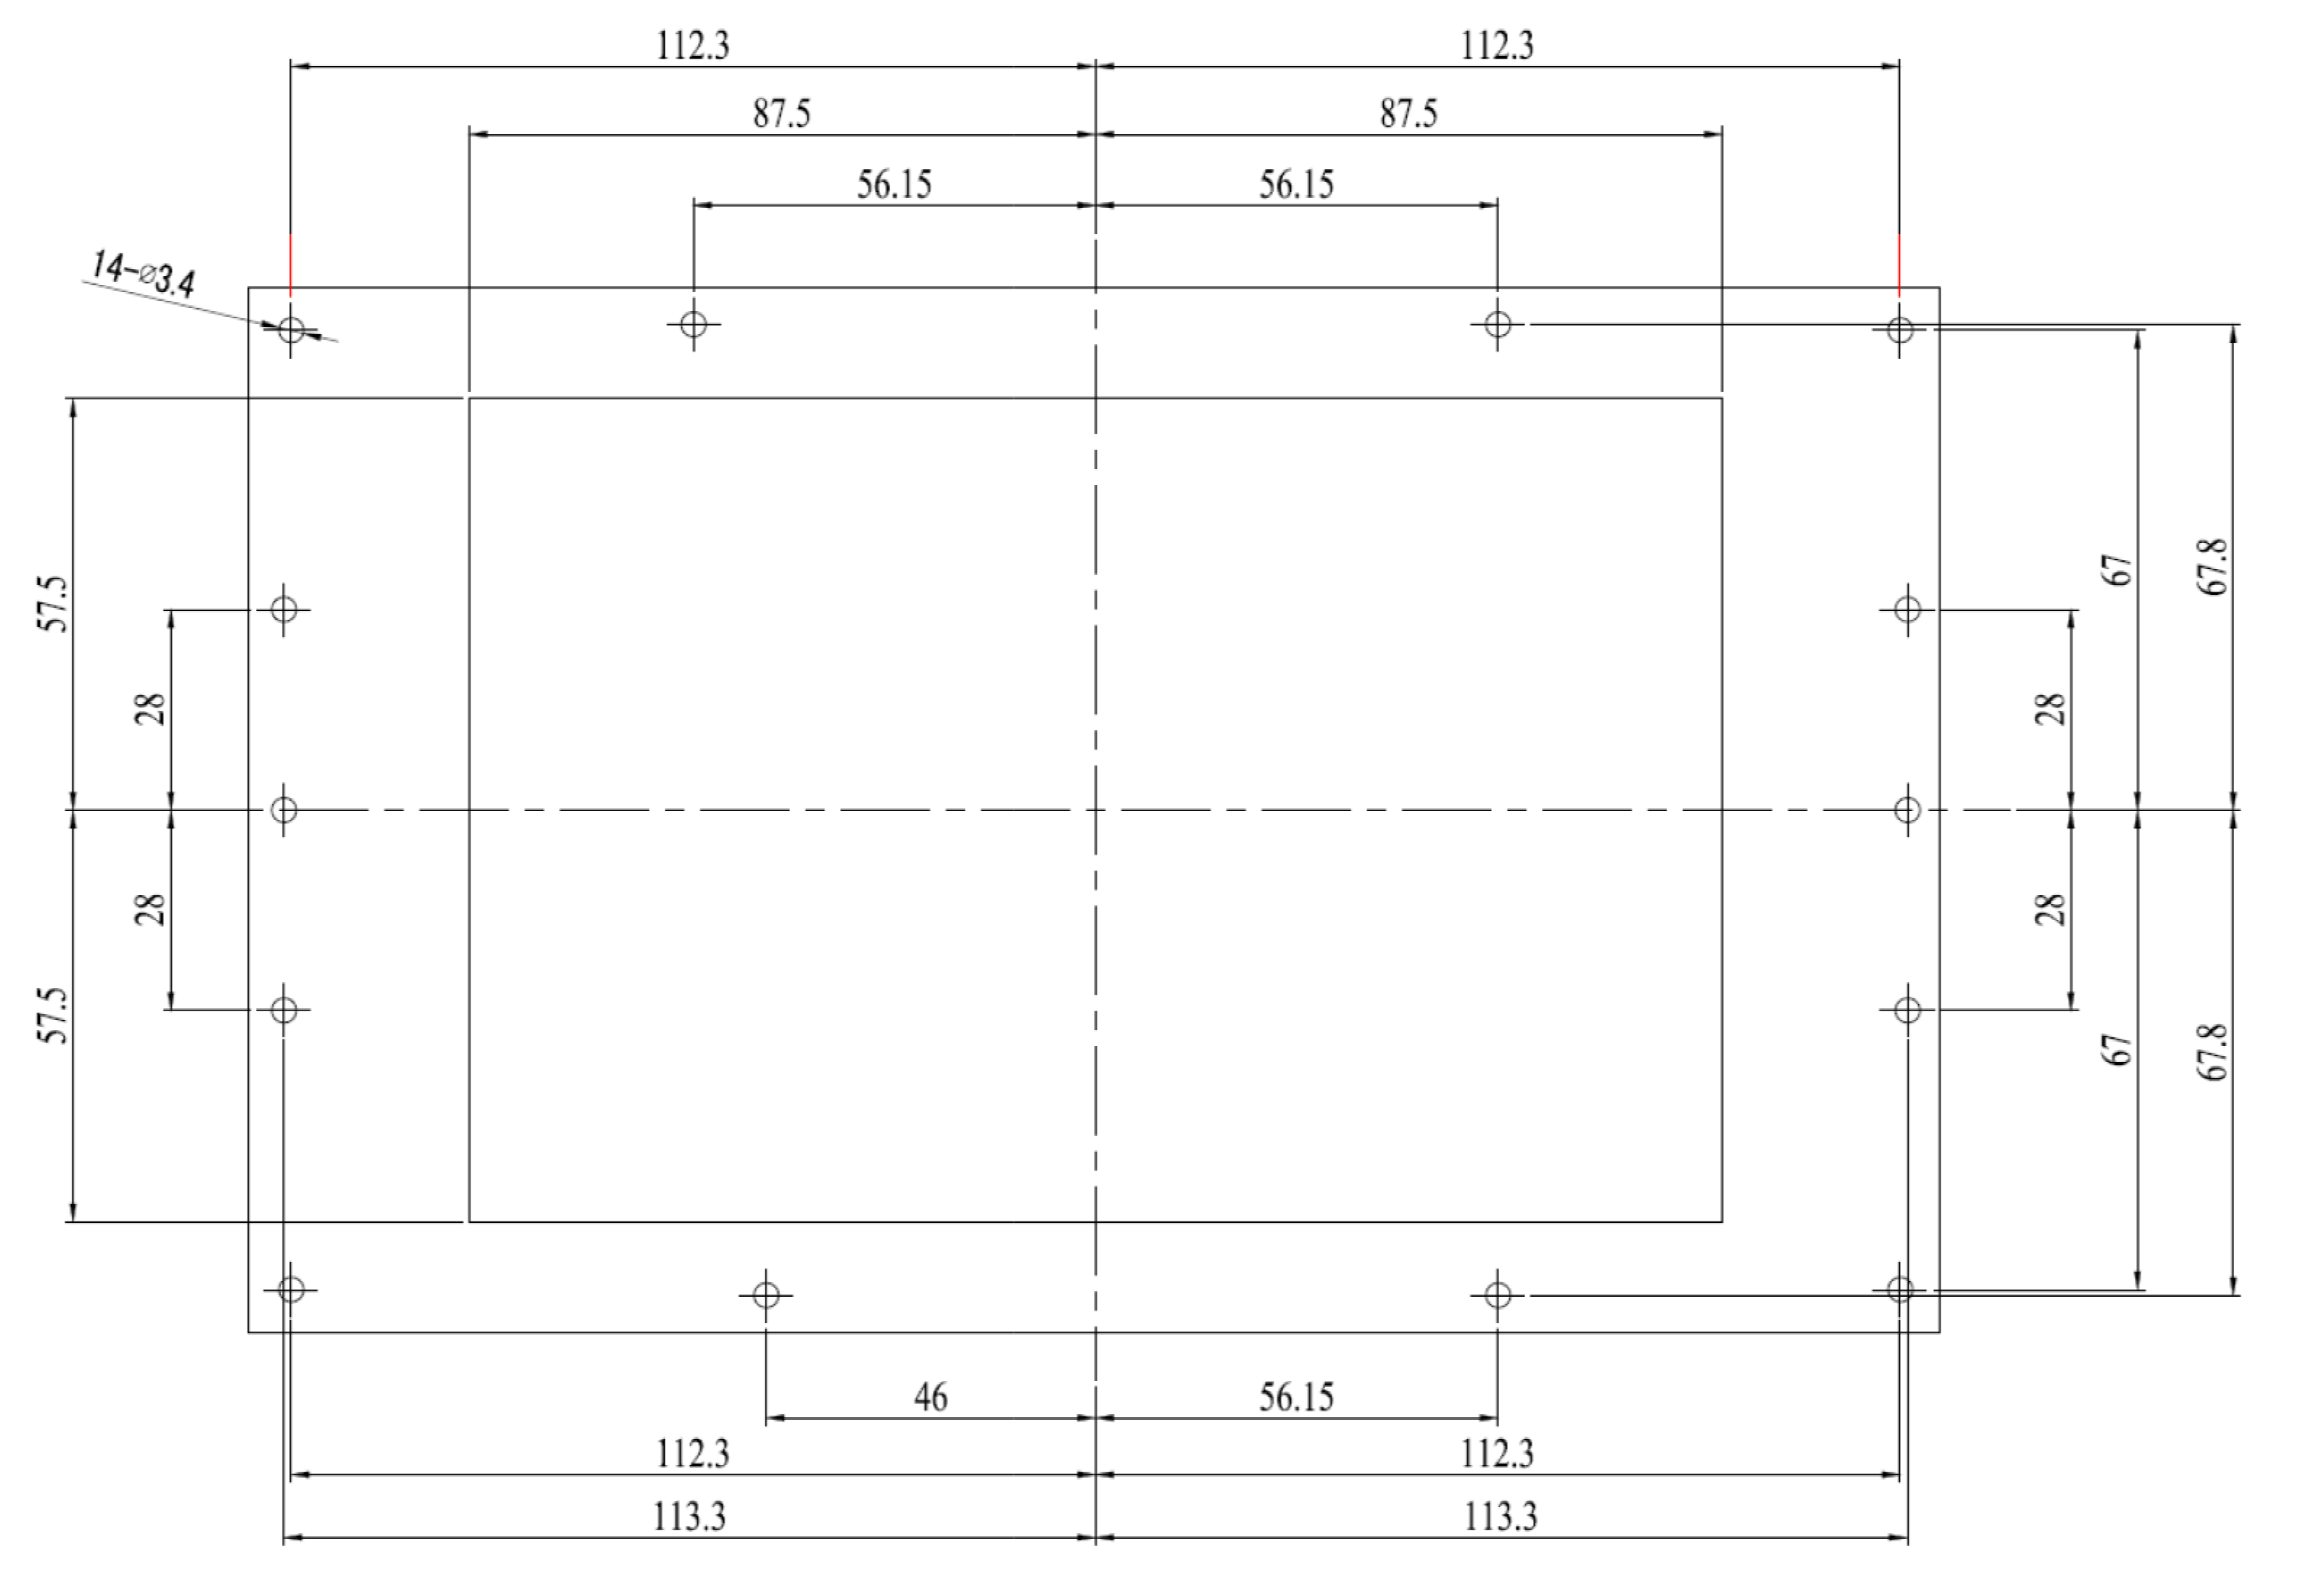 Tip: Cut the holes in the bracket using a professional machine shop.
 -
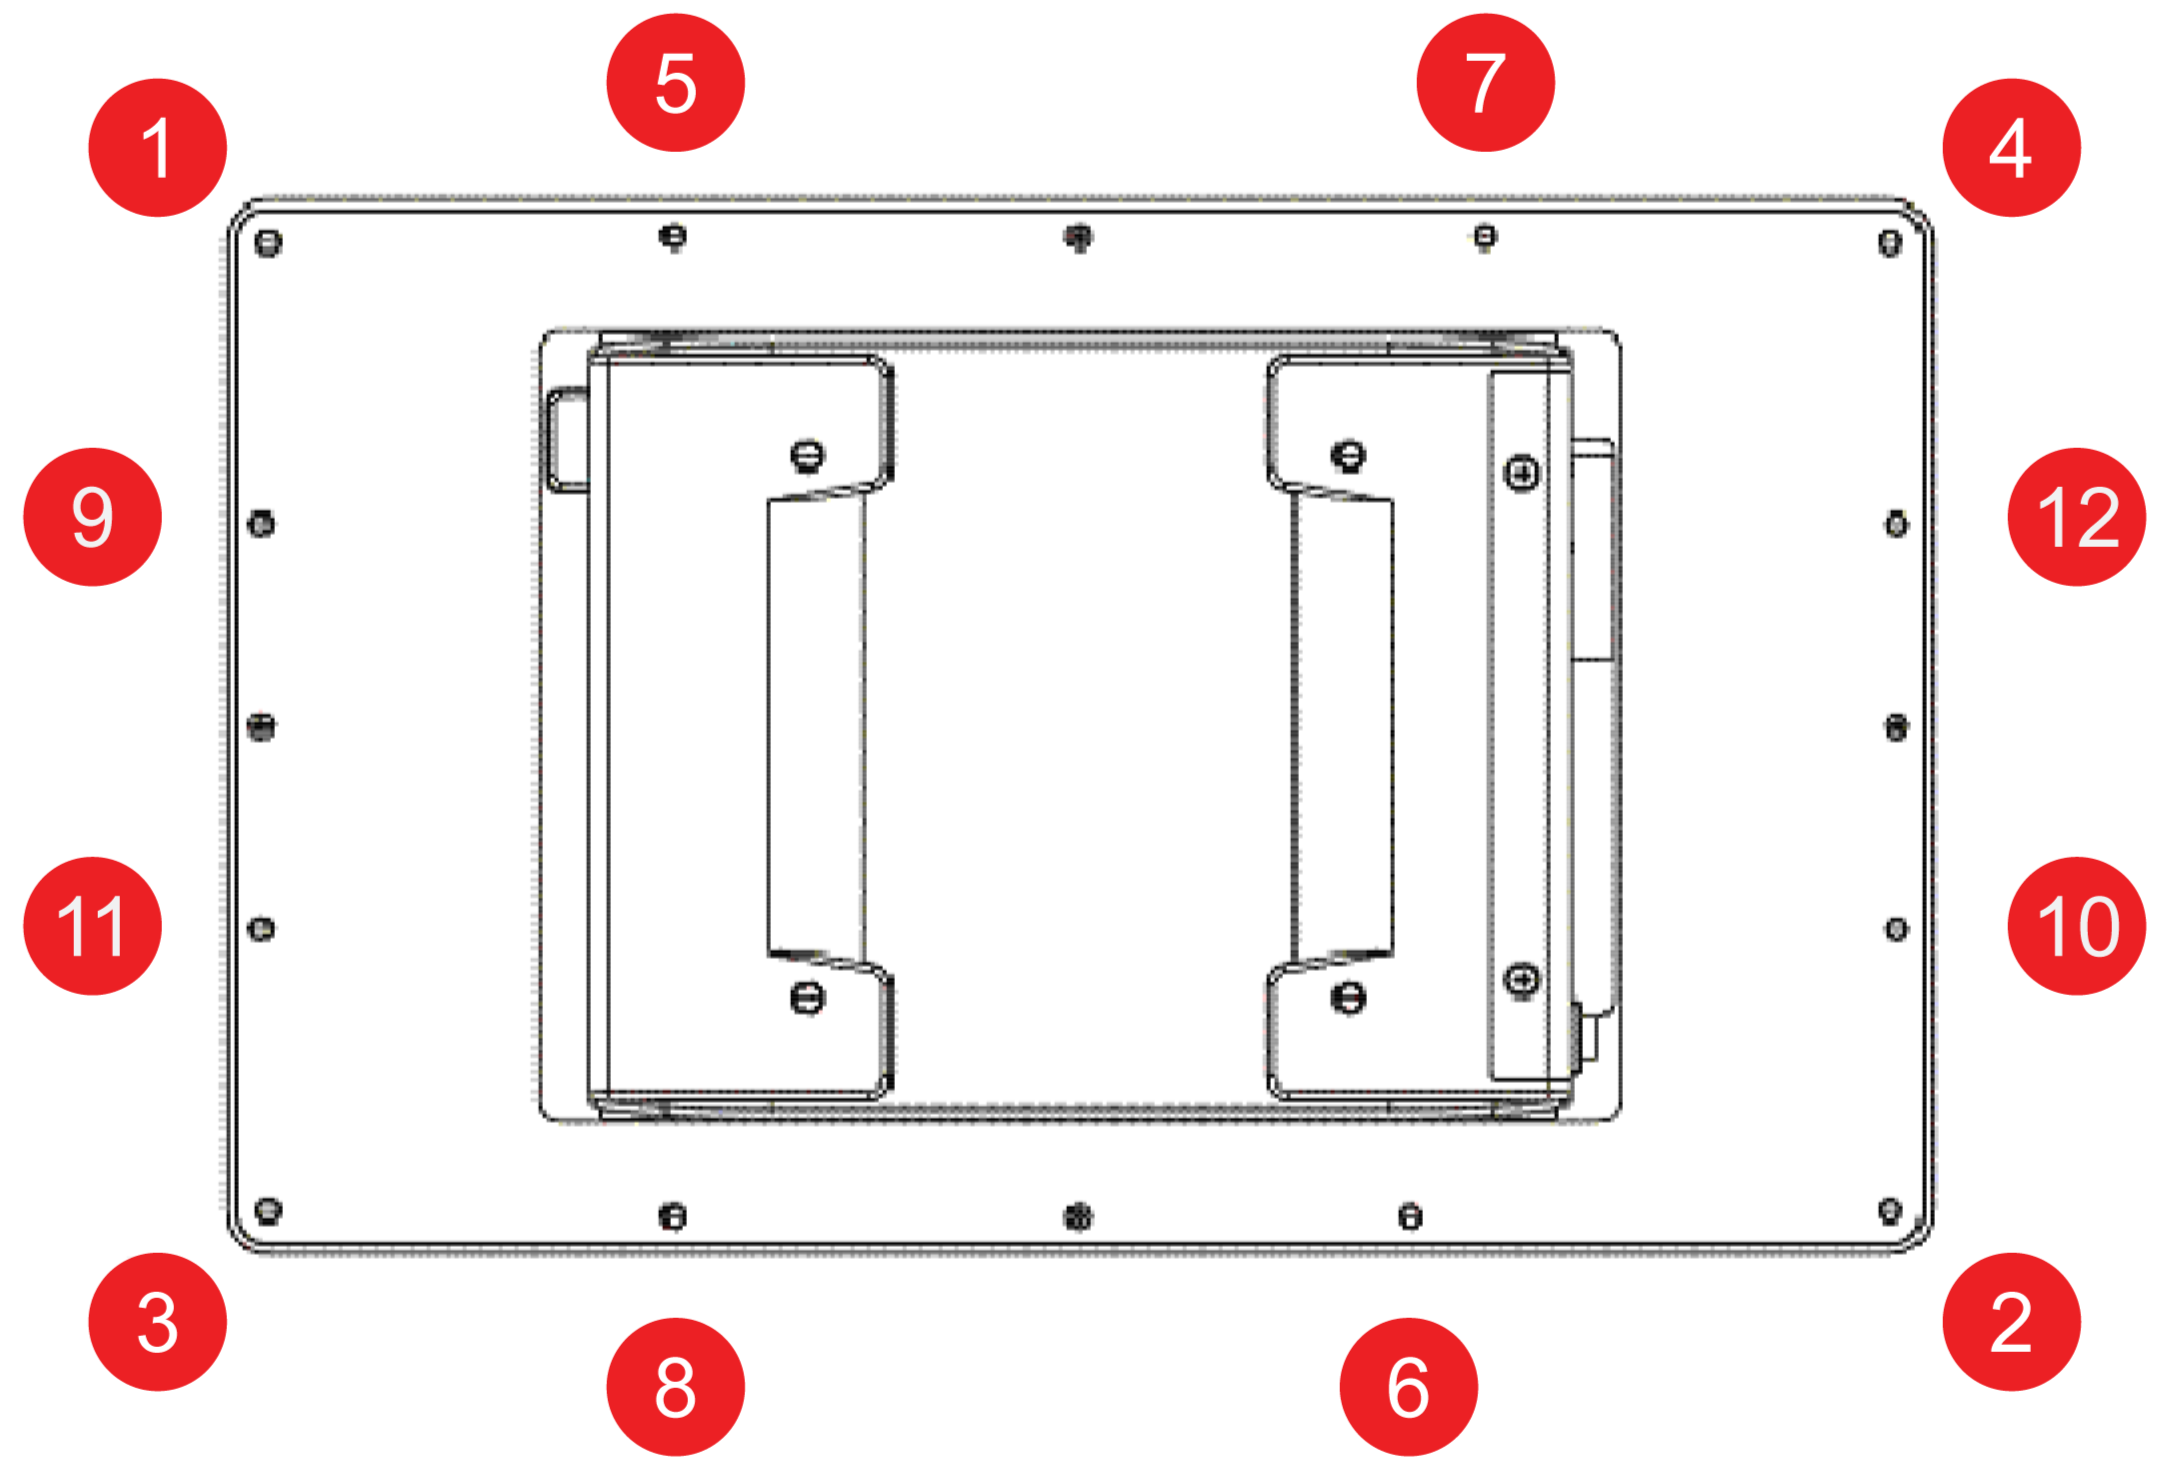
If necessary, remove the twelve M3 screws from the VisionView Web panel in a diagonal pattern, as shown on the image below:
- Place the VisionView Web panel face-down on a clean, flat surface.
- Slide the bracket around the back of the VisionView Web panel until the bracket rests directly on the gasket. Align the screw holes with the mounting holes on the VisionView Web panel.
-
Insert all twelve M3 screws into the mounting holes and screw them in until they are finger-tight.
Note:The screw size is M3×L (L=wall thickness + 6.0 mm).
The required length for all twelve M3 screws changes according to the thickness of mounting bracket. For example, the length of a standard M3 screw for the VisionView Web panel is 6 mm. If the thickness of your mounting bracket is 3 mm and washer thickness is 1 mm, you have to use 10 mm M3 screws.
-
Finish tightening the screws using an M3 screwdriver. Observe the tightening sequence shown below:
Note: The maximum torque is 1.18 Nm.