
Question
Setting Up and Using Integration Objects OPC Client with In-Sight 2000
Download and Installation
To use Integration Objects OPC Client, download it here after free registration.
Configuring In-Sight Explorer
- Launch In-Sight Explorer (this guide is based on ISE 6.5.0) and connect to your In-Sight 2000 (fw 6.5.0).
- Navigate to Sensor > Network Settings and enable the OPC UA Server by checking the corresponding box.
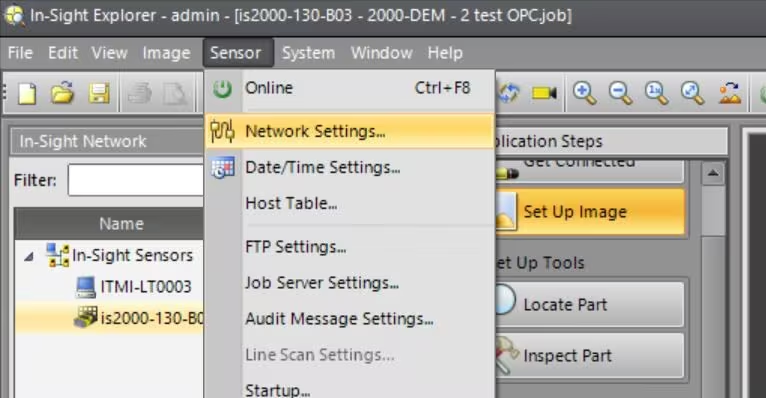
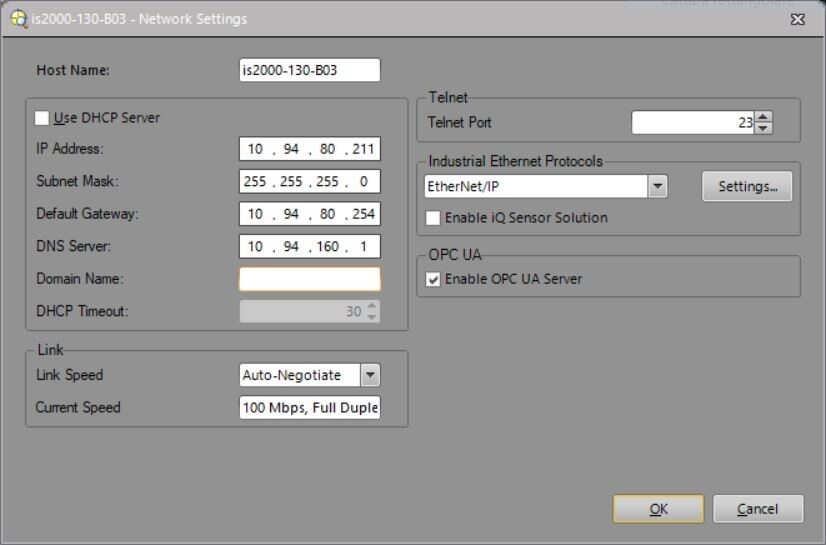
- Click OK, then reboot the camera as prompted.
- Once restarted, reconnect and go to the Communications tab—here, you'll find the newly added OPC tag.
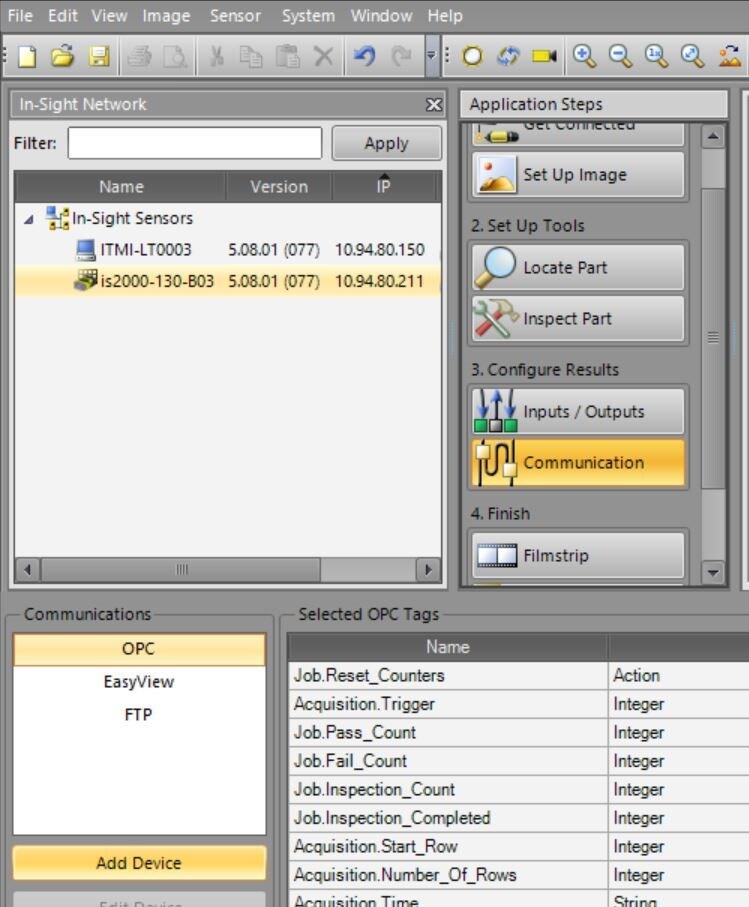
- Configure OPC communication settings as needed.
- Save the job and set the camera to Online—this completes the In-Sight side of the setup.
Setting Up OPC Client
- Install and launch OPC UA Client (look for its desktop icon).
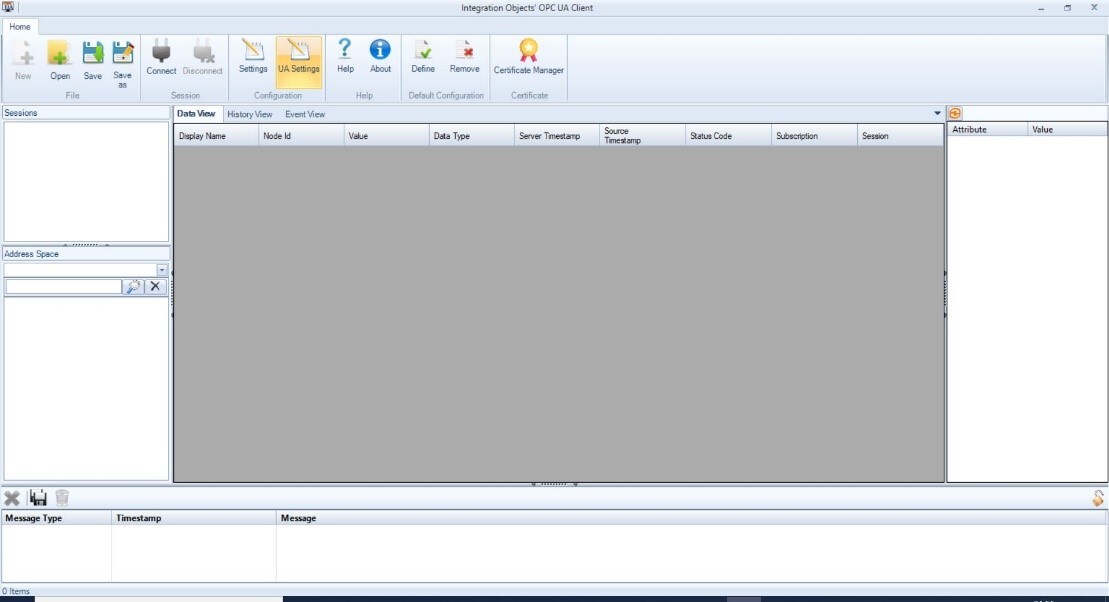
- Click Connect—a window will appear.
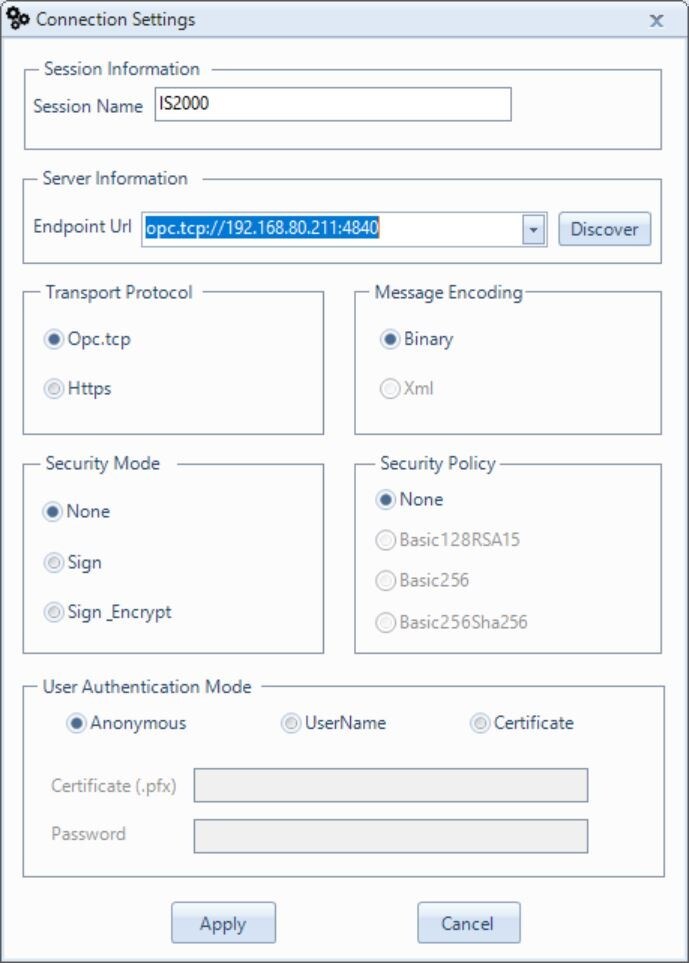
- Set up the session:
- Assign a name (for saving purposes).
- Enter the Server endpoint information (format should match the provided example but replace it with your camera's IP).
- Click Apply.
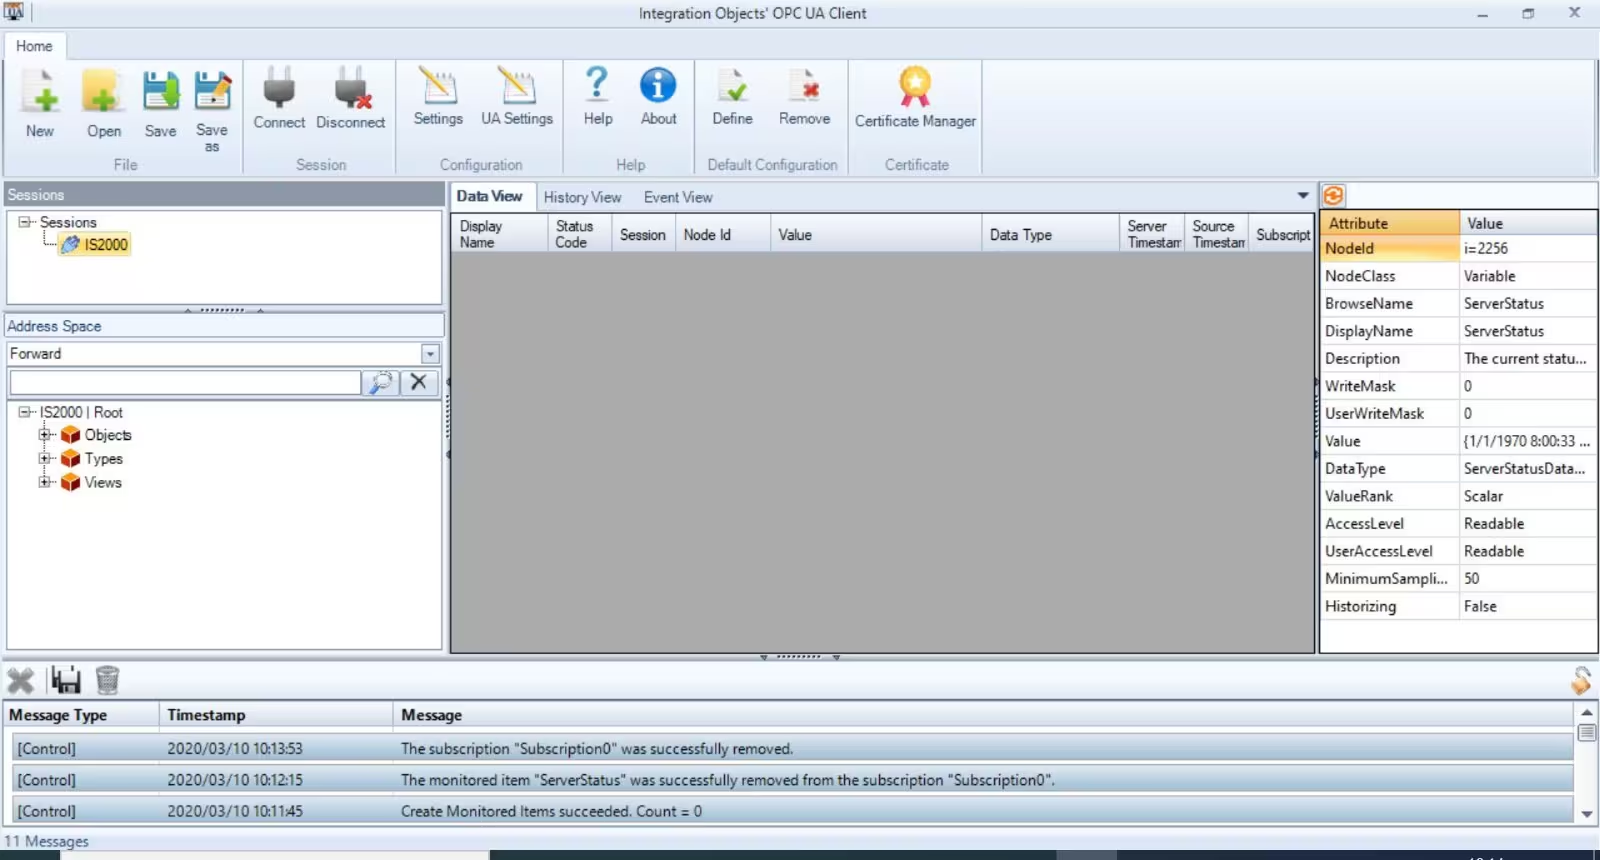
Navigating the Address Space
- Locate In-Sight 2000 | Root directory.
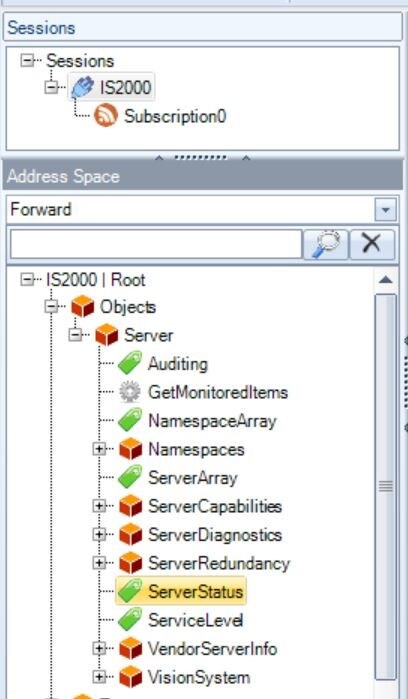
- Go to Object → Server—this contains all camera-related data.
- Under Server, find ServerStatus—this shows whether the Server is running on the camera.

- Add data to the main page using Drag & Drop.
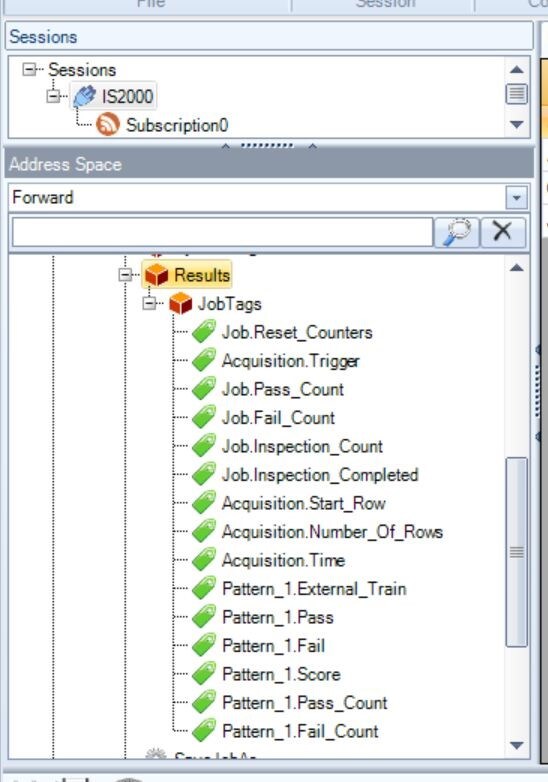
System Tags and Results
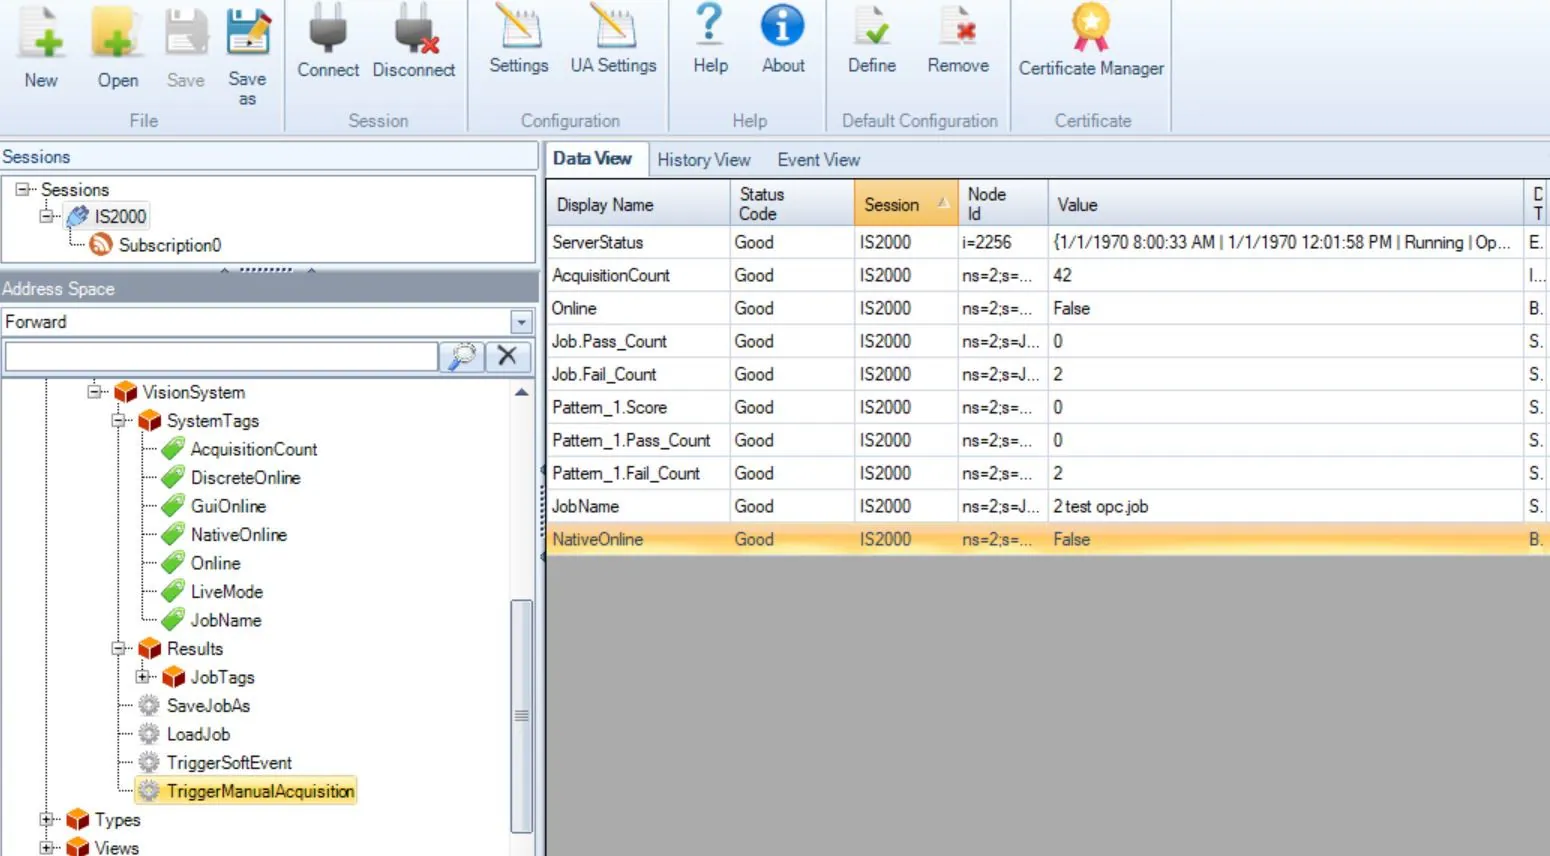
- System Tags: Contains system-related data, including online/offline status and running job info.
- Results: Displays job-specific tags created within In-Sight Explorer.
- Both can be added via Drag & Drop.
Camera Controls
Setting Camera Online/Offline
- Right-click NativeOnline, then select Write.
- Uncheck the flag to set the camera Offline.
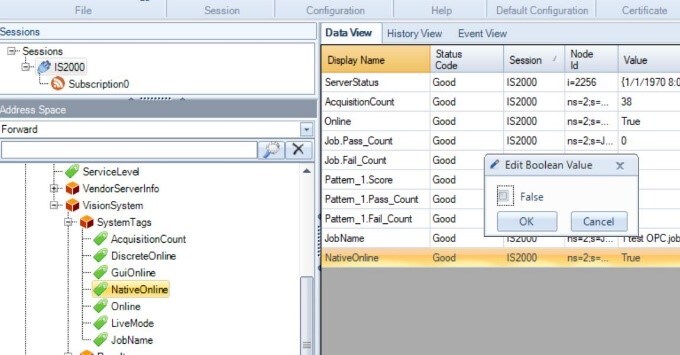
- Repeat the process to set it Online.
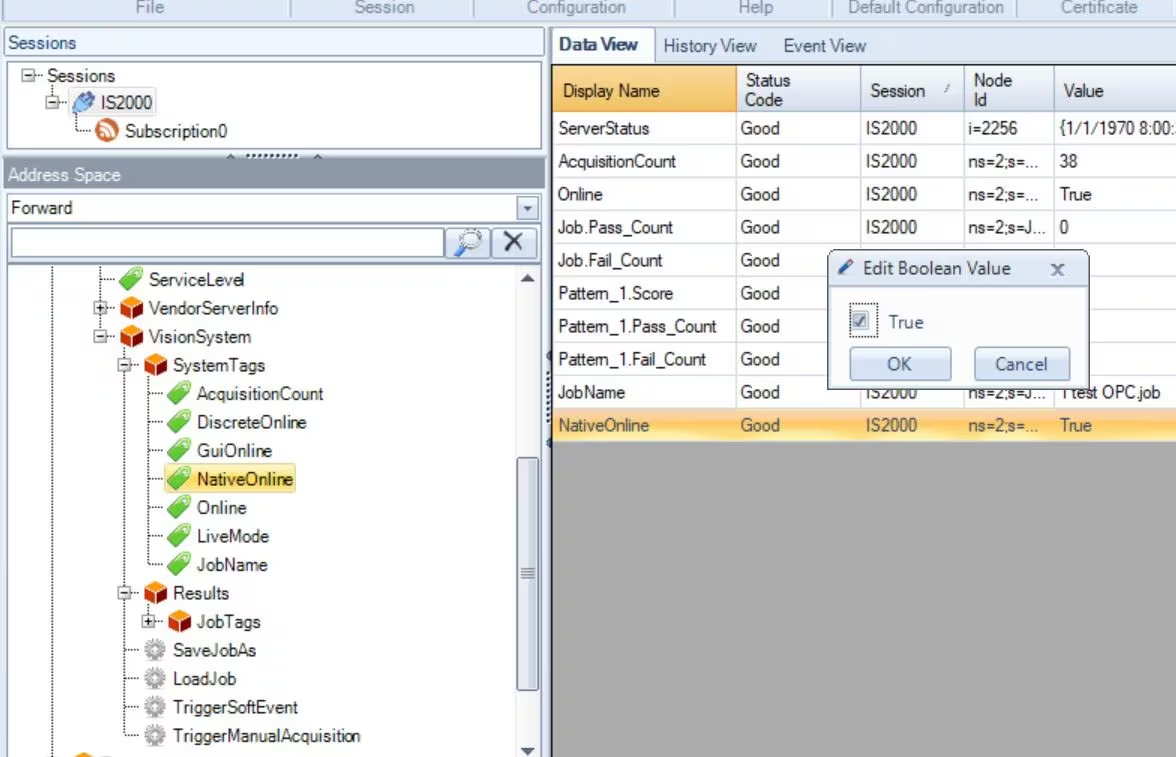
- This command is equivalent to the SO command.
Loading a Job
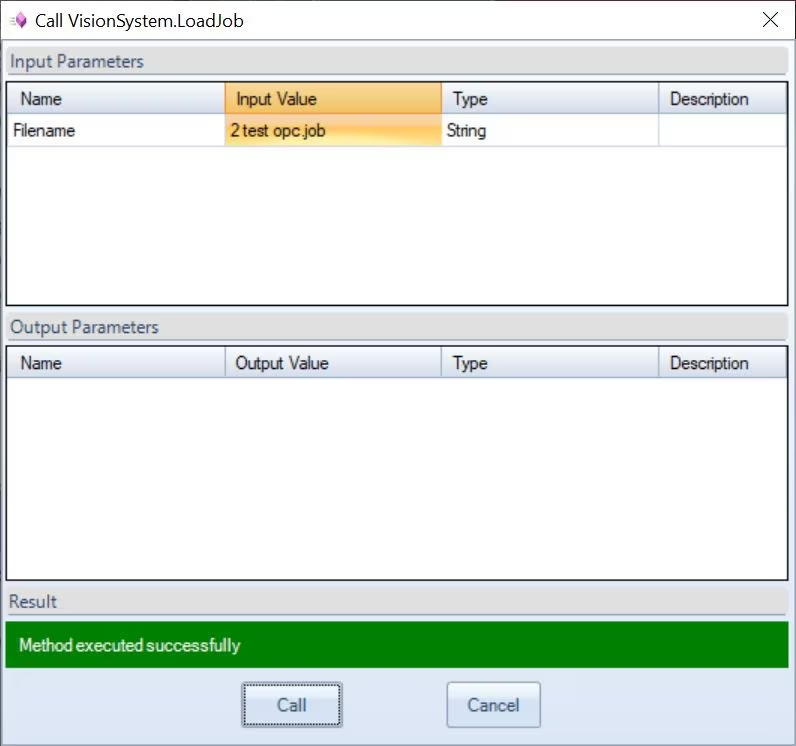
- Right-click LoadJob, then select Call.
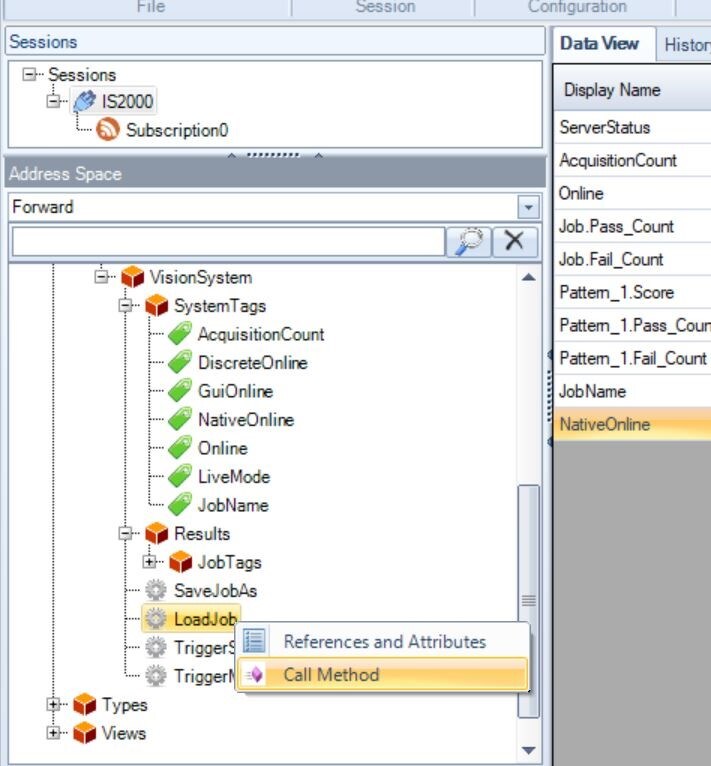
- Enter the job name in the Input Value field and press Call.
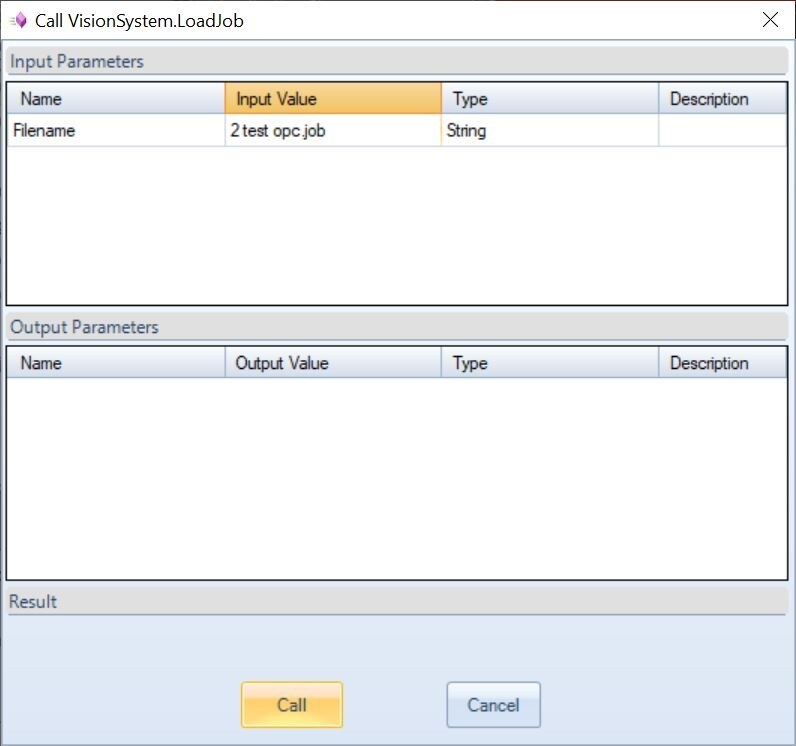
- If successful, you'll see a confirmation.
Saving a Job
- Right-click SaveJobAs, then select Call Method.

- Enter the job name in the Input Value field and press Call.
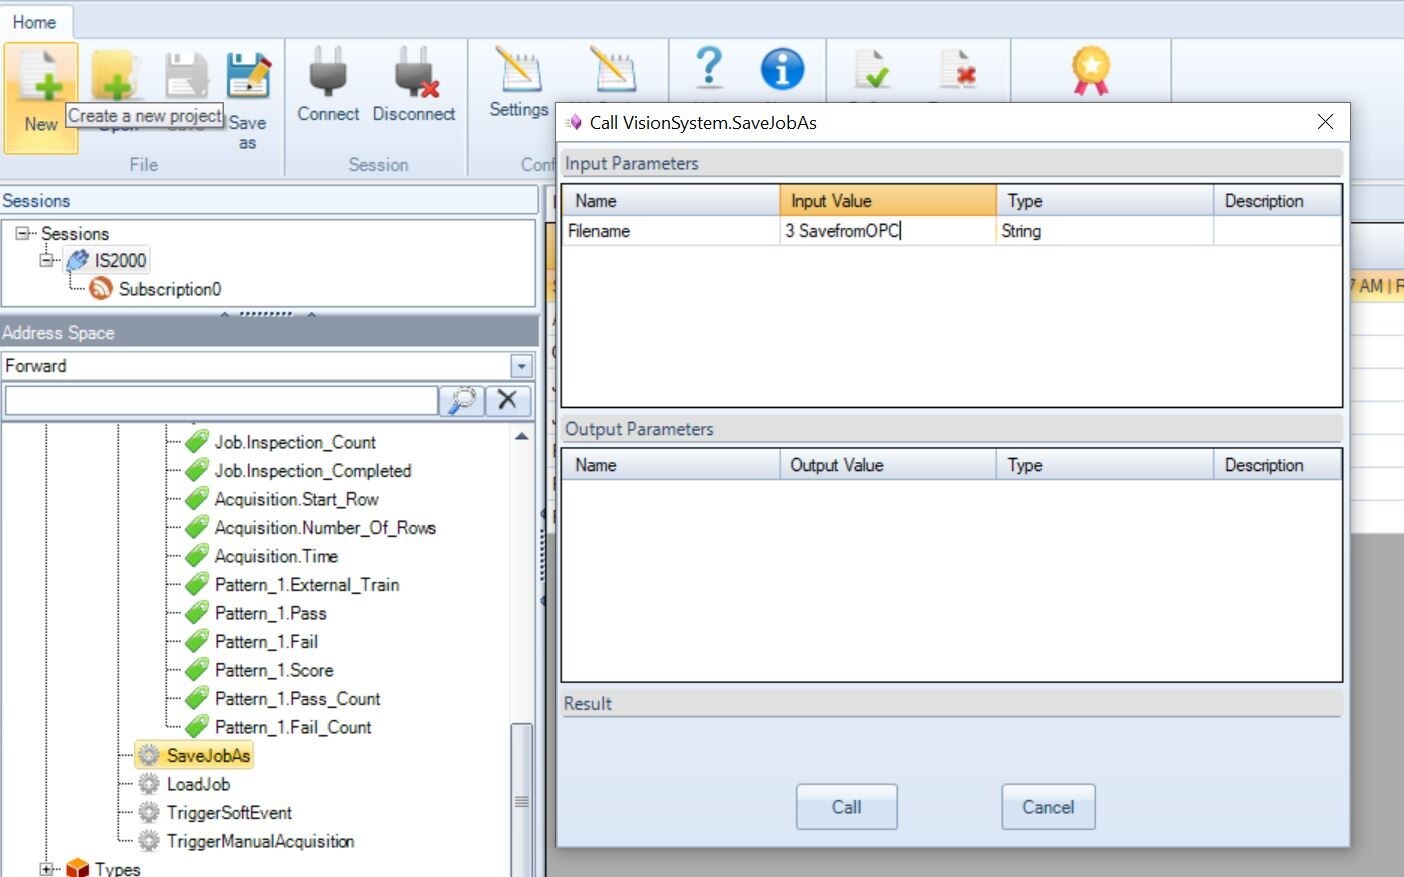
- The job is now saved on the camera.
Triggering the Camera
- Right-click TriggerManualAcquisition, then select Call.
- In the next window, press Call to trigger the camera.
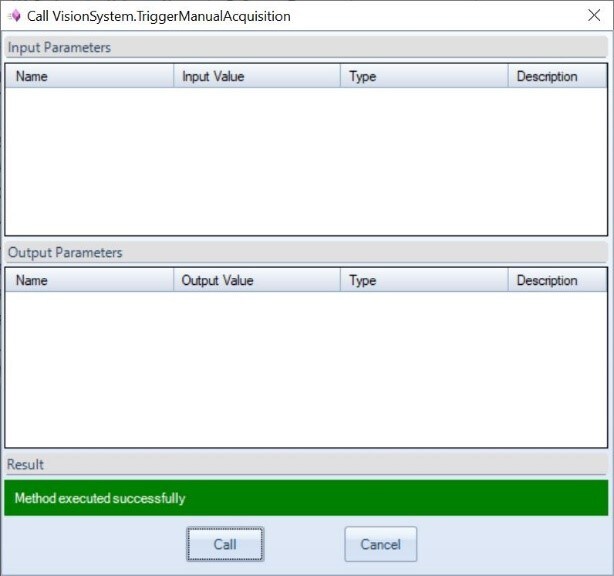
- Once triggered, the camera will capture an image.

Final Steps
- After setup, you should see a confirmation window.
- If needed, save your configuration using the Save button at the top of the screen.
For more details, visit:
Support Page