
Details
Step 1: Connect the Vision System
Ensure that your vision system is properly connected to the network. Check all physical connections, including power and Ethernet cables.
It should be connected directly to your PC with the Ethernet cable. Make sure your Ethernet card is set to DHCP.

Step 2: Open Command Prompt
- Launch Command Prompt: On your computer, open the Command Prompt. You can do this by typing "cmd" in the Windows search bar and pressing Enter.
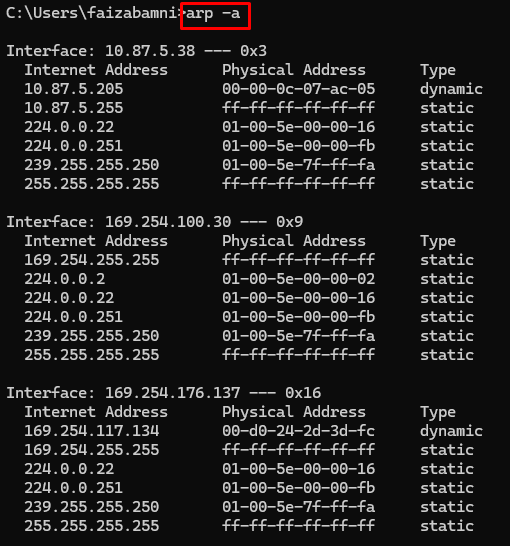
- Run "arp -a" Command: Type arp -a and press Enter. This command will display a list of all devices connected to your network along with their IP and MAC addresses.
Step 3: Identify the Vision System
- Locate MAC Address: Find the MAC address of your vision system. This is usually printed on the device label.
- Match MAC Address: In the list generated by the "arp -a" command, locate the entry that matches the MAC address of your vision system. The corresponding IP address is the one assigned to your vision system.


Step 4: Assign a New IP Address (if needed)
If the vision system has an incorrect IP address or you need to change it, follow these steps:
- Access Device Settings: Use In-Sight Vision Suite or In-Sight Explorer to access the device settings.
- Assign IP Address: Enter the new IP address that matches your network’s configuration.
Step 5: Add the Vision System to the Software
- Add Device: Use the "Configure Manual Devices" dialog in In-Sight Vision Suite or "Explorer Host Table" In-Sight Explorer to manually add the vision system.
- Enter Details: Input the IP address, host name, and other required details.
In-Sight Vision Suite :


In-Sight Explorer :


Step 6: Verify the Connection
- Check Status: Ensure that the vision system is now visible and accessible in the software.
- Test Communication: Perform a test to ensure that the vision system is communicating correctly with the software.
Troubleshooting Tips
- Firewall and Antivirus: Temporarily disable any firewall or antivirus software that might be blocking the connection.
- Network Configuration: Ensure that your computer and the vision system are on the same subnet.
- USB Connection: If network discovery fails, try connecting the vision system via USB and use the software to configure the network settings.