
Question
How to write data from PLC over Profinet to use it as FTP file name in In-Sight Vision Suite EasyBuilder view?
Answer
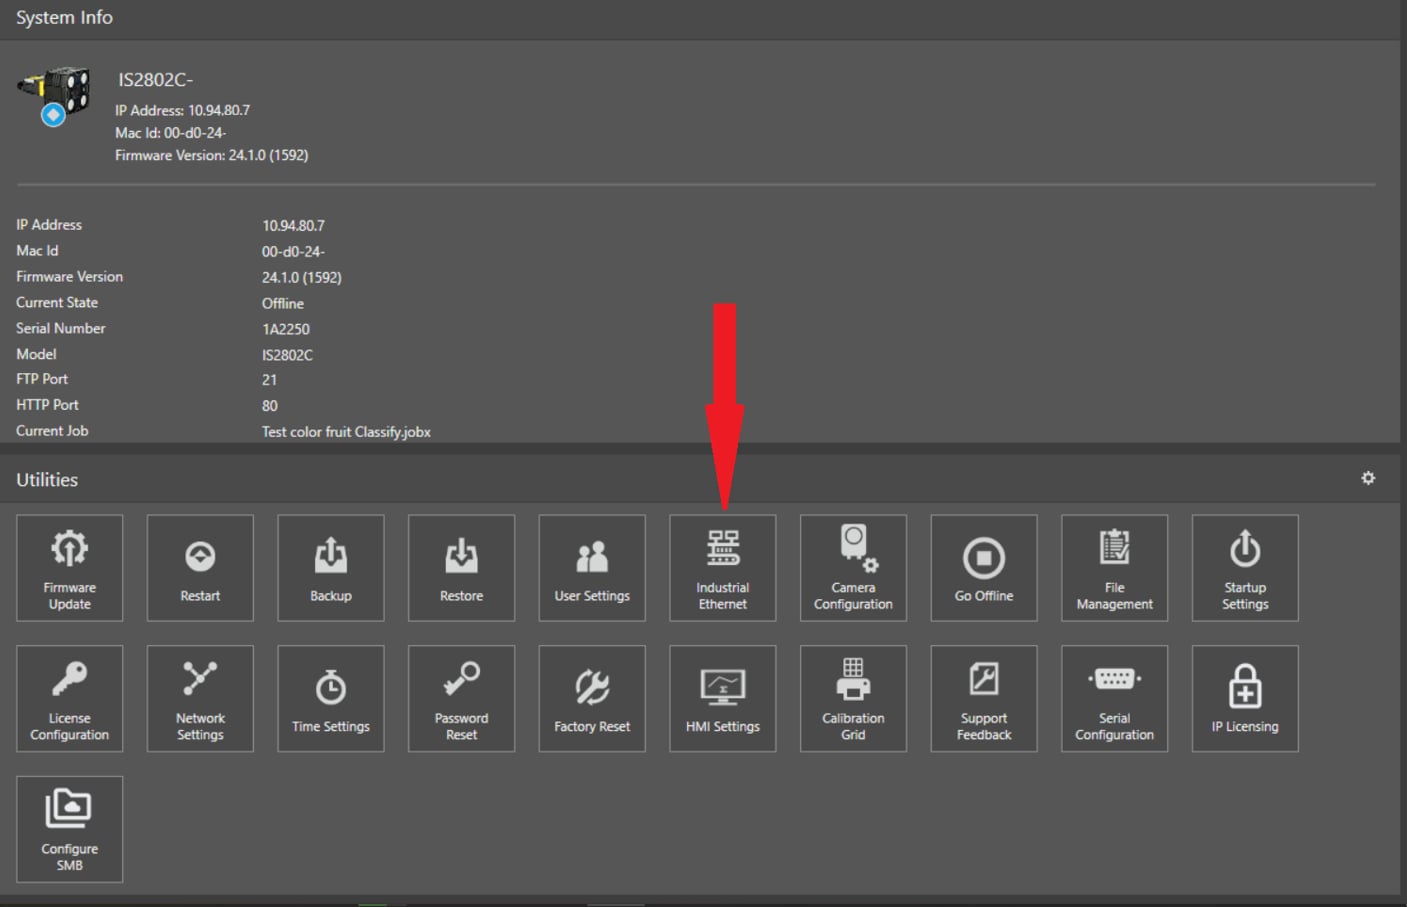
First of all, camera have to be set to communicate in Profinet, and you can do this from the In-Sight Vision Suite main page, clicking here:
And then select, in the next window, Profinet as the preferred communication method:
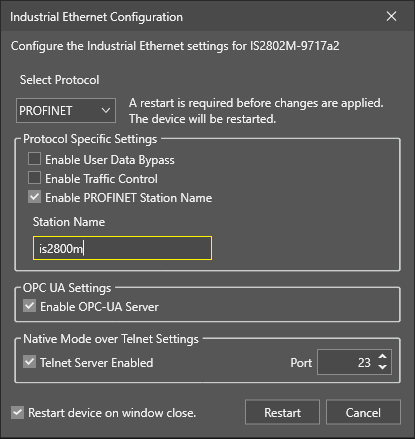
As you can see, a Restart is required once this parameter is set, so press Restart.
Once restarted, camera will have Communication set for Profinet
For this example, we will use a Math Tool.
Done? Ok, let’s go.
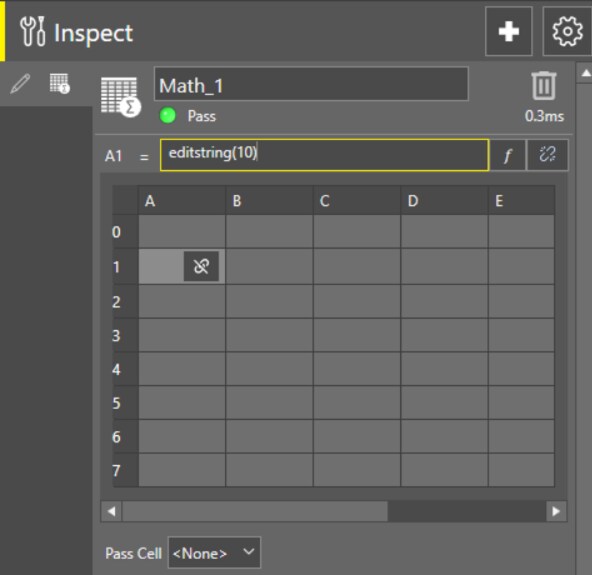
First you have to insert an EditString into the Math tool, we will use cell A1, like this:
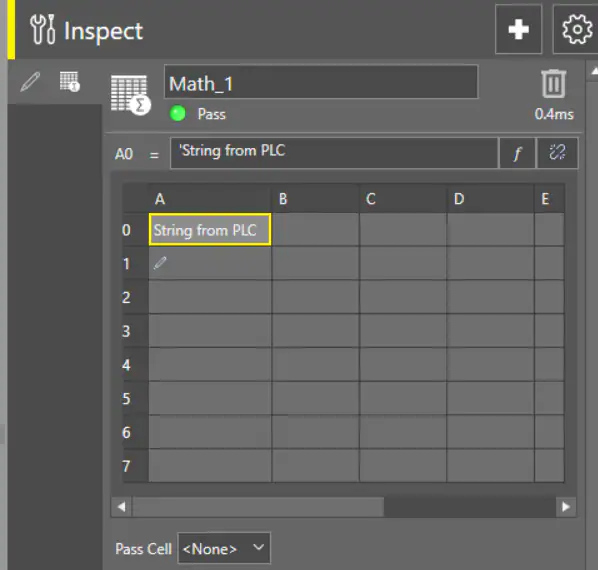
And this is what it will be, with a comment in A0:
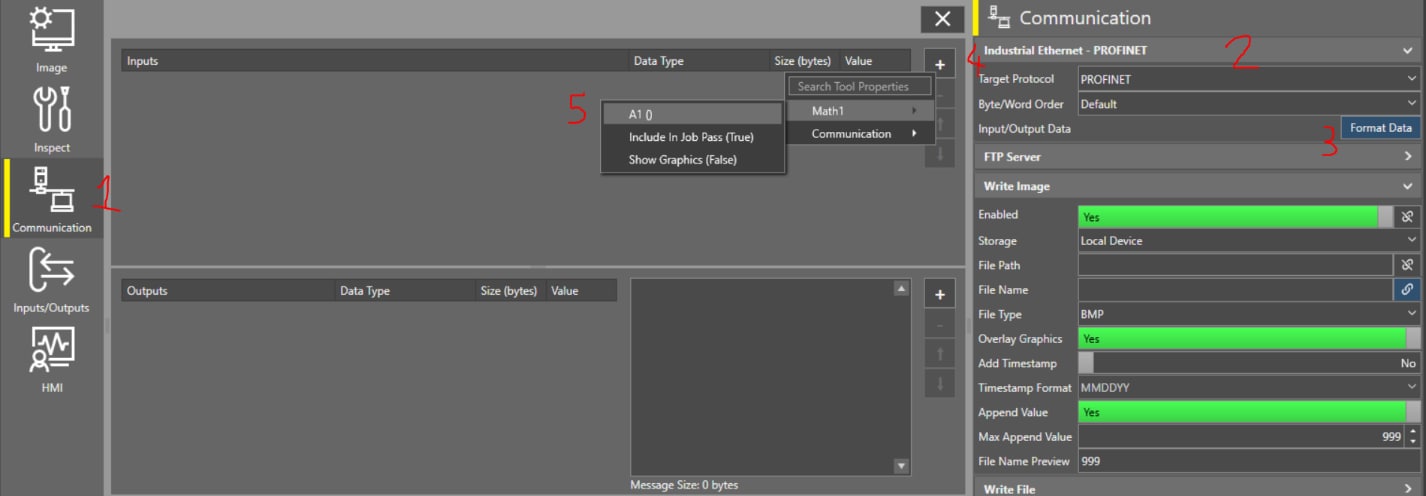
Now, let’s move to Communication (1), then Profinet (2), then Format Data (3), this will open a nearside window, then go to + (4) and select Math.A1 (5). This will add the Editstring to the Input Buffer from PLC, starting from UserData0 (we will see this in the next part)
This is how it will appear:
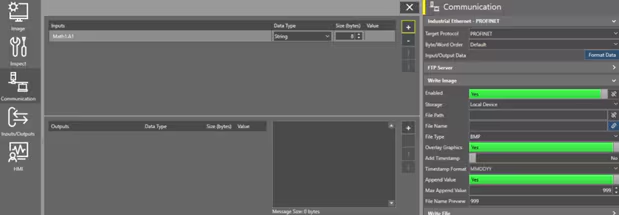
Now, if you go back to the Math tool, you’ll see that the InputString cell has been modified, like this:
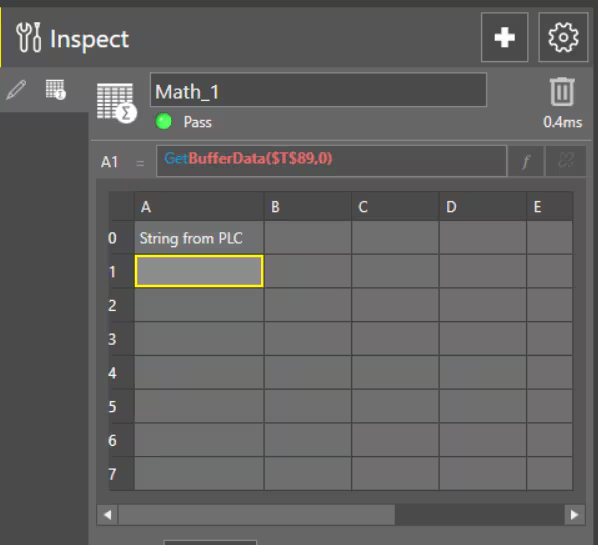
This happen because now the string from PLC will be written into this field.
On PLC side, what is needed is to set the correct string in the UserData section and then set the SetUserData, like in this image.
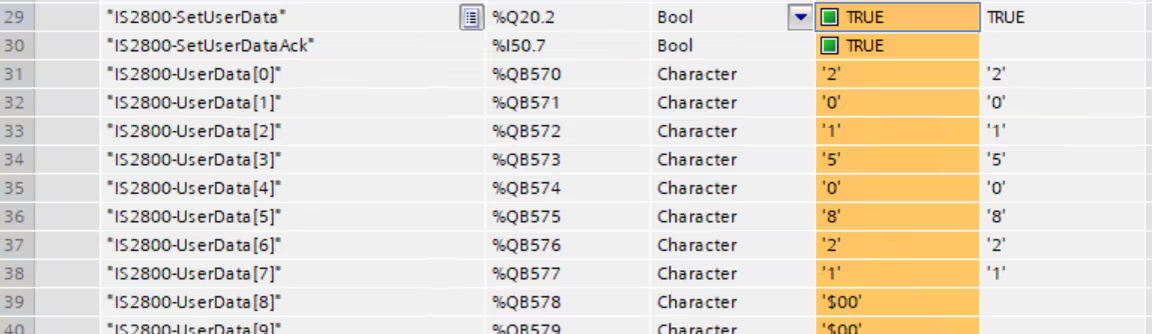
When the camera will answer with the SetUserAck bit, this means that the data is correctly written into the camera.
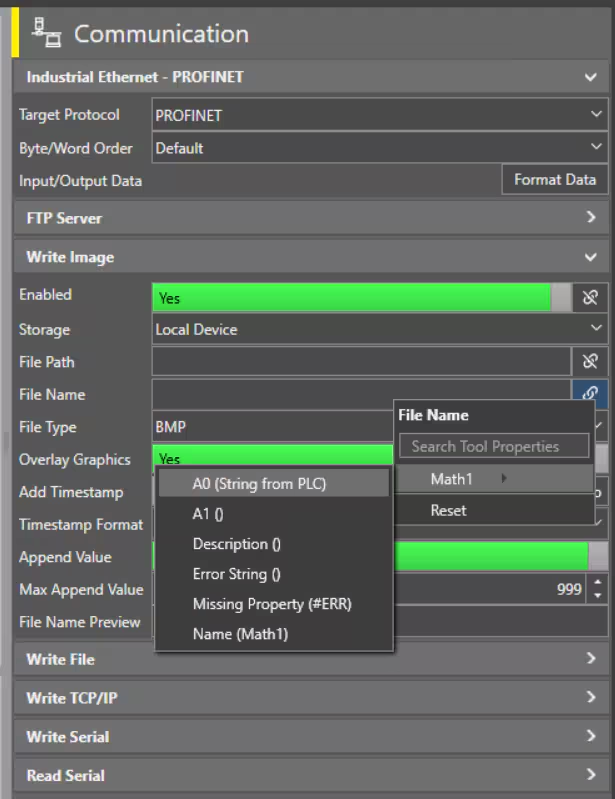
Now, last step, is to go to Communication again, click on the icon near the File Name field and from there select Math1 > A1.
This will set the string received from PLC as the File Name from the next trigger.
ATTENTION: the data will be not visible in the MathTool cell after the PLC send it, but the data is there and will be used from the Math Tool for FTP File Name, it will become visible after the first next trigger.
Question
How to write data from PLC over Profinet to use it as FTP file name in In-Sight Vision Suite EasyBuilder view?
Answer
First of all, camera have to be set to communicate in Profinet, and you can do this from the In-Sight Vision Suite main page, clicking here:
And then select, in the next window, Profinet as the preferred communication method:
As you can see, a Restart is required once this parameter is set, so press Restart.
Once restarted, camera will have Communication set for Profinet
For this example, we will use a Math Tool.
Done? Ok, let’s go.
First you have to insert an EditString into the Math tool, we will use cell A1, like this:
And this is what it will be, with a comment in A0:
Now, let’s move to Communication (1), then Profinet (2), then Format Data (3), this will open a nearside window, then go to + (4) and select Math.A1 (5). This will add the Editstring to the Input Buffer from PLC, starting from UserData0 (we will see this in the next part)
This is how it will appear:
Now, if you go back to the Math tool, you’ll see that the InputString cell has been modified, like this:
This happen because now the string from PLC will be written into this field.
On PLC side, what is needed is to set the correct string in the UserData section and then set the SetUserData, like in this image.
When the camera will answer with the SetUserAck bit, this means that the data is correctly written into the camera.
Now, last step, is to go to Communication again, click on the icon near the File Name field and from there select Math1 > A1.
This will set the string received from PLC as the File Name from the next trigger.
ATTENTION: the data will be not visible in the MathTool cell after the PLC send it, but the data is there and will be used from the Math Tool for FTP File Name, it will become visible after the first next trigger.