Using the Green Classify Tool
When using the Green Classify Tool, follow these steps:
- If a pose from a Blue Locate tool is being used to transform the orientation of the View being used as an input to the Red Analyze tool, process the images (press the Scissors icon) before opening the Red Analyze tool.
-
If necessary, adjust the Region of Interest (ROI). Within the Display Area, right-click and select Edit ROI from the menu.

- After adjusting the ROI, press the Apply button and the adjusted ROI will be applied to all of the images.
- Press the Close button on the toolbar to continue.
- If there is extraneous information in the image, add appropriate masks to exclude those areas of the image. Within the Display Area, right-click and select Edit Mask from the menu.
From the Mask toolbar, select and edit the appropriate masks.

After adding the necessary mask(s), press the Apply button and the mask will be applied to the current image.
If you click Apply All and click Yes button on the ensuing Apply Mask dialog after adding the necessary masks, the same mask will be applied on all the images. If you click No on the dialog, the mask will not be applied and you go back to the Edit Mask window.

- Press the Close button on the toolbar to continue.
-
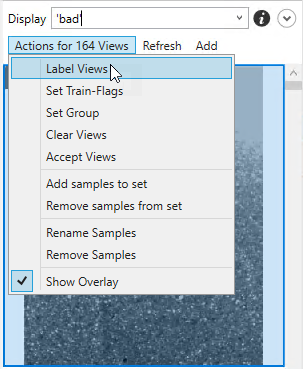
Go through all of the images and label the images with classification tags.
Tip: It is recommended to annotate your image files with descriptive names or numbering schemes to help when labeling the images. -
You can use the Label Views option in the View Browser.
-
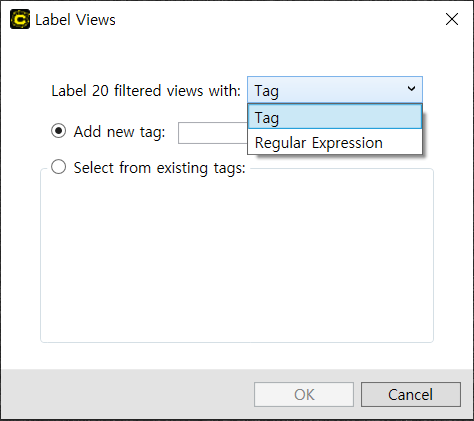
When labeling, you can either apply a tag or use regular expressions to apply the classification tag label.
- Make sure that all of the images have been labeled with a classification tag.
- Train the tool by pressing the Brain
 icon.
icon.- For Green Classify High Detail mode, you can check the training status by monitoring Validation Loss with Loss Inspector.
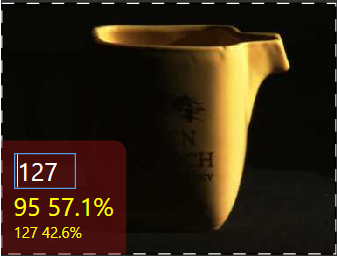
- After training, review the results.
- Go through all of the images and determine whether or not the tool correctly marked the images with the appropriate tag.
- If the tool has correctly marked the images with the appropriate tag, right-click the image and select Accept View.
- If the tool has incorrectly marked the images with incorrect tags:
- Right-click the image again and select Clear Markings and Labels.
Manually tag the image.
- If you encountered the scenario in (a.), you are ready to use the tool. If you encountered the scenario in (b.), you will need to retrain the tool and repeat steps 8 and 9.
- Go through all of the images and determine whether or not the tool correctly marked the images with the appropriate tag.