Select an Image Source and Acquire Your Image
The first step in configuring most Cognex Designer projects is selecting an image source. An image source is either a physical camera or a simulated camera: in the latter case, Cognex Designer is using an image file or a set of image files to simulate camera acquisition. This tutorial describes how to set up acquisition with a simulated camera, using images from a VisionPro database.
Removing the Physical Camera from the Project
If you already have a physical camera configured to your system, a Camera Acquire block representing your physical camera appears in your Cognex Designer Task window when you create a project using Predefined Project Types (such as the Single Camera type selected in the previous step of this tutorial). As this tutorial is using a simulated camera, you need to define a camera block that points to an image database.
If you do not have a physical camera configured to your system, proceed to the Define Your Image Source section. Otherwise, perform the below procedure to continue.
-
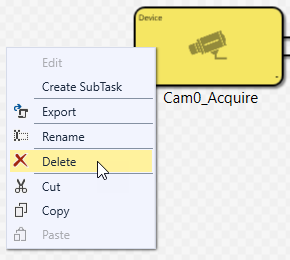
Right-click on the Camera Acquire block that represents your physical camera, and select Delete in the context menu.
 Note:
Note:Do not worry, as you are only deleting the camera block, not the camera itself. You can re-add your physical camera's block to a Task at any time by dragging it from the Cameras section of the Toolbox pane.
-
Create an Image File Device to simulate a camera so you can use the image file database in this tutorial:
-
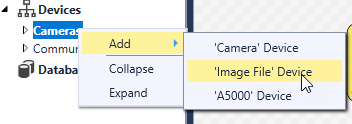
Right-click the Devices > Cameras node in the Explorer pane, and select Add > 'Image File' Device. The Parameter Configuration dialog opens.
- In the Name field, type FileCamera2, then click Accept.
-
- Create a Camera Acquire block to represent the FileCamera2 device in the Task window:
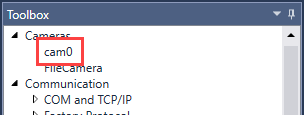
- From the Toolbox pane, select Cameras > FileCamera2.
- Drag FileCamera2 into the left-side of the Task window, replacing the Camera Acquire block you previously deleted. The new Camera Acquire block is labeled FileCamera2_Acquire, by default.
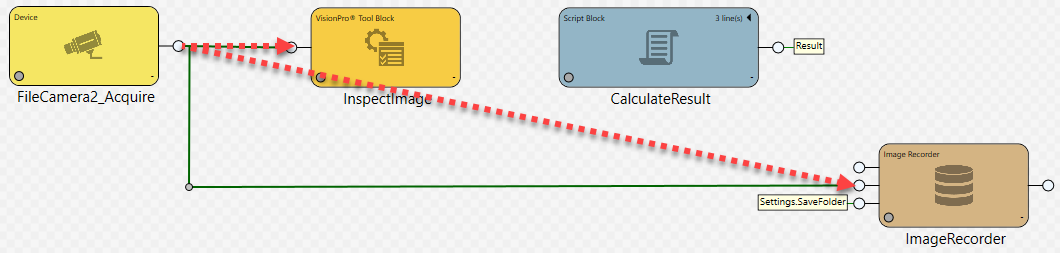
Connect the output pin of the Camera Acquire block to the input pin of the InspectImage block and to the input pin (that is, the middle pin) of the ImageRecorder block. As the on-screen notes of these blocks indicate, this ensures that the image file acquired through the Camera Acquire block will be inspected by VisionPro, and the processed images will also be saved at the same time.
 Tip: After connecting the Camera Acquire block to the ImageRecorder block, you can right-click anywhere on the green connector line to make a Bend Point in the line. Move that bend point then to manipulate connector line direction, and make your task structure easier to comprehend.
- Continue to the next section to define your image database to this simulated camera block.
Define Your Image Source
If you do not have a simulated camera configured in your project (which is a common case when you have a physical camera defined to your system), remove the physical camera from the project as described in the previous section. Once you are ready and you have a simulated camera defined, configure it to use the Jell-O Box Image Database in VisionPro as follows:
- In the Explorer Pane, open the Devices > Cameras node, and look for the FileCamera2 device.
-
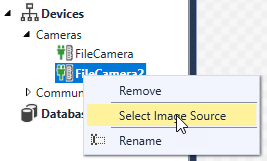
Right-click FileCamera2 and click Select Image Source.
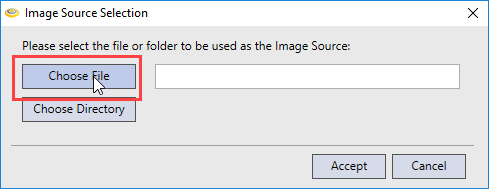
- The VisionPro Jell-O Box Image Database should already be selected, with its path name displayed in the dialog box field. If this is the case, click Cancel to dismiss the dialog box. However, if it is not, then follow these steps:
Click Choose File.
- Navigate to C:\Program Files\Cognex\VisionPro\Images.
- Select JellOBoxes.tif and click Open.
The path of the file must appear in the Image Source Selection dialog. Click Accept to apply the changes.

Acquire Your Image
Before you can process an image, Cognex Designer has to run the task to acquire it. Perform the following steps to do so:
-
In the Task window, click the
 button. Once done so, green dots appear on the bottom left corner of the Acquire, InspectImage, and CalculateResult blocks. This indicates that the instructions defined for these task blocks have run successfully. However, note that the dot of the ImageRecorder task block stays gray, and does not turn green. This is because ImageRecorder, unlike the other blocks, has not yet been configured. You will configure this block later in the tutorial.
-
Click Project > Run, or the
 (Run) button on the top Task toolbar, or press F5 to start your vision application. The application executes in "test" mode, "acquiring" images from the Jell-O Box image database. Because a Web Page has been preconfigured with the Single Camera project type, a Web Browser tab opens, displaying one of the Jell-O box images and associated data. Later in the tutorial, you will customize this Web HMI and host it, running an instance of a Web Server on your computer.
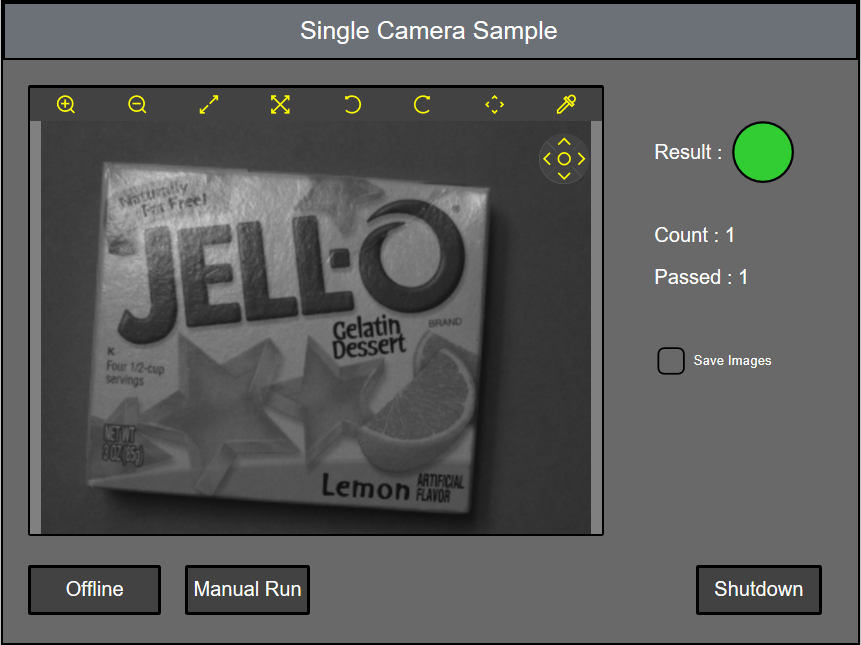
-
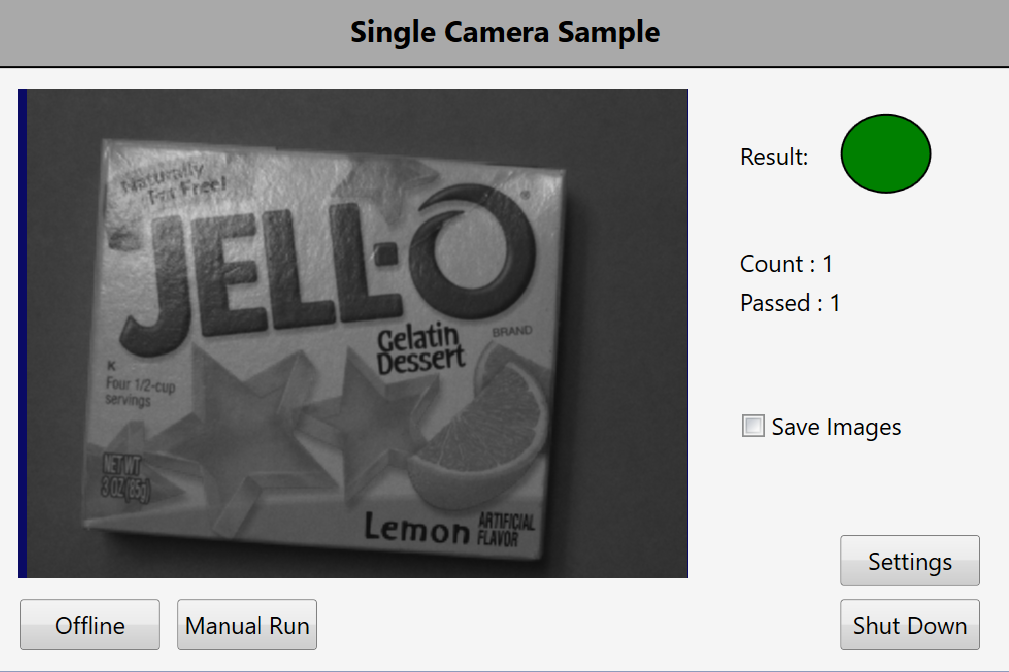
Select the Run Mode tab at the top. This is the preconfigured client HMI. It is similar to the Web HMI, but designed to run as a local session (not on the Web). Note that while the design of the client may be different, the image displayed is the same as in the Web HMI.
- Exit run mode by clicking Project > Stop, or clicking the
 (Stop) button, or pressing F5.
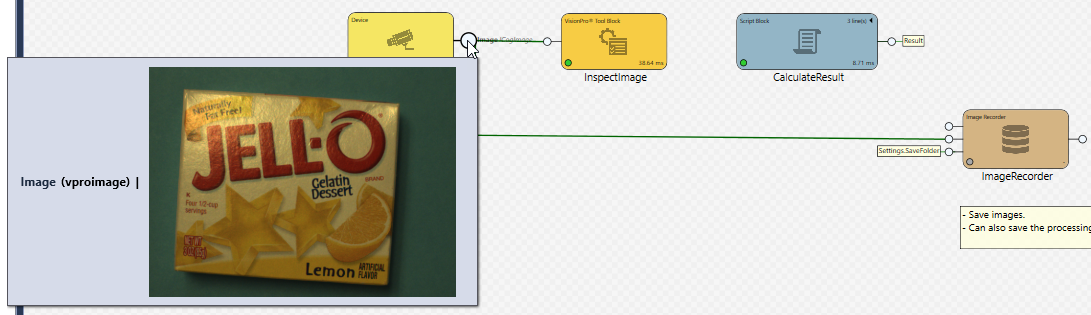
 - Select the Task tab again. Hover your mouse over the pin protruding from the right-side (the output) of the task block Acquire. The same image you saw on the HMIs displays and is labeled Image (vproimage). Cognex Designer passes data between blocks using Tags and links. In this case, the image connector pin passes a VisionPro vproimage object to the InspectImage block using a link.
- Click File > Save All to save your project before continuing.
These details may not mean much now, but they are important concepts that you will revisit as you become proficient with the product. Note that inspecting the output of the camera acquisition block is an accurate way to determine if the Acquire block is doing its "job" and processing your image, as depicted in the graphic below.
You are now ready to add tool blocks to process the simulated image file database that you "acquired" with the simulated FileCamera2 device.