Property Sheet
A Property Sheet is used to configure In-Sight functions whenever a Function Reference returns a Structures Functions or the function has several input parameters.
Every Property Sheet has a table that lists the default parameters, values and expressions of a function. Each row of a Property Sheet consists of a parameter name and value, or a group of expanded / collapsed parameters (indicated by the  /
/ symbols) and values.
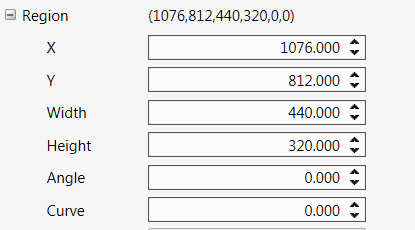
Some property sheet parameters are grouped together for clarity, such as the following Region:
Property Sheet parameters support drag-and-drop placement of their controls into the spreadsheet. By selecting a parameter from a Property Sheet and then dragging that parameter to the spreadsheet, the parameter's label and an edit control will be automatically created and referenced in the spreadsheet.
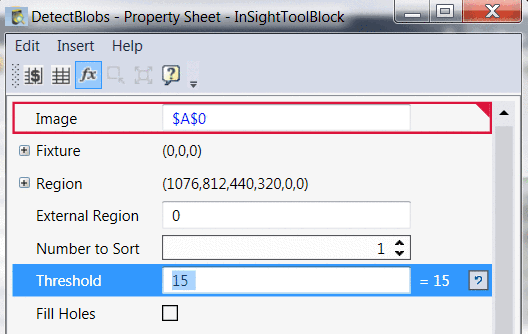
For example, if the Property Sheet of a DetectBlobs function were open, you may drag-and-drop the threshold parameter into the spreadsheet in cell A2, with cell A2 being populated with the text, "Threshold" and A3 being populated with an EditInt function. The Threshold parameter in the DetectBlobs function's Property Sheet will be automatically set as absolute cell reference to cell $A$3.
For the AcquireImage property sheet, when you drag-and-drop a parameter to the spreadsheet, an ApplyAcquisitionSettings function will be added to the spreadsheet. For more information, see ApplyAcquisitionSettings.
Parameter values can be assigned through the following methods:
- Cell References: The value is determined by either Absolute or Relative Cell References or to a cell in the spreadsheet.
- Coordinates: The value is determined by either entering Interactive Graphics Mode or manually entering numeric coordinate values.
- Integer: The value can be increased or decreased by clicking the
 buttons, or by manually entering the desired numeric value.
 - Text: The value is represented by an alphanumeric character string.
- Checkbox: The value is assigned a 0 when unchecked and a 1 when checked.
- Drop-down list: The value is selected from an available choice in the list; the value is set to the index number (zero-based) of the selected item within the list.
To display a Property Sheet
Using the Insert Function Dialog, insert a function into a cell in the spreadsheet. If the function has an associated Property Sheet, it will automatically open.
Each Property Sheet consists of the following:
- The title bar indicating the function name, dialog names
- Menu bar
- Toolbar
- The parameter configuration area
- Context-sensitive help
To edit a cell graphic in a Property Sheet
- Click on the parameter with an associated cell graphic.
-
From the Property Sheet's Edit menu, click on Graphic. Alternately, you can click the Edit Graphic
 button on the Property Sheet's toolbar or double-click
the parameter name with an associated cell graphic. The Property Sheet will disappear and the Interactive Graphics Mode will be displayed on top of the image. Note: The Edit Graphic menu and toolbar button will be grayed out if the selected parameter does not have an associated cell graphic.
button on the Property Sheet's toolbar or double-click
the parameter name with an associated cell graphic. The Property Sheet will disappear and the Interactive Graphics Mode will be displayed on top of the image. Note: The Edit Graphic menu and toolbar button will be grayed out if the selected parameter does not have an associated cell graphic. - To accept the modifications, click the OK button on the toolbar, press ENTER or double-click within the cell graphic. To cancel the modifications, click the Cancel button on the Job Edit toolbar or press ESC.
To maximize a region cell graphic
- Click on the parameter with an associated region cell graphic.
-
From the Property Sheet's Edit menu, click on Maximize Region. Alternately, you can click the Maximize Region
 button on the Property Sheet's toolbar. The region's
cell graphic is resized, equal to the image region in the referenced
button on the Property Sheet's toolbar. The region's
cell graphic is resized, equal to the image region in the referenced  data structure.
Cell A0 is the default image source. Note: The Maximize Region menu and toolbar button will be grayed out if the selected parameter does not have an associated region cell graphic.
data structure.
Cell A0 is the default image source. Note: The Maximize Region menu and toolbar button will be grayed out if the selected parameter does not have an associated region cell graphic. - To accept the modifications, click the OK button. To cancel the modifications, click the Cancel button.
- Insert a Pattern Match function into the spreadsheet. The Property Sheet automatically opens. The Image parameter value is $A$0, referencing the default image source, cell A0.
-
Highlight the FindRegion parameter.
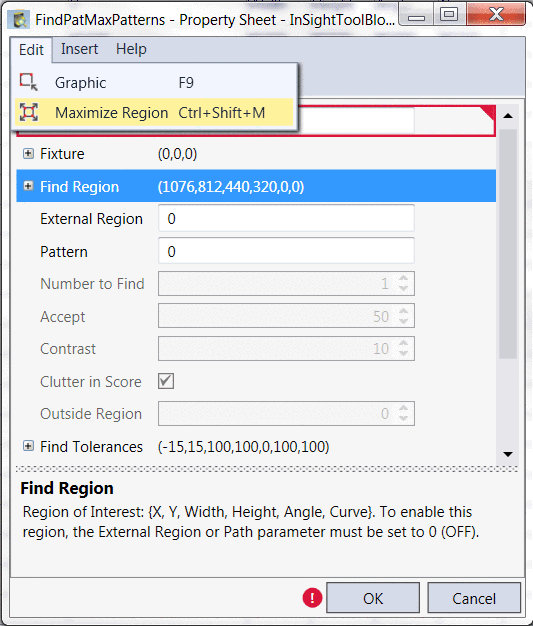
- From the Property Sheet's Edit menu, click on Maximize Region or click on the Maximize Region button in the toolbar. The region's cell graphic is resized, equal to the image region in the referenced data structure (cell $A$0).
To insert a function in a Property Sheet
Inserting a function into a Property Sheet parameter allows you to create a dynamic argument. For example, if you had a DetectBlobs function, and you needed the Threshold parameter to change dynamically with the image acquisition based on a set of fluctuating variances, you could insert a Math into the parameter to compute against those variances. By adding a function within the parameter (instead of creating a separate function within the spreadsheet and building the same formula and then referencing those cells), you can save time and computational space within the spreadsheet.
-
Click on the parameter for which you would like to enter a function.
Note: Functions cannot be placed into a group when collapsed; the group must first be expanded by pressing the plus button. Then select an individual sub-parameter. -
From the Property Sheet's Insert menu, click on Function. Alternately, you can click the Insert Function
 button on the Property Sheet's toolbar.Note: The Insert Function menu and toolbar button will be grayed out if the selected parameter does not support a function.
 -
The parameter's value will switch to an editable expression:
-
Manually type the name of the function, followed by an open parenthesis and the parameter.
Note: When manually typing the name of the function, if any text is highlighted in red, then your formula contains an error which must be corrected before being accepted. -
Once you have created your function, press the TAB key to accept the function and move to the next parameter:

- Pressing the ENTER key will automatically accept the function and exit the Property Sheet. Pressing the ESC key will exit the Property Sheet without accepting the function.
To insert a cell reference from the Property Sheet
- Click on the parameter for which you would like to set a cell reference.
-
From the Property Sheet's right-click menu, click either Insert Absolute Reference or Insert Relative Reference. Alternately, you can click either the
 button or the
  button on the Property Sheet's toolbar. The Property Sheet disappears and you enter Cell Selection Mode.Tip: If applicable, double-clicking on the parameter also takes you to cell selection mode.
 -
Select the cell(s) containing the value(s) for that Property Sheet's parameter(s).
Tip:- Multiple-cell references can be useful when defining parameters that have more than one value, such as fixtures and regions.
- Once a cell reference is set within a parameter, it will be highlighted in the spreadsheet. The cell selection can be moved without closing the Property Sheet.
- If you are manually typing a function into a parameter, if applicable, you can click on a spreadsheet cell using the relative cell reference cursor
 (pressing Shift changes the cursor to an absolute cell reference
  ) to insert a cell reference.
- To accept the cell reference(s), click the Accept Changes button
 on the Toolbars, press ENTER or double-click the cell(s). To cancel the cell reference(s), click the Cancel Changes button
  on the Job Edit toolbar or press ESC.
 - After all the changes have been made to the Property Sheet, click either OK to accept the changes or Cancel to undo all changes and return to the spreadsheet.