Feature Size
All of the ViDi tools analyze images based on the Feature Size that you specify. The feature size, which is based in pixels, functions as a hint to the tool about the expected size of "meaningful" or "distinctive" features in the input images. The best method for selecting a feature size is to examine the input images as if you were a human inspector. Note the features in the image that you would use to characterize the image as good or bad, to identify a defect or problem, or to determine where something was and what it was.
For example, if you were attempting to classify pictures of airplanes based on the number of engines, the feature size would be based on the approximate size of an airplane engine.
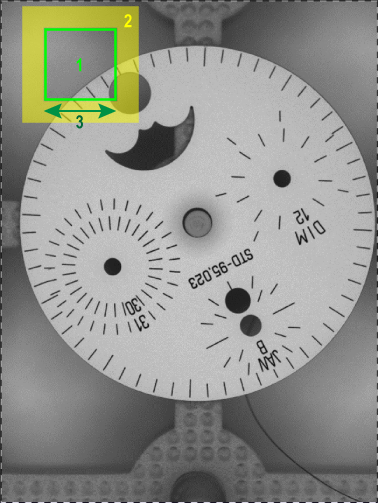
During both training and runtime, the tool will collect samples from the image that correspond to the pixels within a square subregion of the image, as well as contextual information around that region.
|
|
|
|
1 |
Sampling Region |
|
2 |
Context Region |
|
3 |
Feature Size |
Specifying a feature size is a subjective judgment, although there are a few specific guidelines to follow:
-
For the Red Analyze tool (in either Unsupervised Mode or Supervised Mode), the feature size should approximate the size of a typical defect. For elongated defects, such as streaks, smears, scratches and tears, the feature size should approximate the width of the defect.
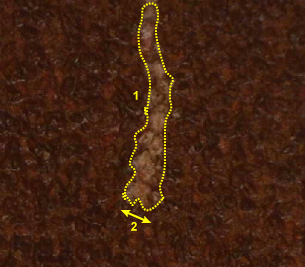
1
Defect
2
Feature Size
- For the Blue Locate tool, the feature size should be about the size of the object that you are identifying. If you are labeling features of different sizes, pick a compromise feature size.
- For the Blue Read tool, the feature size should be approximately the size of the bounding box of a typical "A" or "E" character.
- For the Green Classify tool, the feature size is subjective. The feature size should correspond to the size of the image features that you, a human observer, would use to classify the images.