Sampling Tool Parameters
The Sampling tool parameters control the way that images are sampled during training.
- The Detail, Border Type, Masking Mode and Centered parameters are only available when Expert Mode is enabled.
- The Detail parameter is only available with the Blue Locate Tool.
- The Centered parameter is only available with the Red Analyze Tool.
- Changes to the Sampling parameters after a tool has been trained will invalidate the training, because the underlying image statistics may be fundamentally changed, which will necessitate retraining the tool.
| Parameter | Description | ||||||||||||||||||||||||||||||||||||||||||
|---|---|---|---|---|---|---|---|---|---|---|---|---|---|---|---|---|---|---|---|---|---|---|---|---|---|---|---|---|---|---|---|---|---|---|---|---|---|---|---|---|---|---|---|
|
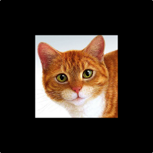
Feature Size |
Specifies the typical feature diameter, in pixels. The Feature Size parameter is graphically displayed in the lower left of the image, and can be graphically resized within the image to set a more accurate size. Feature size strongly influences processing time (n2 ), i.e., a Feature Size of 100 is 100 times faster than a size of 10, while a Feature Size less than 15 usually does not yield good results. When setting the Feature Size, consider the following in regards to Processing time (Ptime):
Note:
|
||||||||||||||||||||||||||||||||||||||||||
|
Detail |
Specifies how much focus the Blue Locate tool should place on the area within the feature graphic, versus the area surrounding the feature label. The available settings are values 1 through 4.
Note: For more information about the way the tool samples images based on feature size, see the Feature Size topic.
|
||||||||||||||||||||||||||||||||||||||||||
|
Color |
Specifies the number of color channels to use when sampling the image. When set to 1, color images will be converted to greyscale.
Note:
|
||||||||||||||||||||||||||||||||||||||||||
|
Border Type* |
Specifies how pixels on the outside of the image are sampled. Tip: Adding an additional mask at the boundaries of the image highly reduces the false detection rate.
|
||||||||||||||||||||||||||||||||||||||||||
|
Masking Mode* |
Specifies how a mask will be applied to the sampled image. A mask is used to limit areas of the image processed by the tool. Masks can be set after training, however, setting them prior to training will help the learning phase.
|
||||||||||||||||||||||||||||||||||||||||||
|
Centered* |
Used with the Red Analyze Tool, this parameter can be used when your inspection contains objects that have a circular symmetry in respect to the center of the view, such that the resulting learned model becomes simpler because the object can be virtually unrolled. |