Create a New Job with the Job Wizard
The Job Wizard allows you to quickly and manually set up a new job. It appears only if you have any custom job templates stored in the <X>:\Users\<username>\Documents\In-Sight Vision Suite\Job Templates folder.
Perform the following steps to create a new job with the Job Wizard:
-
Click File > New to launch the Job Wizard.
Note:When clicking the option, the following dialog may appear, prompting you to save your job before continuing:
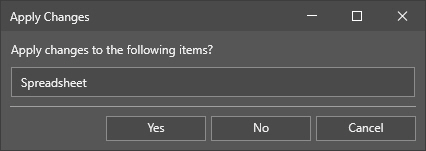
Click Yes if you want to save the currently loaded job and continue with the Wizard, or click No if you want to discard the unsaved changes before continuing. Click Cancel if you want to keep working on the currently open job.
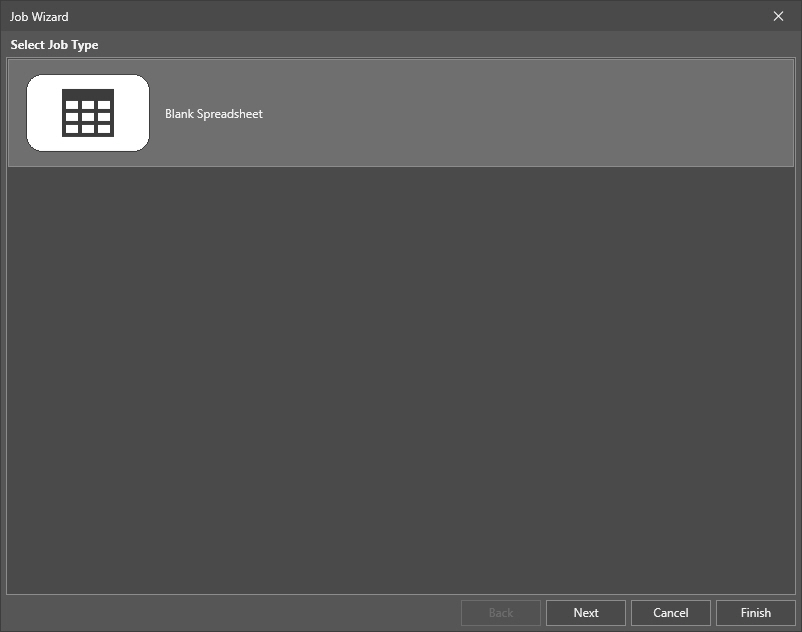
The Job Wizard dialog should open:
-
Select the available job template on the list. By default, the Blank Spreadsheet template should appear. However, in case you have any user-made custom job templates stored in the <X>:\Users\<username>\Documents\In-Sight Vision Suite\Job Templates folder, then these custom templates will also be listed in this step. Select the template, then click
The job is then set up with the parameters provided in the previous steps with the Unsaved Job name. Use the File > Save All or File > Save As options of the Menu Bar to save the job.