Applying Labels
For each of the tools, labeling is a manual operation (see below for the specifics of how labeling is performed for each tool). The most important characteristic of good labeling is that it is consistent, both between images and between observers and people performing the labeling. If you provide an image set to multiple people to label, and their labels do not agree, then the tool will likely not work well.
However, for each tool, there is a slightly different process, but the principle is the same. Once Labeling is completed, you will be ready to train the tool, and examine the Markings that the tool provides.
One way to speed the process of labeling is to do the following:
- Label a few images in your Training Set.
- Train the tool.
- Review the images, and accept the views where the tool's markings are accurate (right-click and select Accept View, or Ctrl + Shift + A). This will change the marking into a label. For the Red Analyze tool in Supervised mode, you may have to edit the defect region.
- For markings that are inaccurate, clear the markings from the image (right-click and select Clear Marking, or Ctrl + C), and then add the correct label.
The specifics for how labeling is performed for each tool is discussed below:
-
The Blue Locate tool locates and identifies features in an image. The Blue Locate tool labeling process involves identifying the locations and names of features in an image. Within the image, you label features by identifying the center of the feature, and placing a feature label graphic over the feature. If orientation and/or scaling is enabled, then you can also specify an orientation or scale. You specify the name of a feature using up to 140 characters.
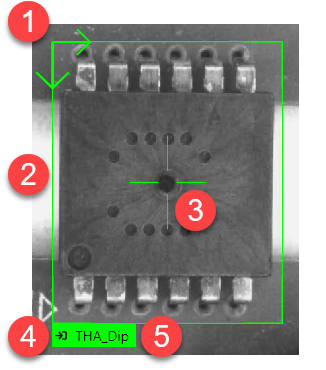 Note: This illustration shows the rectangular feature graphic. You can also use circular feature graphics. This can be changed by selecting the desired feature graphic geometry from the Tool > Display menu. For more information, see the Blue Locate Tool – Feature Label Graphics as Circle or Rectangle topic.
Graphic Description 1
Indicates the orientation of the feature graphic. The Oriented checkbox must be enabled to be able to change the orientation of the feature graphic.
When the display is switched to a circular feature graphic, the orientation is indicated in the middle of the circular graphic.
2
The bounds of the feature.
3
The center of the feature.
4
Along with the color, indicates the state of the feature graphic.
5
The 140 character name of the feature graphic.
Note: For more information, see the Blue Locate Tool – Labels and Marking Legend topic. -
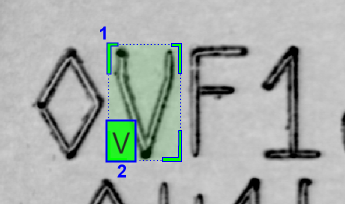
The Blue Read tool is pre-trained to automatically recognize characters and strings, so labeling is not required to use the tool. However, labeling is recommended for application validation and incremental training. Since the Blue Read tool does not return detailed information about character positions, it does not require precise positional labeling. Instead, the labeling is simply the approximate size of the character, and its identity.
1
Feature Size
2
Feature Identity
-
In Red Focused Unsupervised, the only labeling provided to the tool is a defect-free training image.
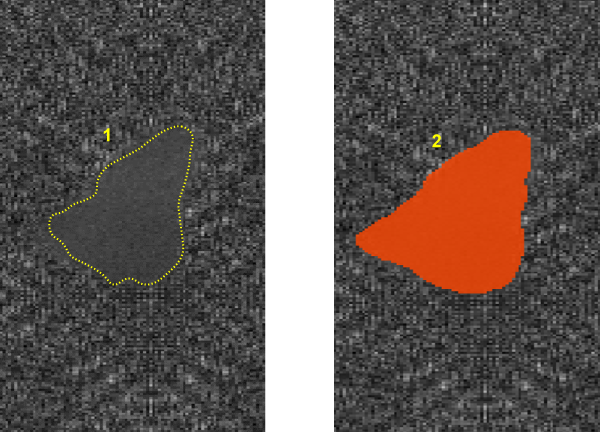
In Red Focused Supervised, Red Analyze High Detail, and Red Analyze High Detail Quick, the labeling process involves first labeling "good" and "bad" images, in other words, images that are defect-free and contain defects. Then for the bad images, you draw regions over the pixels that contain the defects. The accuracy with which your labeled defect masks match the actual defects in the images is a key determinant in the performance of the tool.
1
Defect
2
Labeled defect (region drawn over the defect)
-
The only labeling process entails simply assigning a class to which the image belongs.
Note: The Focused mode also allows you to label training images as belonging to multiple classes, through the use of the Focused Mode Exclusive Mode Parameter.