Adaptation Mode: Adapting to Line Variation
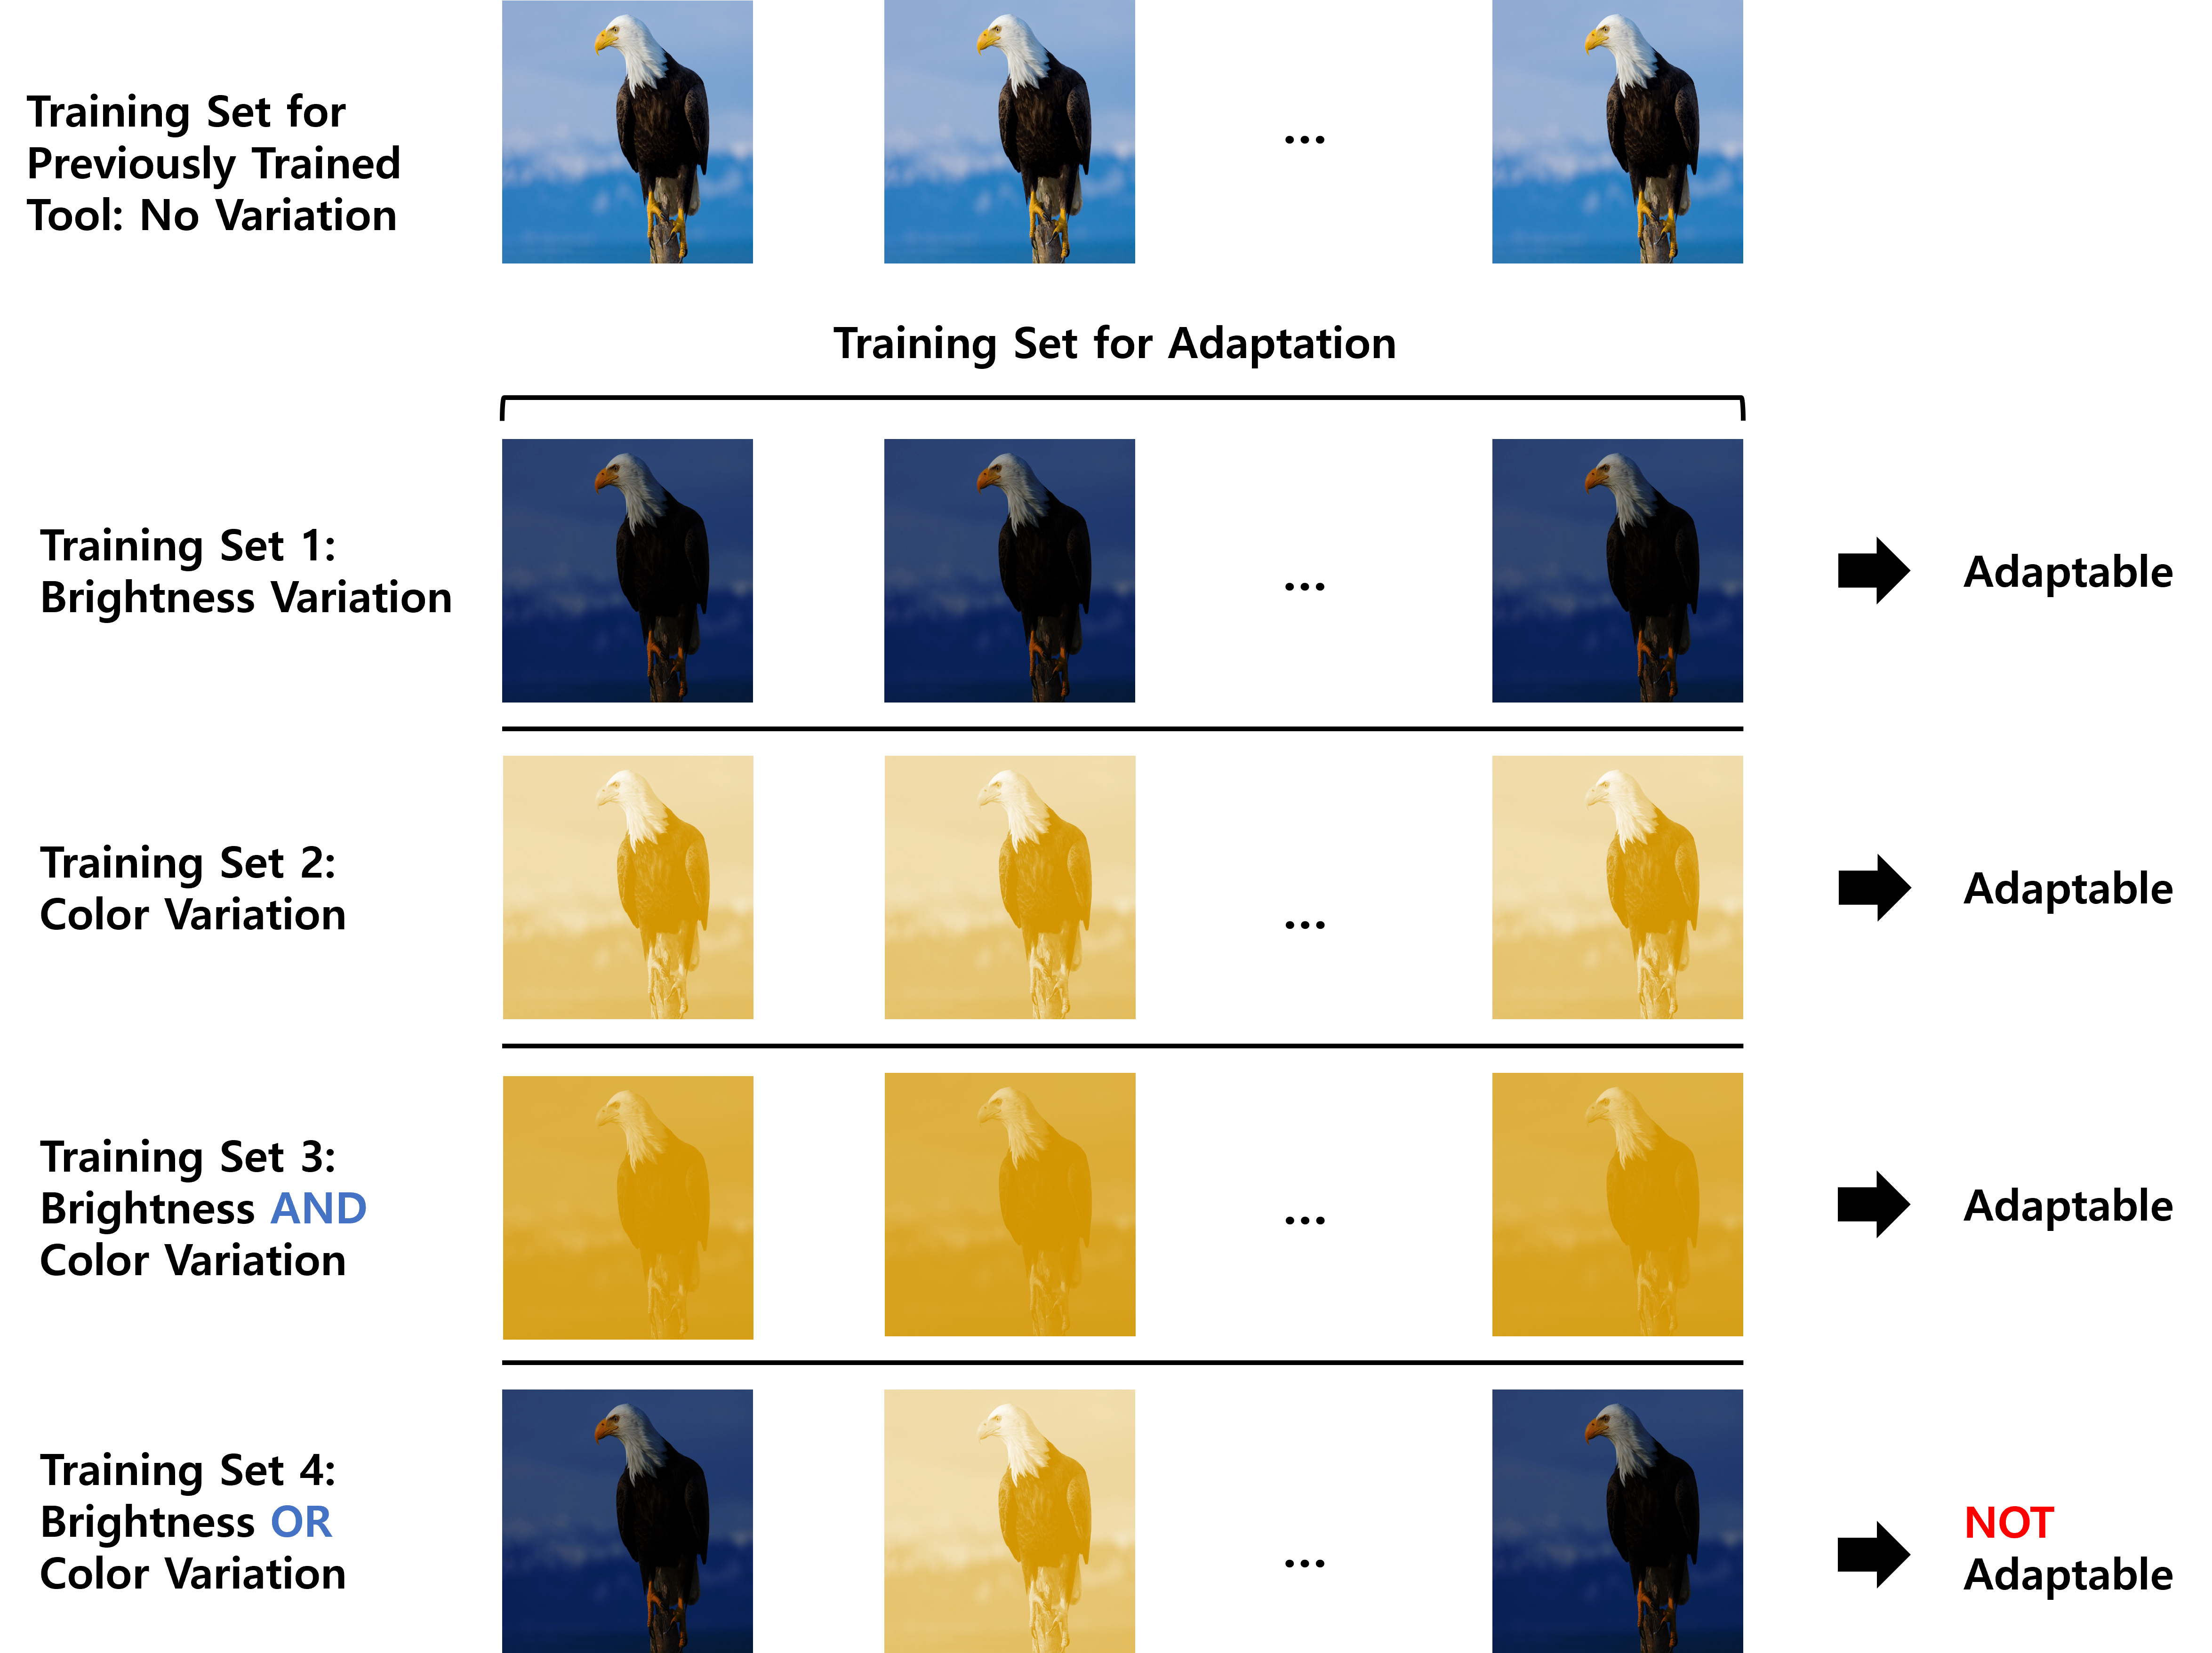
The images newly captured in your production line can have variations in terms of lighting and camera condition from the images that were used to train the existing VisionPro Deep Learning tool (the training images). For example, in one day or other in your production line, the performance of camera could be degraded or the brightness could be changed, and the images captured in the line could deviate from the training images. If this happens, the results of the VisionPro Deep Learning tool for those images become poorer than those from training images. For such case, Cognex provides the statistical result optimization to fill the performance gap between the results coming from training images and new images by adapting a previously trained tool's neural network to a small number of new images that contain variations. When it is the case, the Adaptation could be much faster and more convenient than retraining the tool with the mixture of the newly captured images and the previous training images.
The range of variation
-
The Lighting Condition (lighting angle, brightness, and color)
-
The Camera Condition (height of camera, aging, and distortion)
Image Example Without Variation
Image Example With Variation: Brightness
Image Example With Variation: Camera Angle
Image Example With Variation: Camera Height
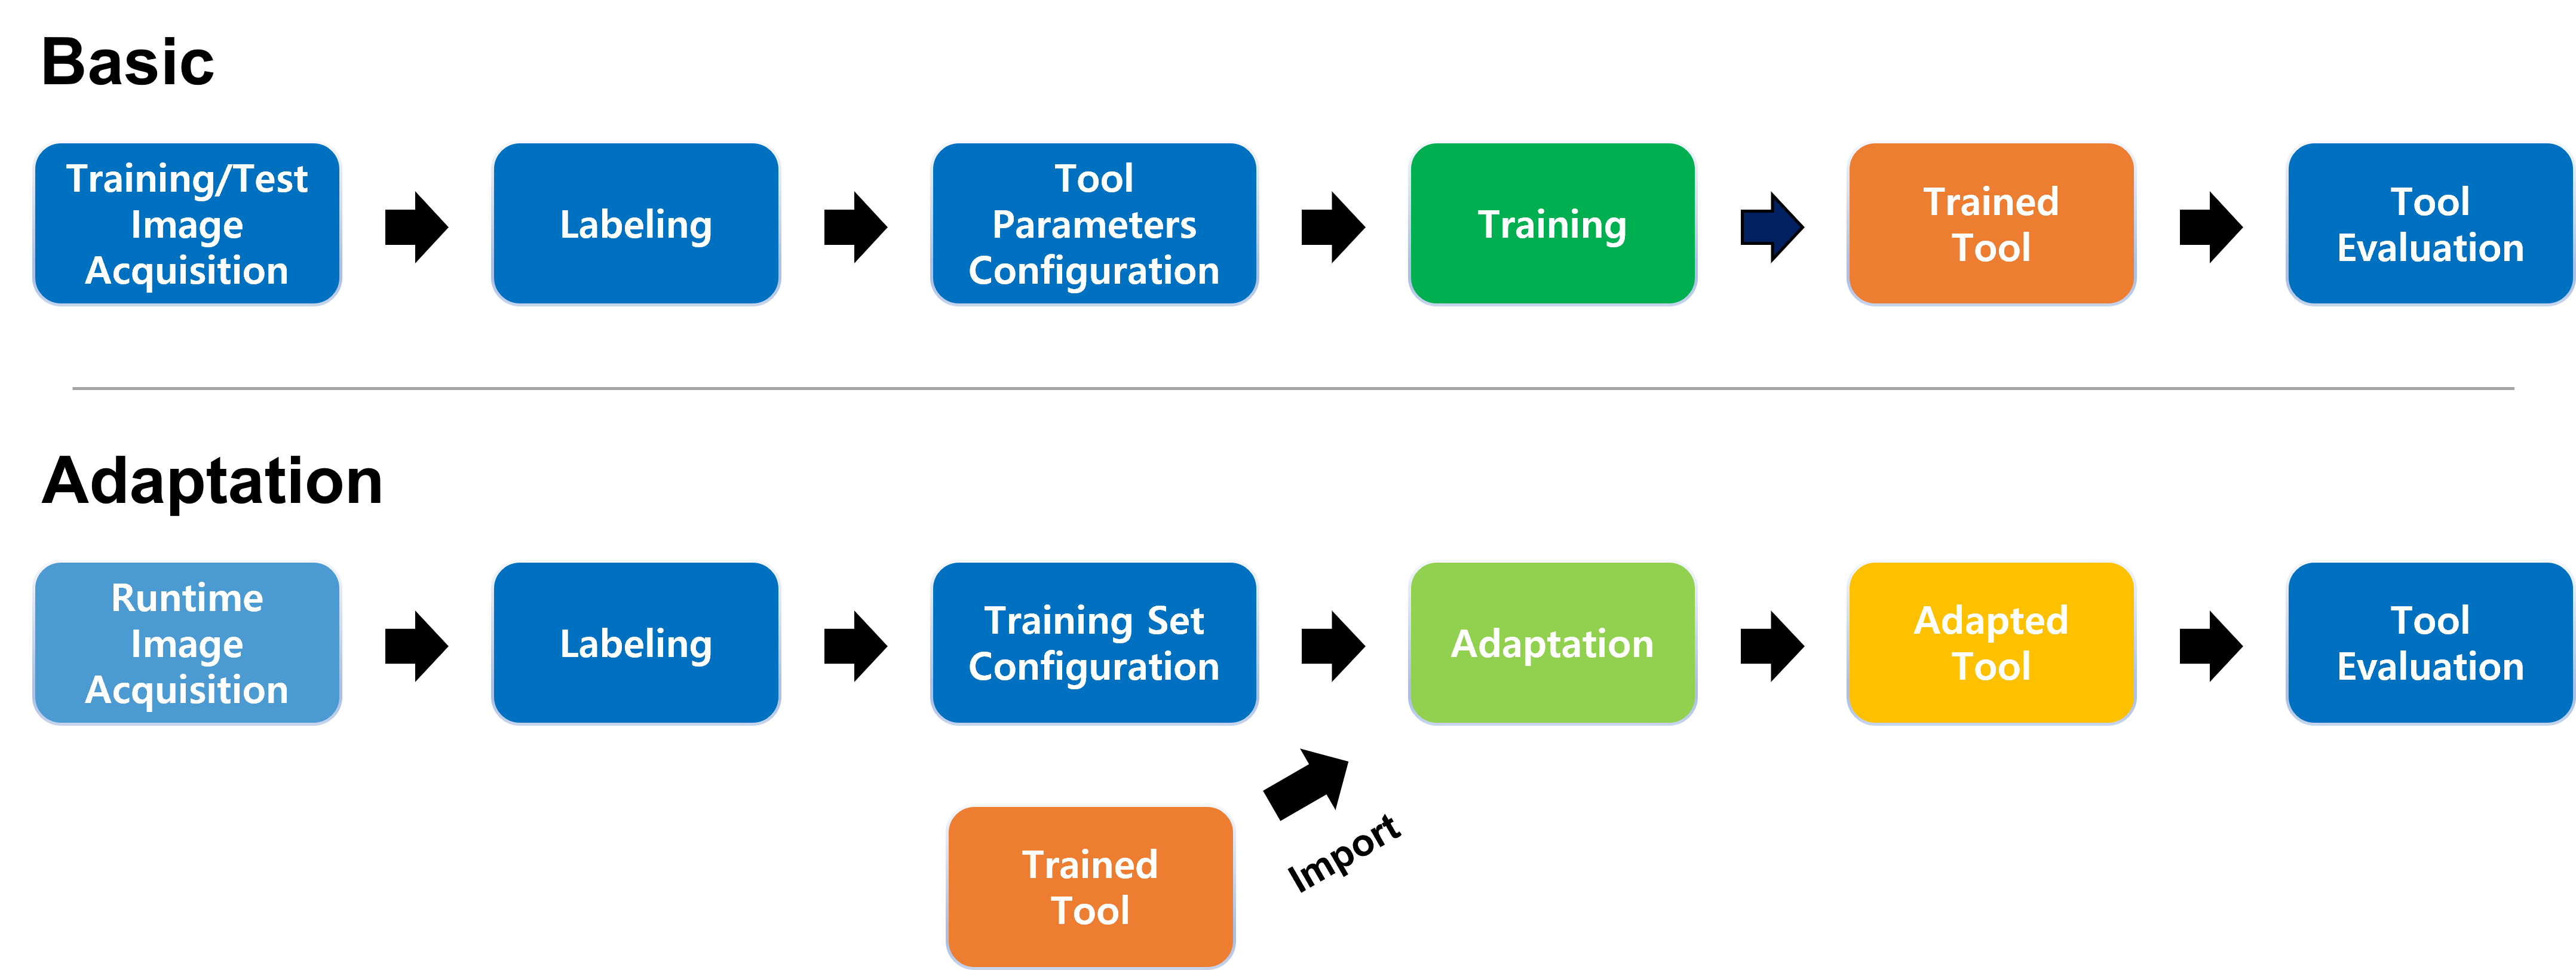
General Workflow
Adaptation is supported for Red Analyze High Detail and Green Classify High Detail. Via Adaptation mode a tool can correctly identify the defects (Red Analyze High Detail) or correctly classify objects (Green Classify High Detail) during the production even if there are slight variations in the newly acquired images.
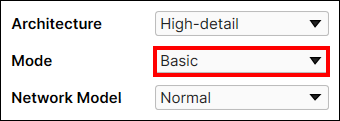
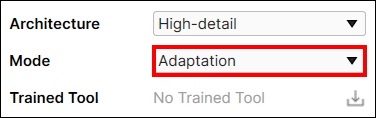
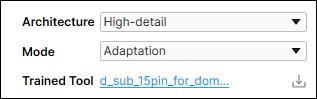
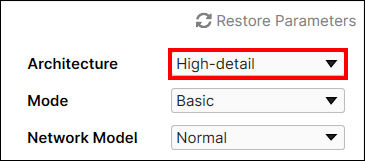
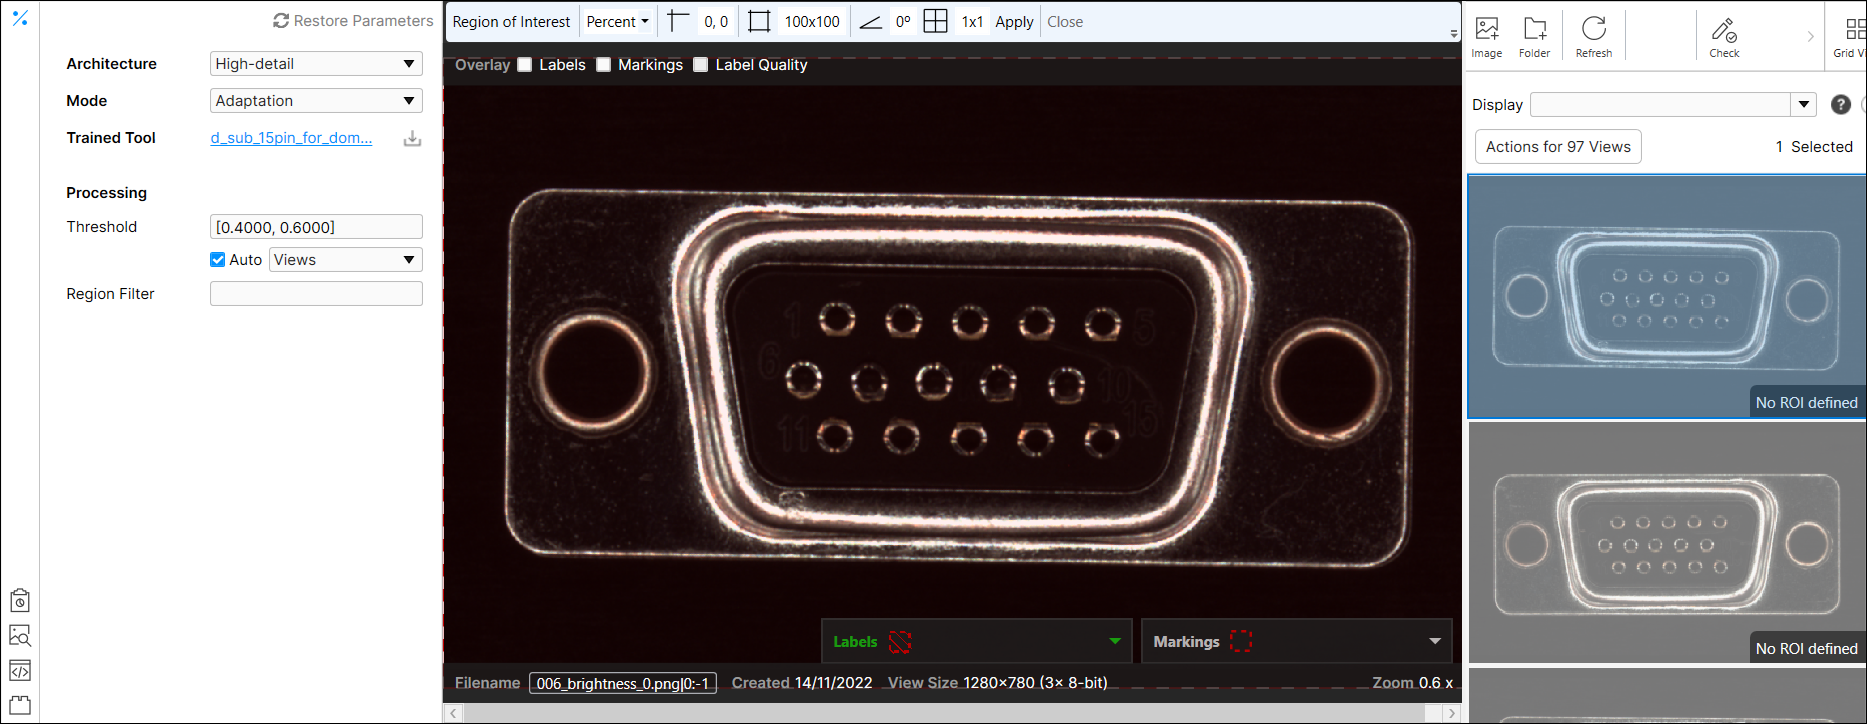
The Mode parameter in the Tool Parameters panel can be either Basic or Adaptation. Basic Mode refers to the default VisionPro Deep Learning training mode in Red Analyze High Detail or Green Classify High Detail. When it is changed to the Adaptation, you can start the process of adapting your previously trained tool to the newly captured images.
Green Classify High Detail Adaptation Workflow
1. Prepare a previously trained Green Classify High Detail tool
Prepare a previously trained Green Classify High Detail tool (.vgta). The trained tool should have been trained in the VisionPro Deep Learning 3.0. The result of Adaptation relies on the result of the previously trained tool trained with no variation. It is recommended to properly train this tool and gain high precision, recall, and F-score in advance.
2. Prepare the samples of the newly captured images that contain variations
Prepare the samples of the newly captured images from your production line that contain variations from the training images. The newly captured images are allowed to have variations in terms of lighting and camera condition from the training images, but all the other properties of images must be identical to those of the training images for the previously trained tool. For the performance of the adaptation, it is recommended to prepare at least 32 sample images in total.
The newly captured images are allowed to have multiple variation types, but the pattern should be consistent over all samples.
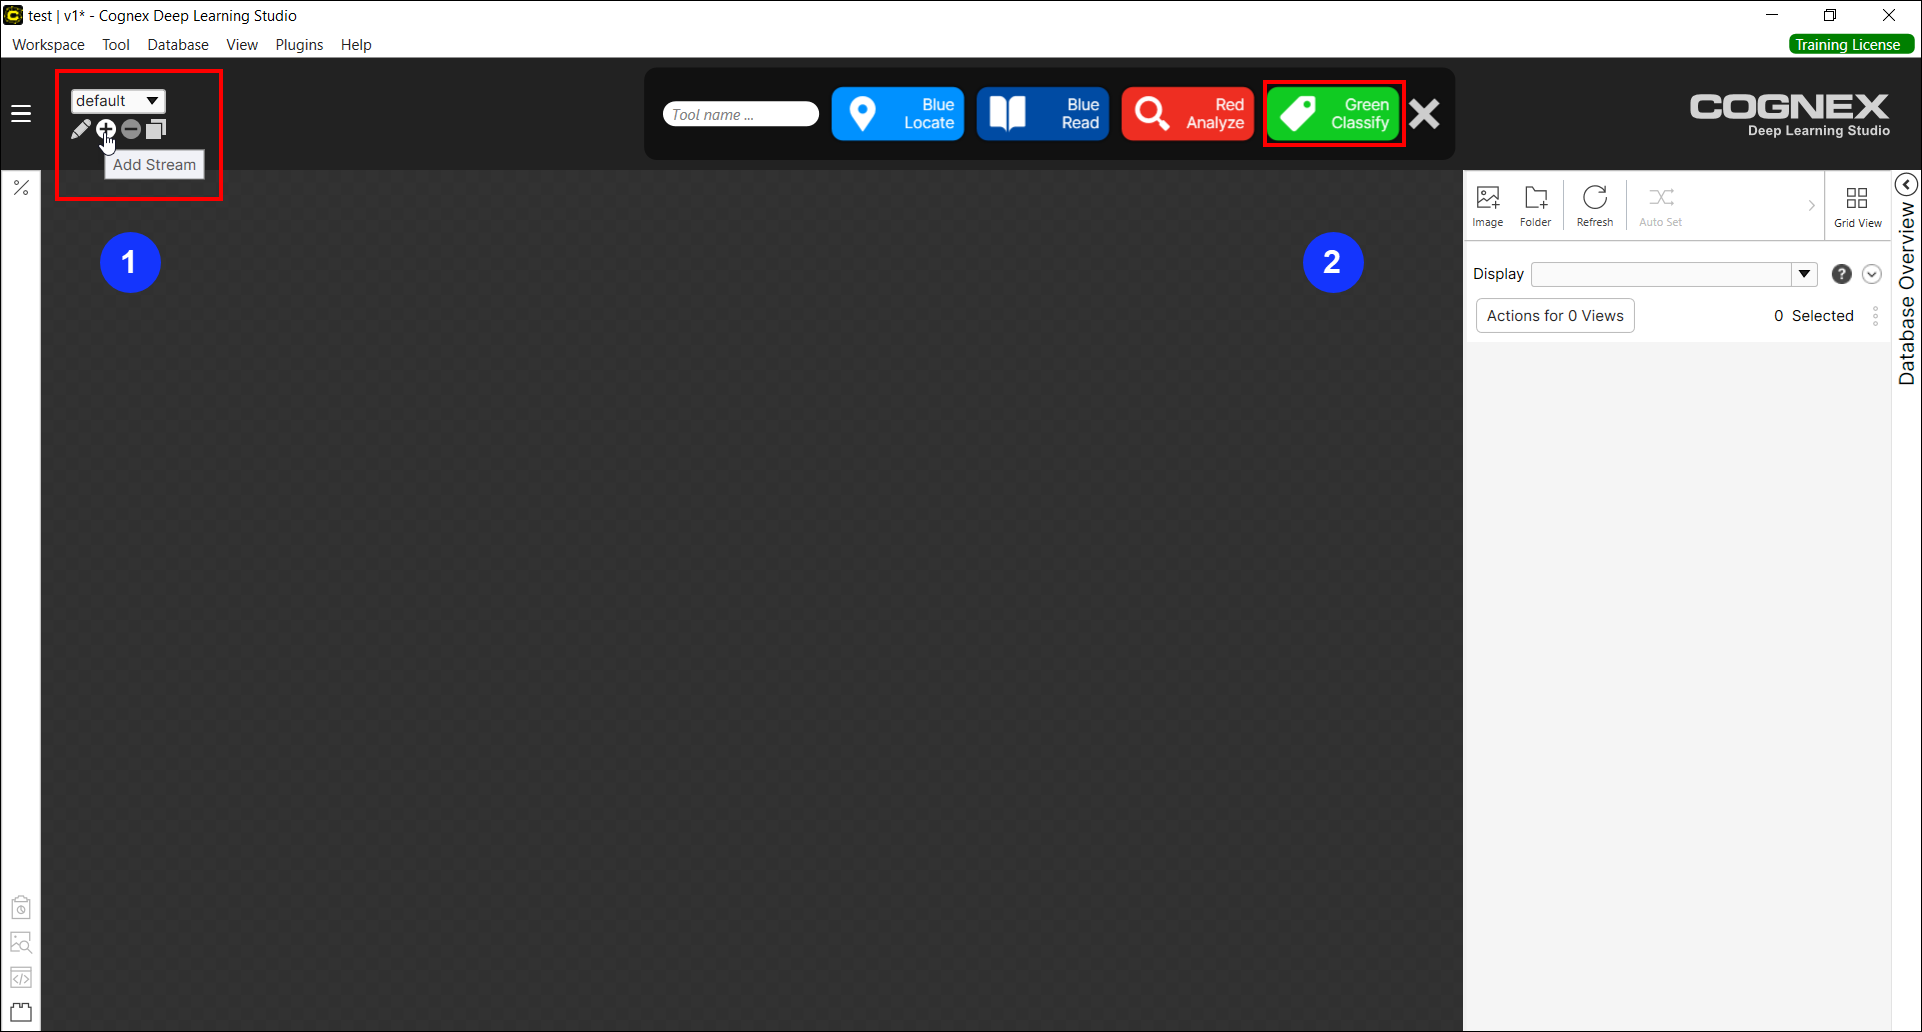
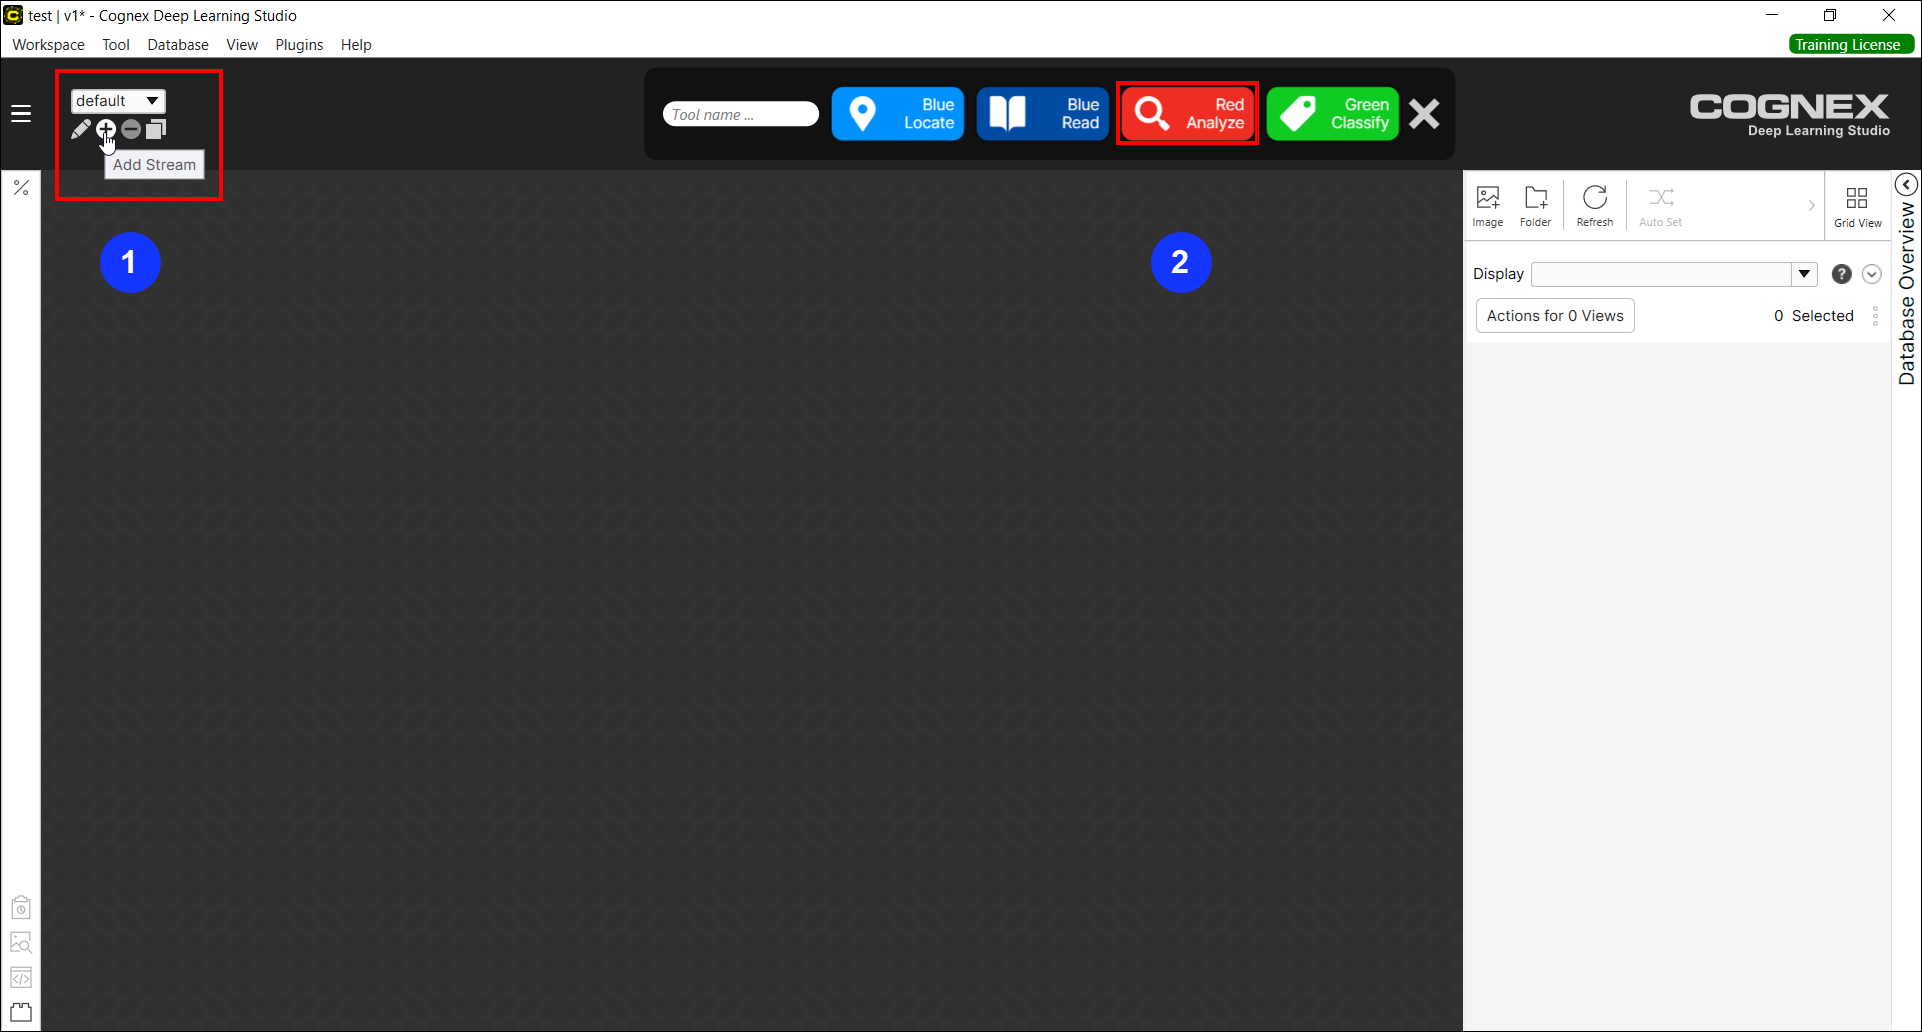
3. Create a new stream and a new tool
Create a new stream and create a new Green Classify High Detail tool in this stream.

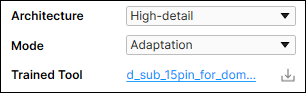
4. Change the Mode parameter from Basic to Adaptation
Change the Mode parameter from Basic to Adaptation for this tool. If the tool created at Step 3 is a trained one, changing the Mode parameter will remove all trained information for this tool.
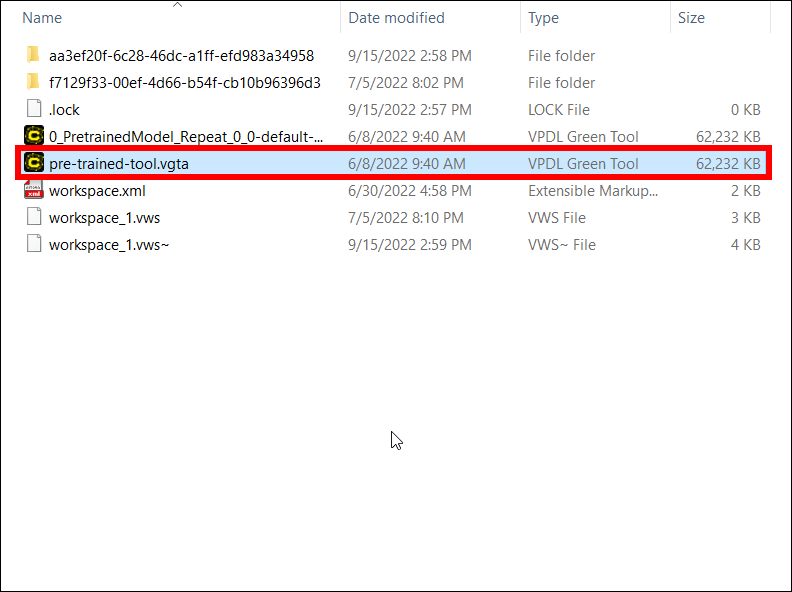
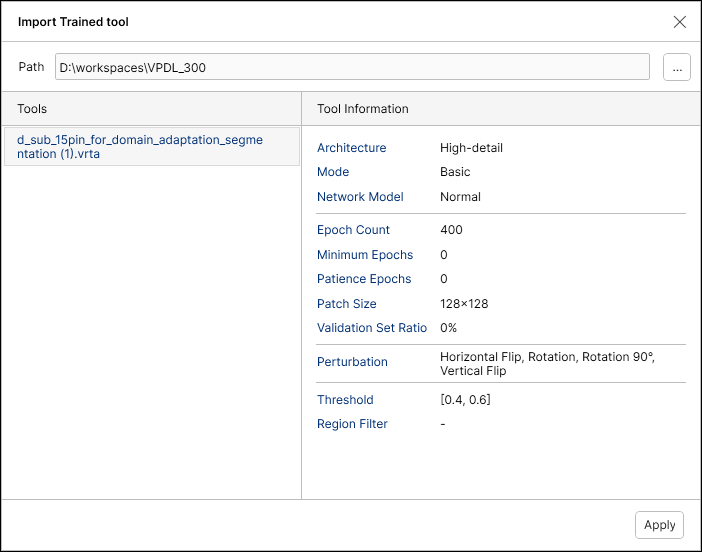
5. Import the previously trained tool
Click Import button to load the previously trained tool.
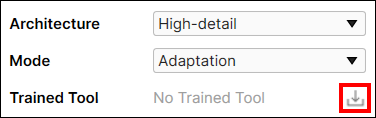
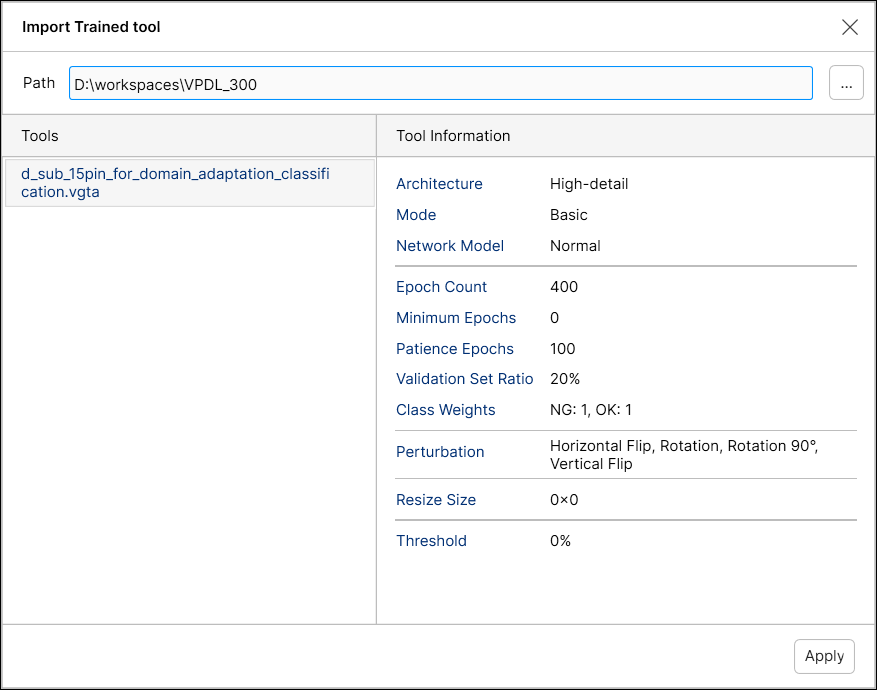
If the previously trained tool is successfully imported, its name will be displayed as Trained Tool.
6. Import the samples of the new images
Import the labeled samples of new images into the current stream, or import the unlabeled samples and label them. The samples of the new images should fully and identically represent the property of the newly captured images. These samples will be used as the target for adaptation. Each class name in the new sample images should exactly match (including capitalization) the name of each class in the images used for building the previously trained tool.
- Export the labels of the new images with variations using the plug-in, in advance.
- Go through from Step 1 to Step 5 above.
- As described in Step 6, import the samples of new images into the current stream.
- Import the labels of the new images with variations using the plug-in.
When you import the samples of new images, the number of views per class should be equal to or greater than 1.
7. Start the adaptation
Click the Adaptation![]() to start the adaptation of the previously trained tool. The tool is automatically processed when the adaptation is completed.
to start the adaptation of the previously trained tool. The tool is automatically processed when the adaptation is completed.
![]()
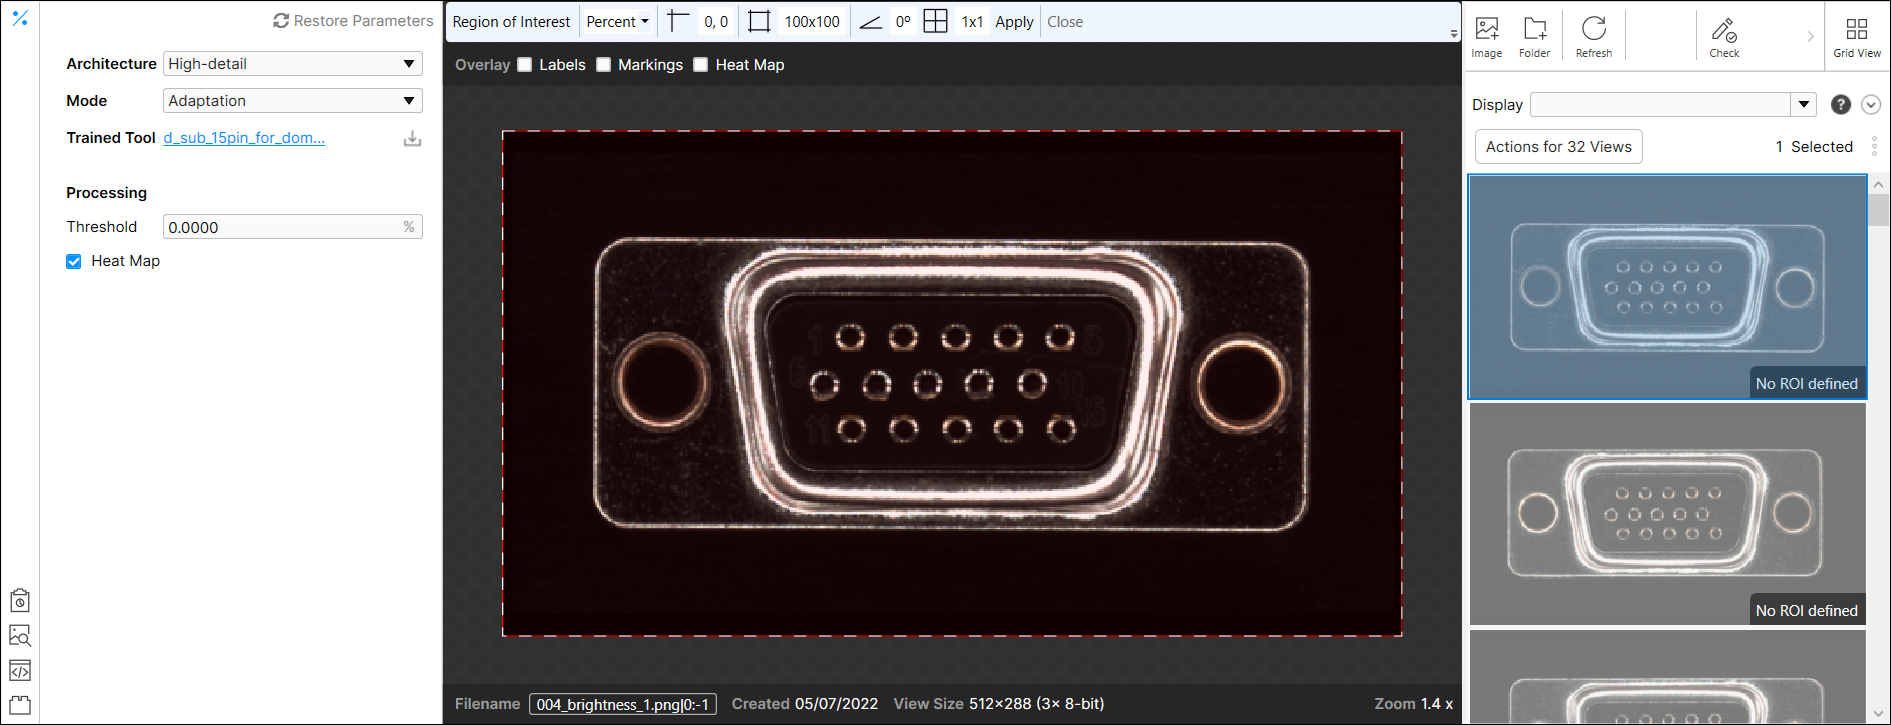
8. Review the adaptation result
You will see the processing results from the adapted tool. If you want to change the results with Processing parameters after the adaptation is completed, configure them and click Processing.
![]()
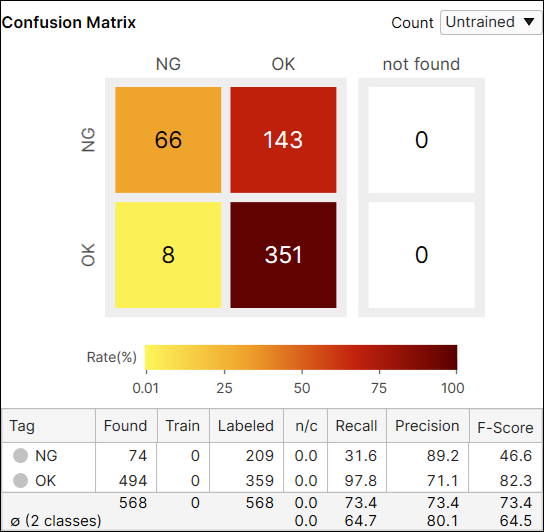
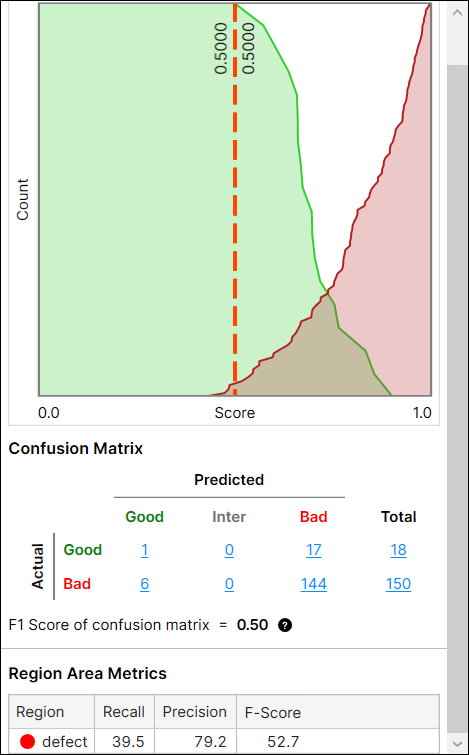
Result Example Before Adapting Previously Trained Tool to New Images with Variations
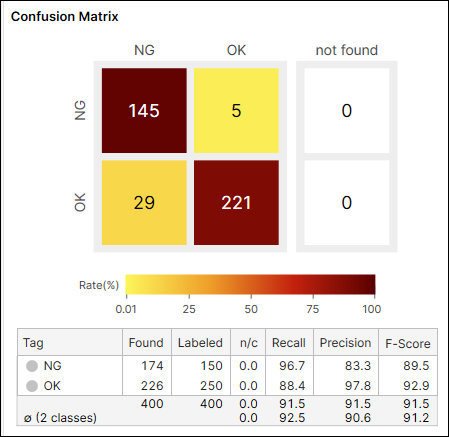
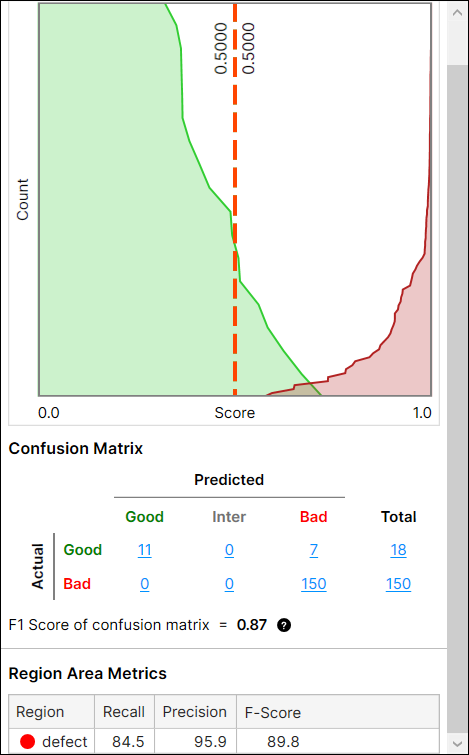
Result Example After Adapting Previously Trained Tool to New Images with Variations
9. Deploy the adapted tool and process the whole new images with it
Deploy the adapted tool in the runtime environment and process the whole set of new images with variation.
Red Analyze High Detail Adaptation Workflow
1. Prepare a previously trained Red Analyze High Detail tool
Prepare a previously trained Red Analyze High Detail tool (.vrta). The trained tool should have been trained in the VisionPro Deep Learning 3.0. The result of Adaptation relies on the result of the previously trained tool trained with no variation. It is recommended to properly train this tool and gain high precision, recall, and F-score in advance.
2. Prepare the samples of the newly captured images that contain variations
Prepare the samples of the newly captured images from your production line that contain variations from the training images. The newly captured images are allowed to have variations in terms of lighting and camera condition from the training images, but all the other properties of images must be identical to those of the training images for the previously trained tool. For the performance of the adaptation, it is recommended to prepare at least 32 sample images in total.
The newly captured images are allowed to have multiple variation types, but the pattern should be consistent over all samples.
3. Create a new stream and a new tool
Create a new stream and create a new Red Analyze High Detail tool in this stream.
4. Change the Mode parameter from Basic to Adaptation
Change the Mode parameter from Basic to Adaptation for this tool. If the tool created at Step 3 is a trained one, changing the Mode parameter will remove all trained information for this tool.
5. Import the previously trained tool
Click Import button to load the previously trained tool.
If the previously trained tool is successfully imported, its name will be displayed as Trained Tool.
6. Import the samples of the new images
Import the labeled samples of new images into the current stream, or import the unlabeled samples and label them. The samples of the new images should fully and identically represent the property of the newly captured images. These samples will be used as the target for adaptation.
- Export the labels of the new images with variations using the plug-in, in advance.
- Go through from Step 1 to Step 5 above.
- As described in Step 6, import the samples of new images into the current stream.
- Import the labels of the new images with variations using the plug-in.
When you import the samples of new images, the number of Good-labeled and Bad-labeled (pixel-wise labeled) views should be equal to or greater than 1 each.
7. Start the adaptation
Click the Adaptation![]() to start the adaptation of the previously trained tool. The tool is automatically processed when the adaptation is completed.
to start the adaptation of the previously trained tool. The tool is automatically processed when the adaptation is completed.
![]()
8. Review the adaptation result
You will see the processing results from the adapted tool. If you want to change the results with Processing parameters after the adaptation is completed, configure them and click Processing.
![]()
Result Example Before Adapting Previously Trained Tool to New Images with Variations
Result Example After Adapting Previously Trained Tool to New Images with Variations
9. Deploy the adapted tool and process the whole new images with it
Deploy the adapted tool in the runtime environment and process the whole set of new images with variation.