Optimize Labeling with Label Check
In the world of deep learning, it is no exaggeration to say that the correct labeling is the most critical factor for the performance of a deep neural network. But, when you use a large amount of image data, it is hard to control all images to be labeled consistently and accurately because, in many cases, labeling is done by human hands. For a Green Classify, a human labeler can mistakenly label a view as class 'Nuts' when its ground truth is 'Beef.' For a Red Analyze, a human labeler can mistakenly draw a defect region on a view without any defect. And more mislabeled images eventually bring worse results for a tool in general. For such cases, Cognex introduces Label Check that displays how good (consistent or accurate) a view's label is for every view. Once you run the label quality check successfully, you can check the label quality level for each view, sort the views by the quality level, and correct noisy or wrong labels.
Label Check is only supported for the following tools.
-
Green Classify Focused
-
Green Classify High Detail
-
Basic Mode
-
Adaptation Mode
-
-
Green Classify High Detail Quick
-
Red Analyze High Detail
-
Basic Mode
-
Adaptation Mode
-
-
Red Analyze Focused Supervised
General Workflow
If you imported images and finished labeling them in VisionPro Deep Learning, you are ready to use Label Check. It is recommended to run the quality check to correct possibly wrong labels before training a tool to get better results. The followings summarize how to utilize Label Check.
-
Prepare labeled views in VisionPro Deep Learning.
-
Run Label Check to get the label quality value for each view in the current workspace.
-
Sort the views by the label quality value (ascending order).
-
Review the views with low label quality values and modify their labels if necessary.
-
Train or process the current tool and review the results.
Green Classify Workflow
-
Import images into a VisionPro Deep Learning workspace, create a Green Classify, define ROI of them, and label them. To start the label quality check of the views for Green Classify, you need 2 or more classes (tags) and 5 or more labeled views for each class.
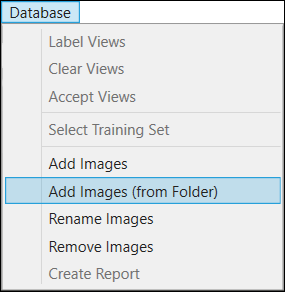
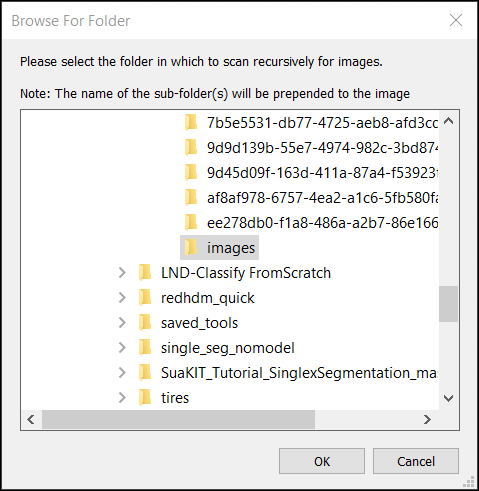
Note: For the details of importing, defining ROI, and labeling images for Green Classify, see Collect Images, Define Region of Interest (ROI) and Mask to Construct View, and Create Label (Labeling)Note: To import labels as image files, JSON files, or files in VisionPro Deep Learning internal label formats, see Cognex Label Import/Export Plug-in.Import Images
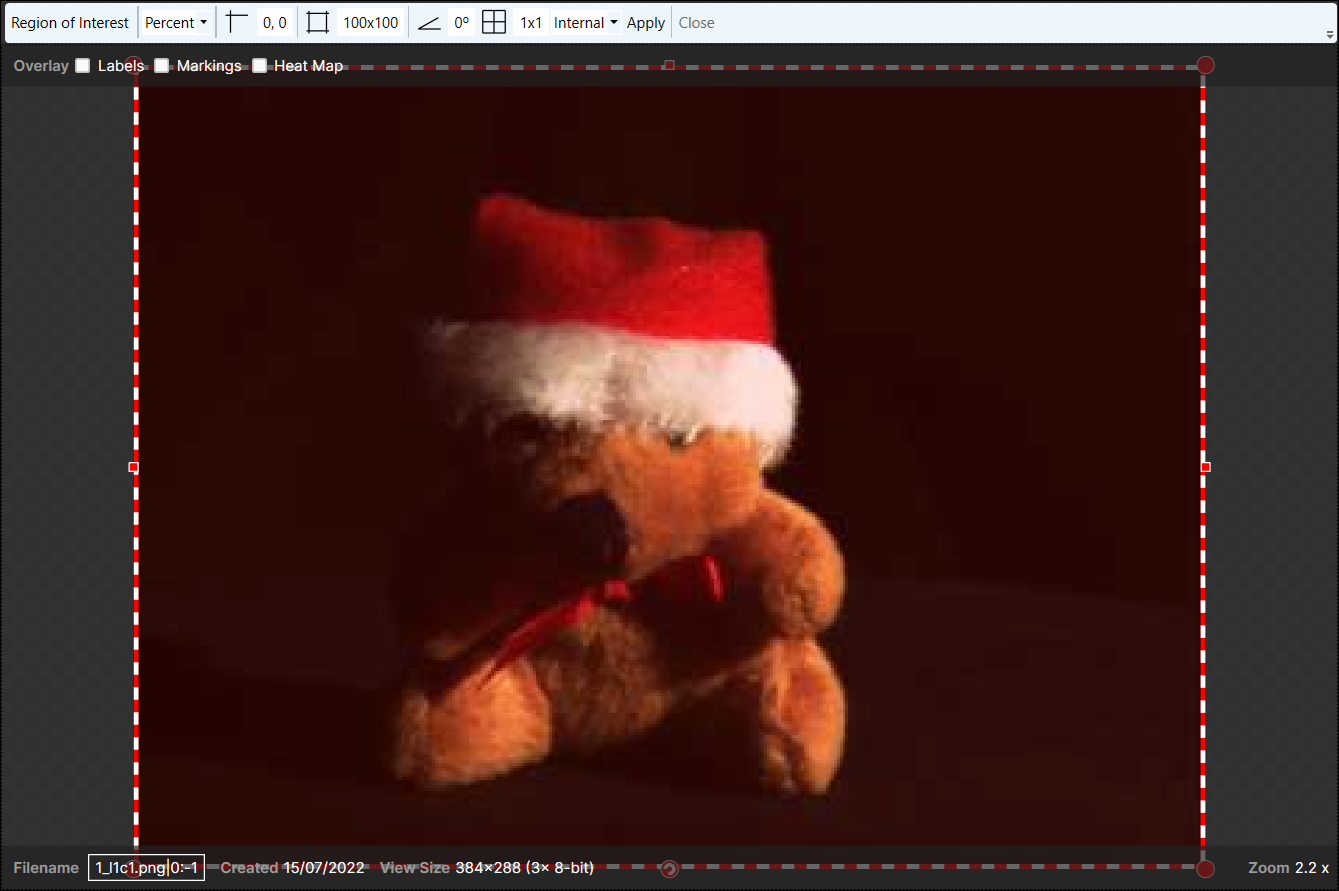
Define ROI
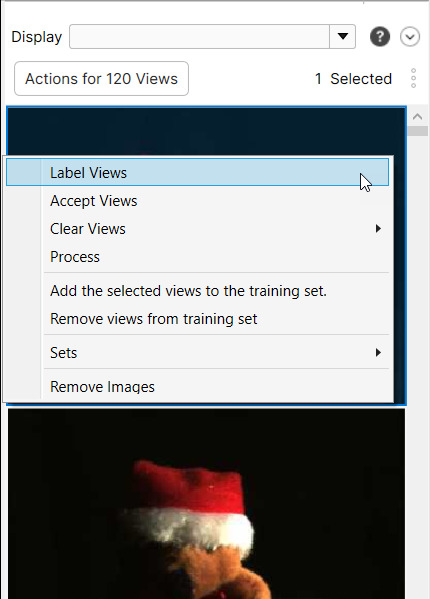
Label Views

-
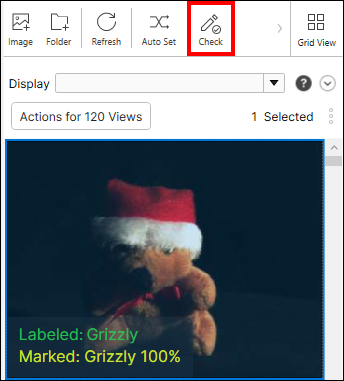
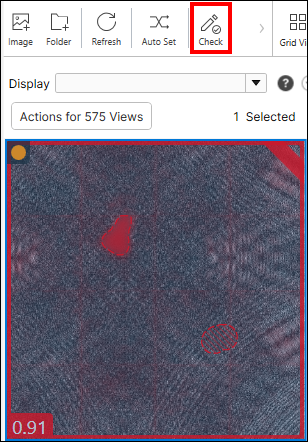
On the View Browser, click Check to start the label quality check.
-
Click Start to begin the label quality check. The quality check will run on all labeled views, not on the unlabeled views in the current workspace.
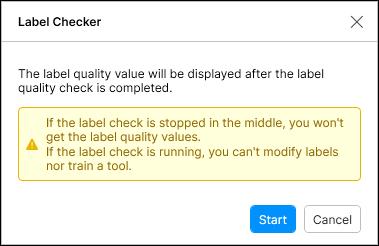
As the label quality check is run only on the labeled views, you can't remove, rename, clear, or accept labeled views. Also, you can't train a tool when the label check is running. To get the label quality for each view, the label check task should not be paused or interrupted.
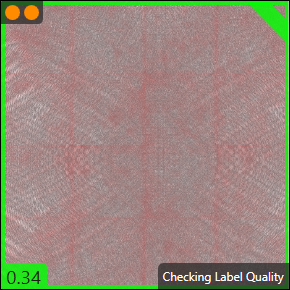
Note: You can still label, remove, rename, clear, or accept views that were not labeled when the label check is running.Views Running Label Check (View Browser Grid Mode)
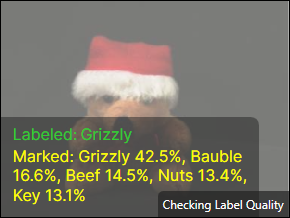
Views Running Label Check (View Browser List Mode)
 Note: Select List View or Grid View to swap back and forth between the 2 modes of View Browser.
 -
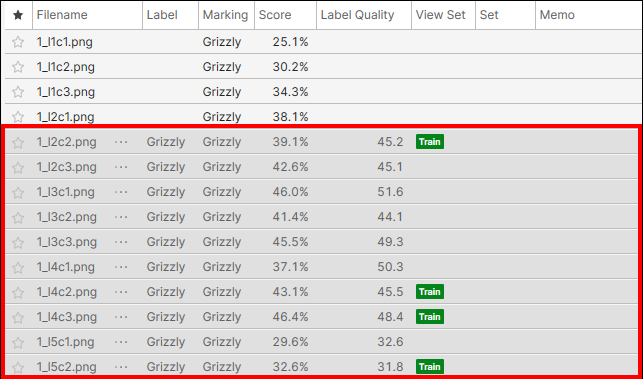
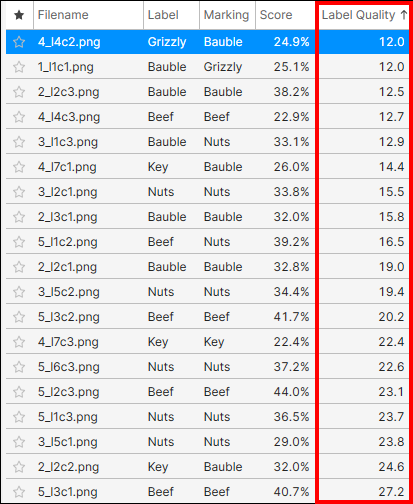
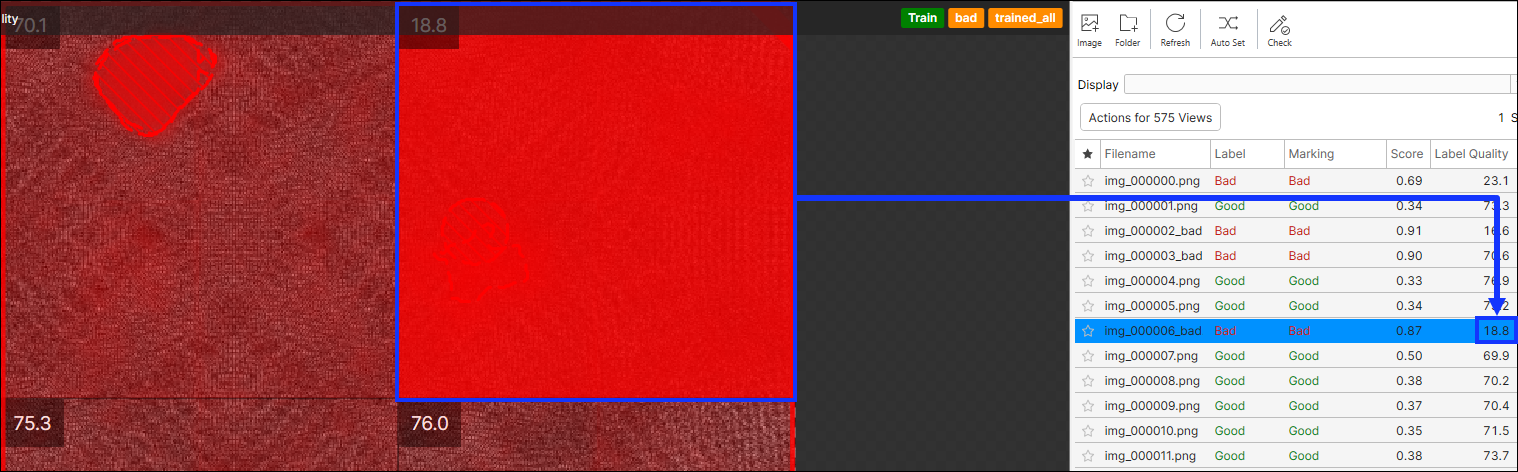
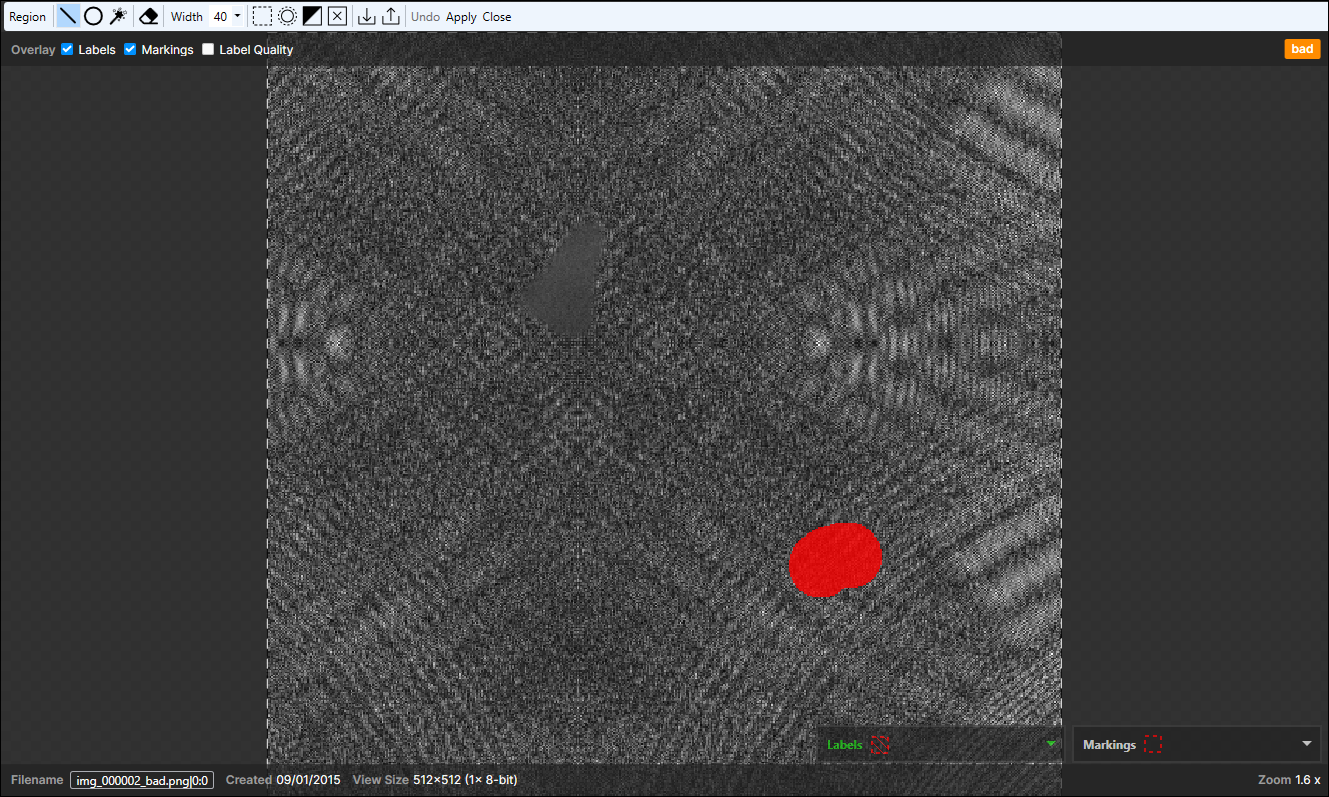
Once the label quality check is successfully completed, the label quality value (0~100) is displayed in the Label Quality column of the View Browser's list mode. The higher the label quality value, the better (more consistent or more accurate) a view's label is.
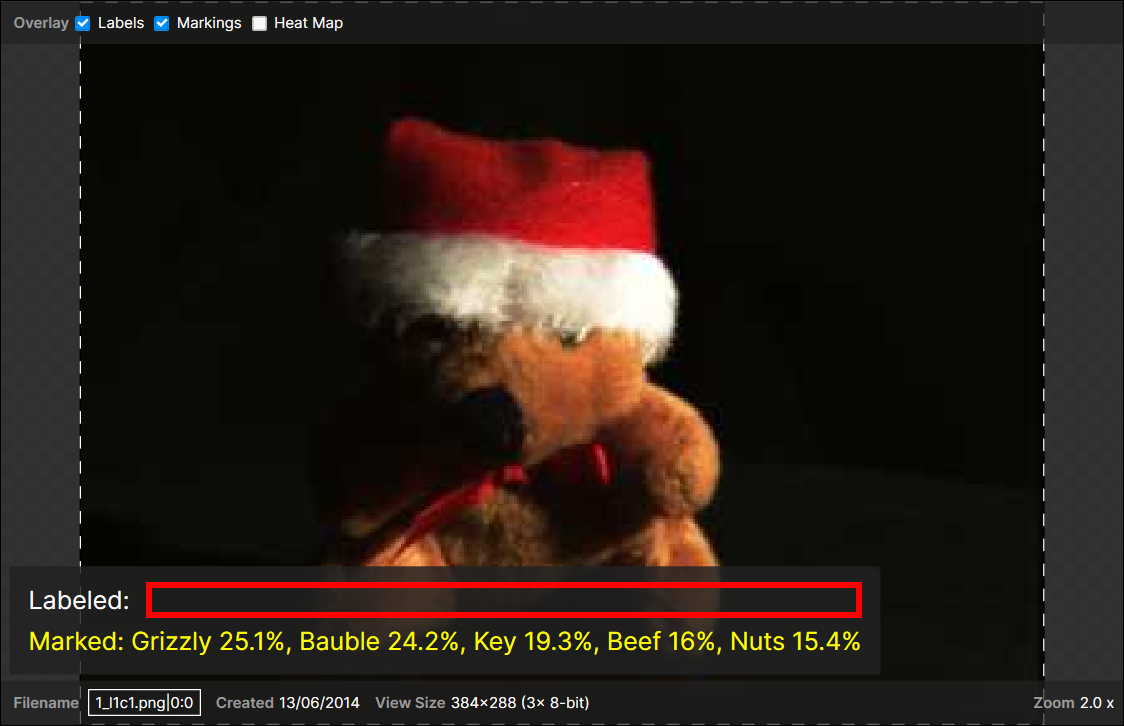
Note: The label quality values of some views with correct labels can be comparatively lower than those of the views with incorrect labels, but overall you can find incorrect labels much more frequently on the views with lower quality values.Note: The range of absolute quality values differs by the image data you use as the quality value distribution over all views differs by image.A Mis-labeled View with A Low Label Quality Value
-
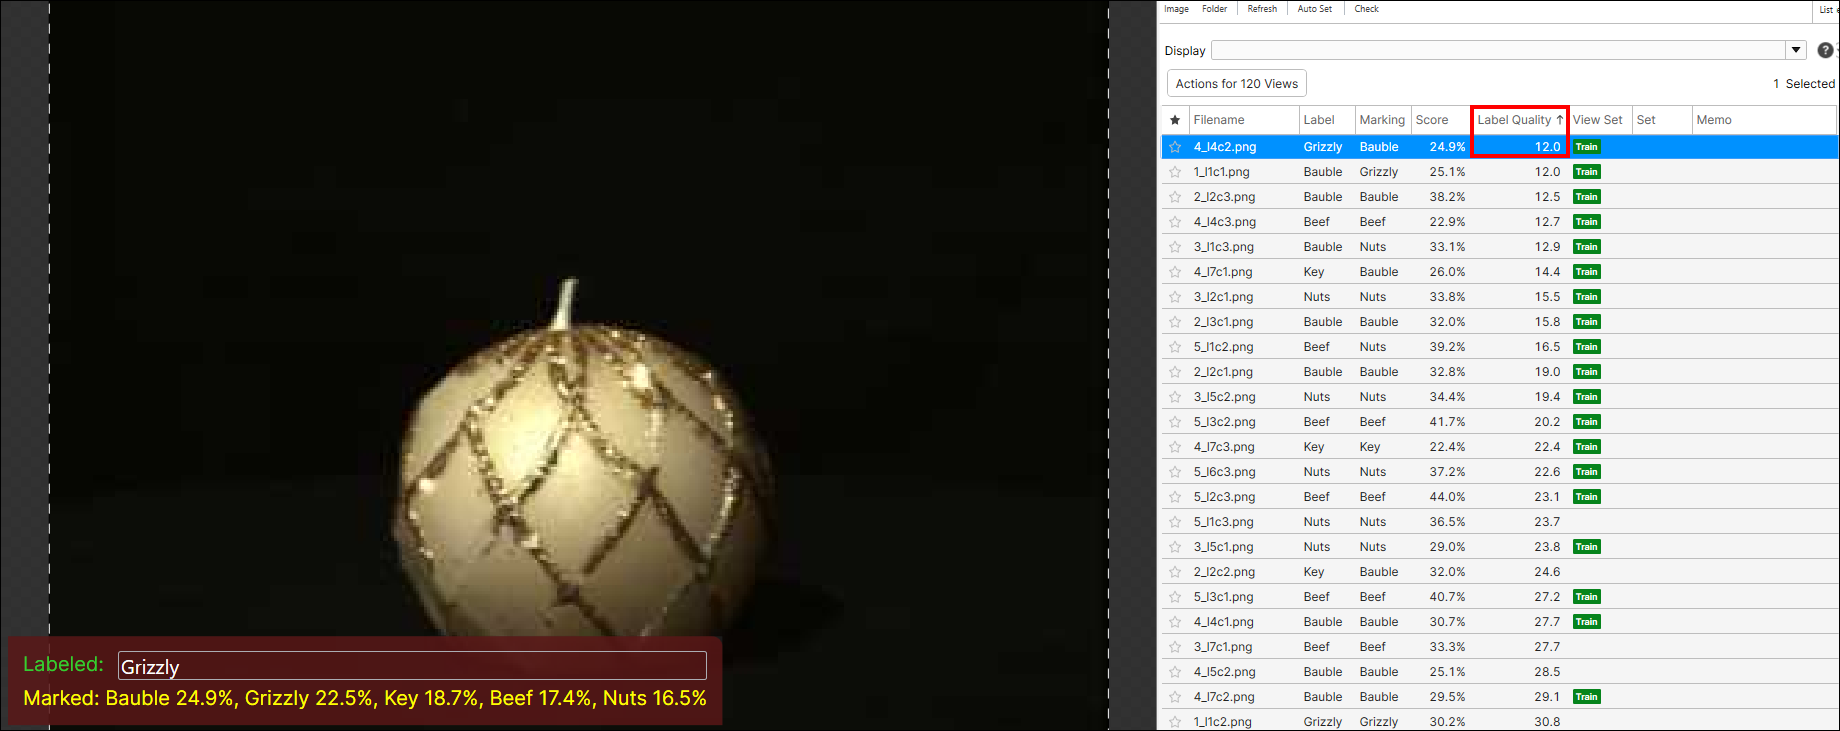
Click the Label Quality column header to sort the views by the label quality value in ascending order, and check the views with low quality values.
-
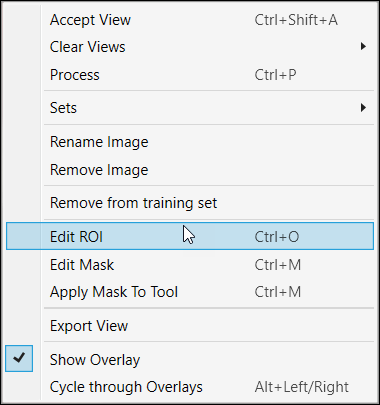
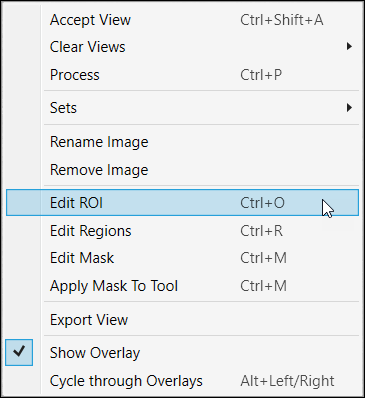
Modify their labels if required. You can directly change a view's label on Image Display Area or with the right-click menu on View Browser (Clear Views > Labels to clear the existing label, Label Views to put a new tag).
Note: For the more details of labeling, see Create Label (Labeling) for each tool type.Directly Change A View's Label (Class) on Image Display Area
If a view's label is modified or deleted after the successful completion of the quality check, the value in the Label Quality column for this view is removed and displayed on the Memo column instead, following the ‘Label Quality QUALITY_VALUE with Tag TAG_NAME’ format.
Note: Double-click a memo cell to edit or remove a memo.Quality Value Deleted and Moved to Memo with Old Label Information

-
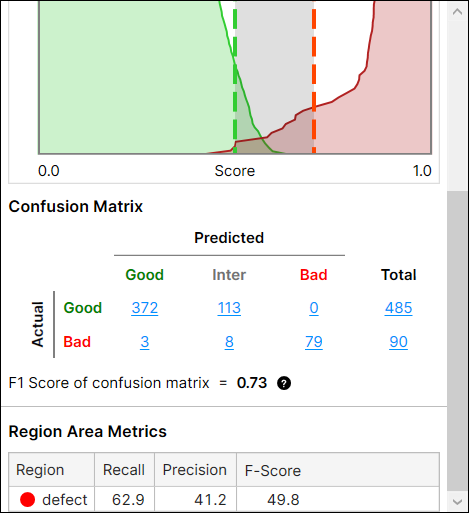
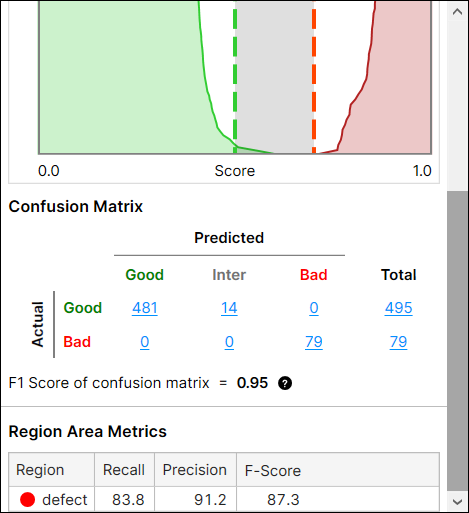
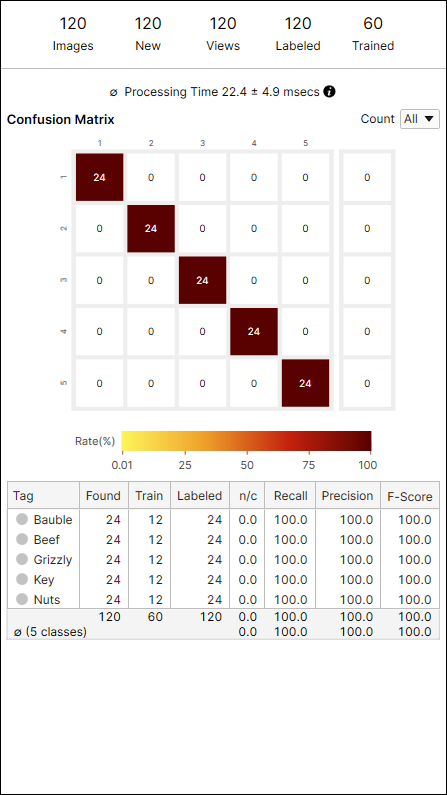
Train and process the current Green Classify tool and check the improvement of the results.
Before Correcting Labels After Correcting Labels via Label Check 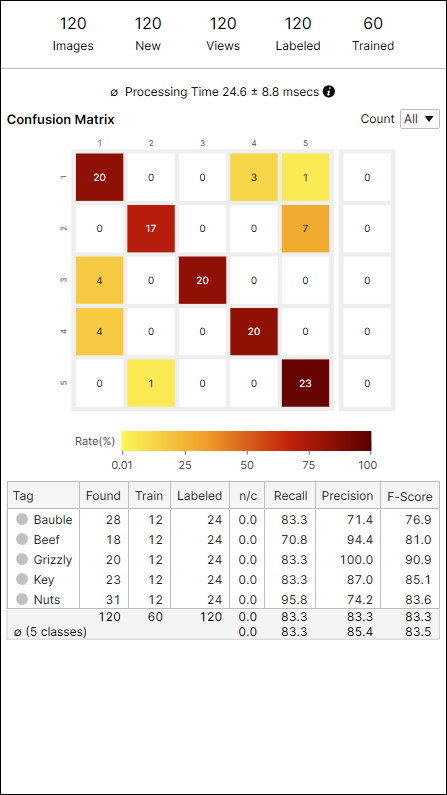
Red Analyze Workflow
-
Import images into a VisionPro Deep Learning workspace, create a Red Analyze, define ROI of them, and label them. To start the label quality check of the views for Red Analyze (except Red Analyze Focused Unsupervised), you need 5 or more Bad-labeled views with defect regions (pixel-wise labeled). If there are only Good-labeled views in the current stream, you can't start the label quality check. Also, if there are Bad-labeled views without defect regions, the label quality check will not run on those views and thus no label quality values will be generated for them.
Note: For the details of importing, defining ROI, and labeling images for Red Analyze, see Collect Images, Define Region of Interest (ROI) and Mask to Construct View, and Create Label (Labeling)Note: To import labels as image files, JSON files, or files in VisionPro Deep Learning internal label formats, see Cognex Label Import/Export Plug-in.Import Images
Define ROI
 Note: When you create a new Red Analyze, you are automatically prompted to edit ROIs of the images loaded in the current stream.
Label Views
-
On the View Browser, click Check to start the label quality check.
-
Click Start to begin the label quality check. The quality check will run on all labeled views, not on the unlabeled views in the current workspace. If a view is labeled as Bad but has no labeled defect regions, the quality check will not run on this view.
As the label quality check is run only on the labels views, you can't remove, rename, clear, or accept labeled views. Also, you can't train a tool when the label check is running. To get the label quality for each view, the label check task should not be paused or interrupted.
Note: You can still label, remove, rename, clear, or accept views that were not labeled when the label check is running.Views Running Label Check (View Browser Grid Mode)
Views Running Label Check (View Browser List Mode)
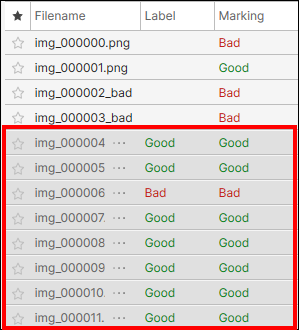 Note: Select List View or Grid View to swap back and forth between the 2 modes of View Browser.
 -
Once the label quality check is successfully completed, the quality value (0~100) is displayed in the Label Quality column of the View Browser's list mode. The higher the quality value, the better (more consistent or accurate) a view's label is.
Note: The label quality values of some views with correct labels can be comparatively lower than those of the views with incorrect labels, but overall you can find incorrect labels much more frequently on the views with lower quality values.Note: The range of absolute quality values differs by the image data you use as the quality value distribution over all views differs by image.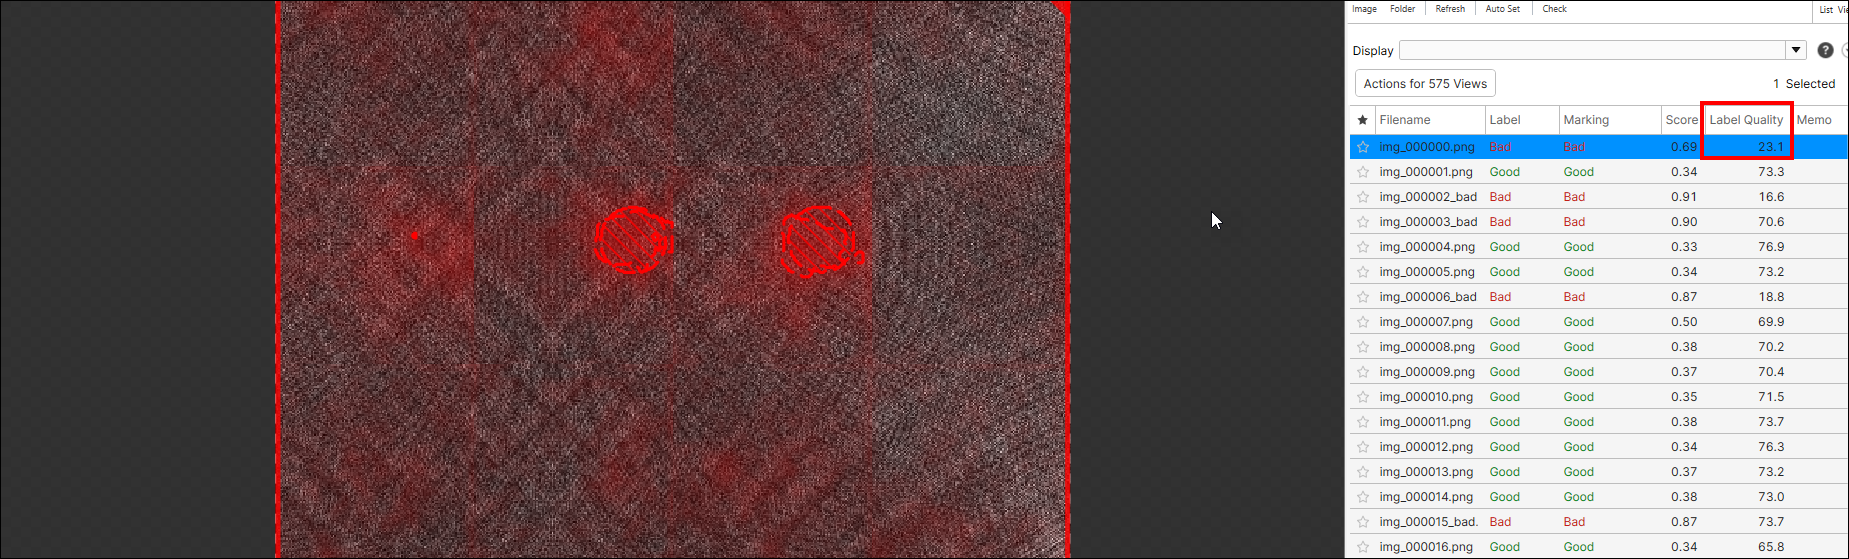
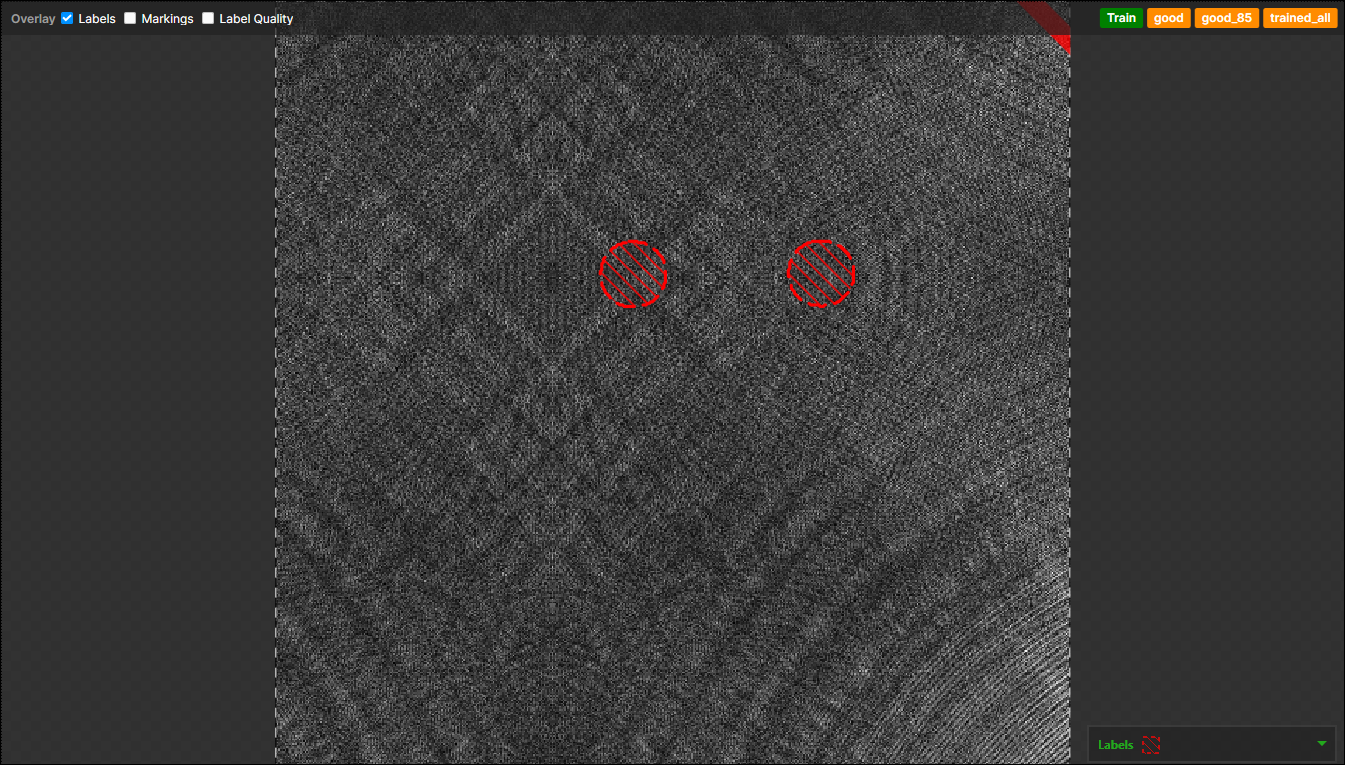
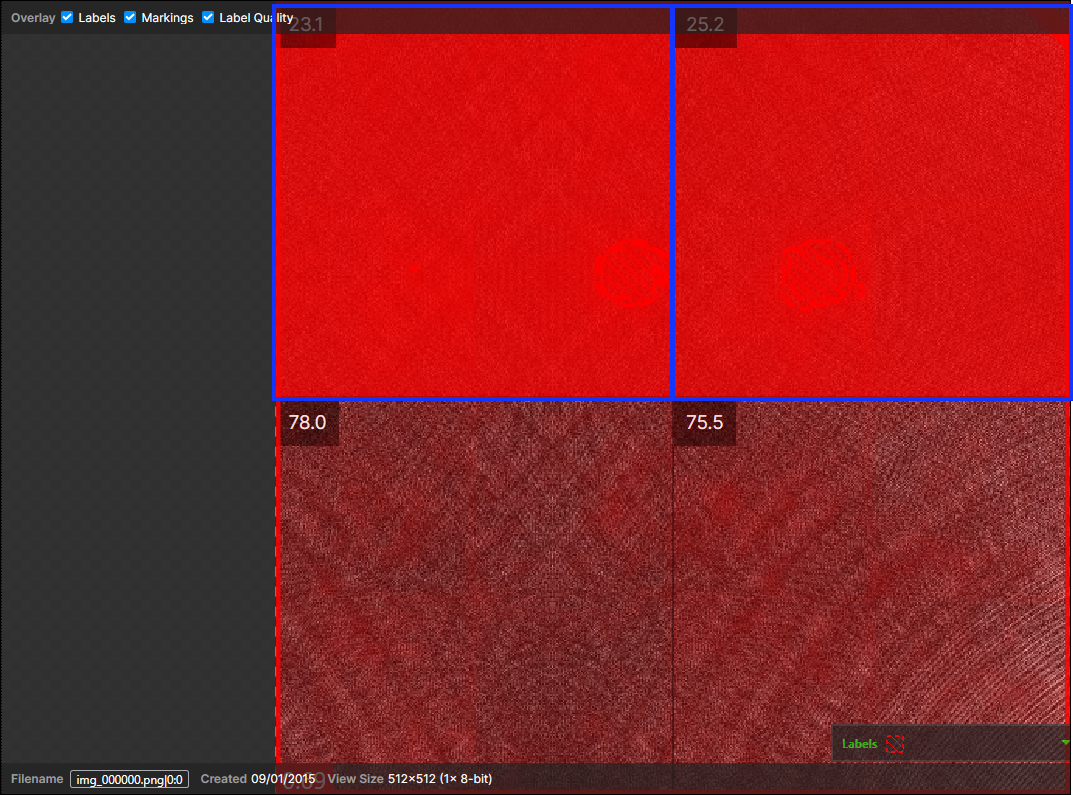
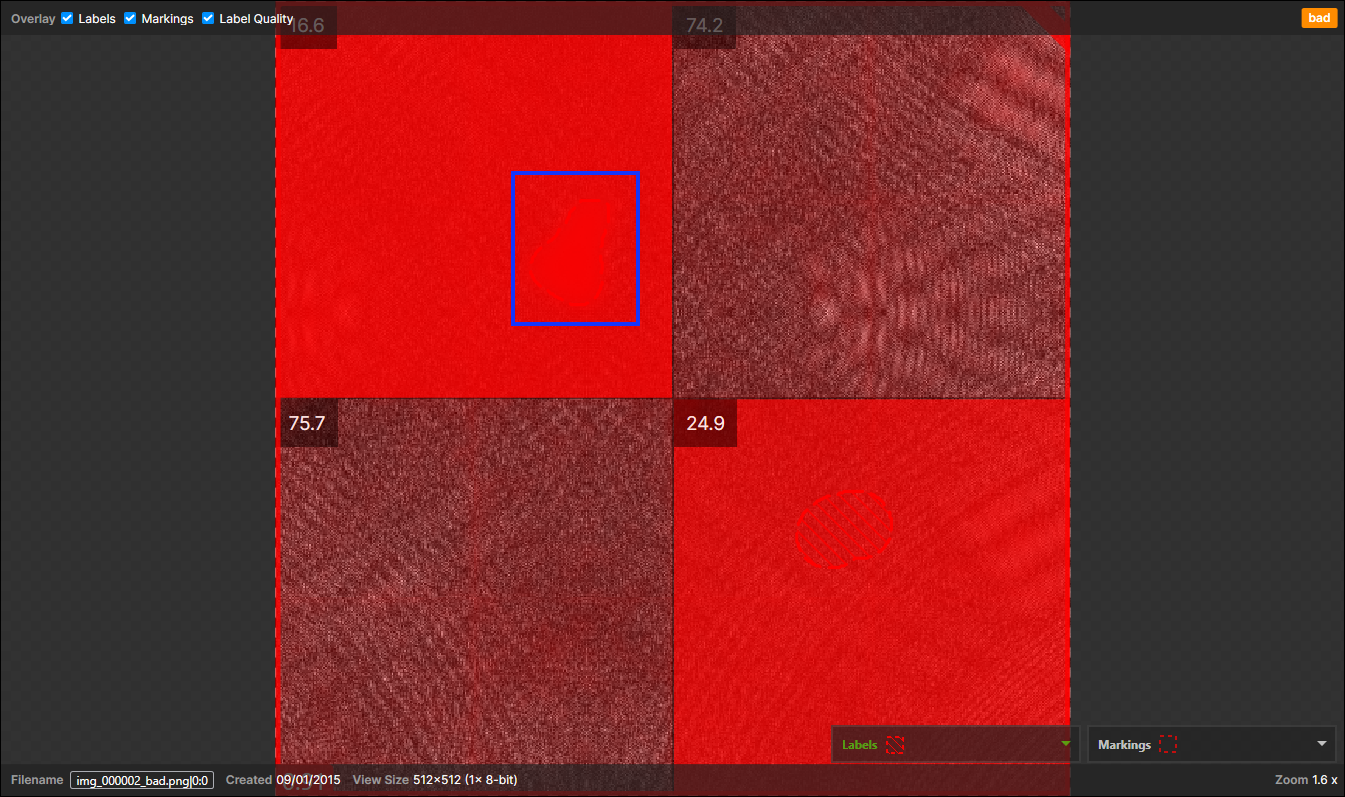
Specifically, a view is divided into multiple patches (256 x 256 pixel), and each patch has its own quality value. The quality value of a view displayed in the Label Quality column is the lowest quality value among the quality values of all patches of this view. On Overlay Checkbox, select Label Quality to display the quality value for each patch on Image Display Area.
Quality Value for Each Patch
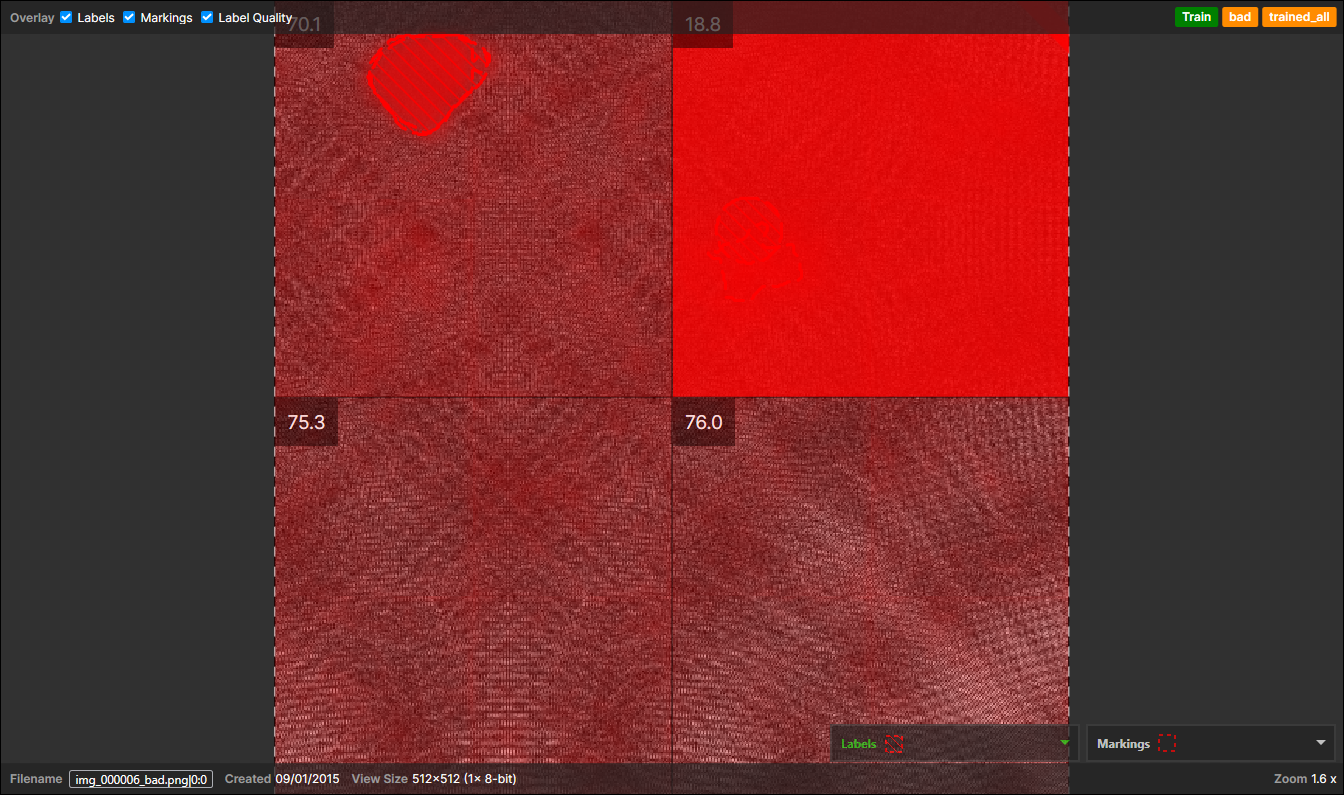
The Lowest Value of All Patch Quality Values Becomes View's Quality Value
The examples of views with low label quality values (inaccurate labeling) are the followings:
-
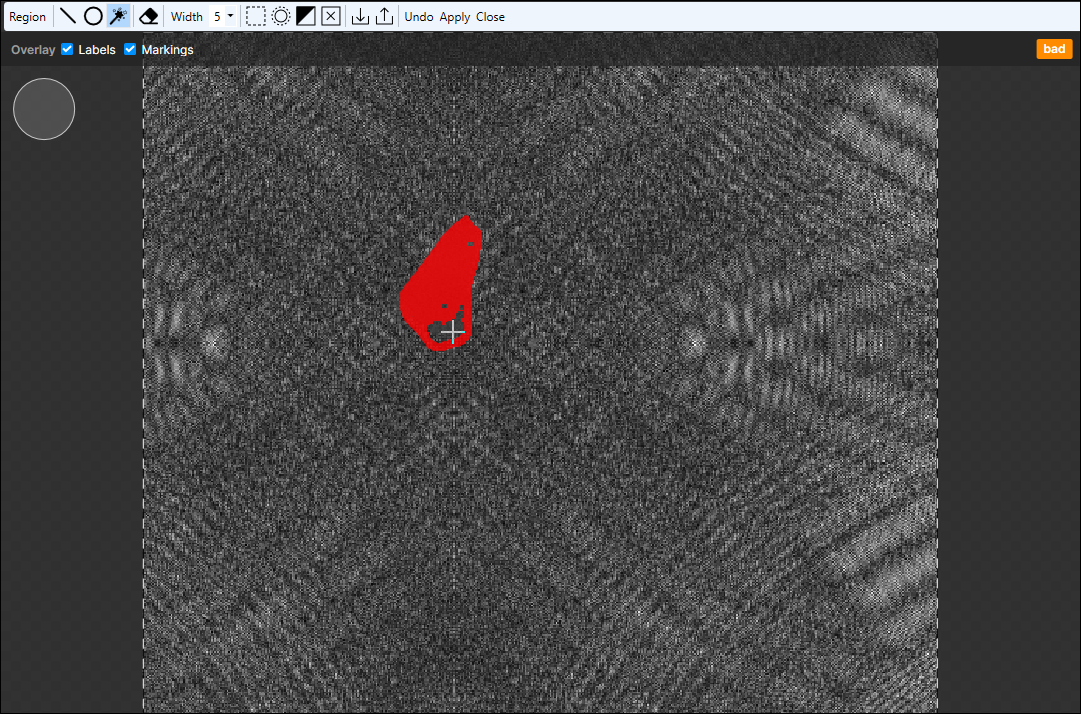
A view without any actual defect has a low label quality value when the defect regions are painted on it.
-
A view with defects has a low label quality value when the defect regions are not precisely painted on it.


-
A view with defects has a low label quality value when the defect regions are not painted on them at all.
-
-
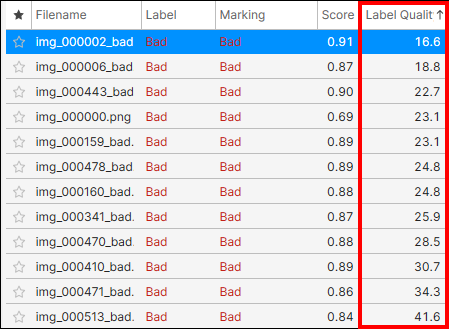
Click the Label Quality column header to sort the views by the quality value in ascending order, and check the views with low quality values.
-
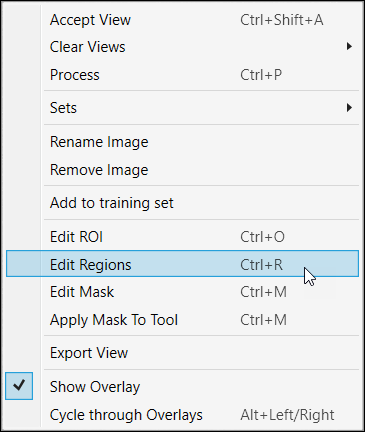
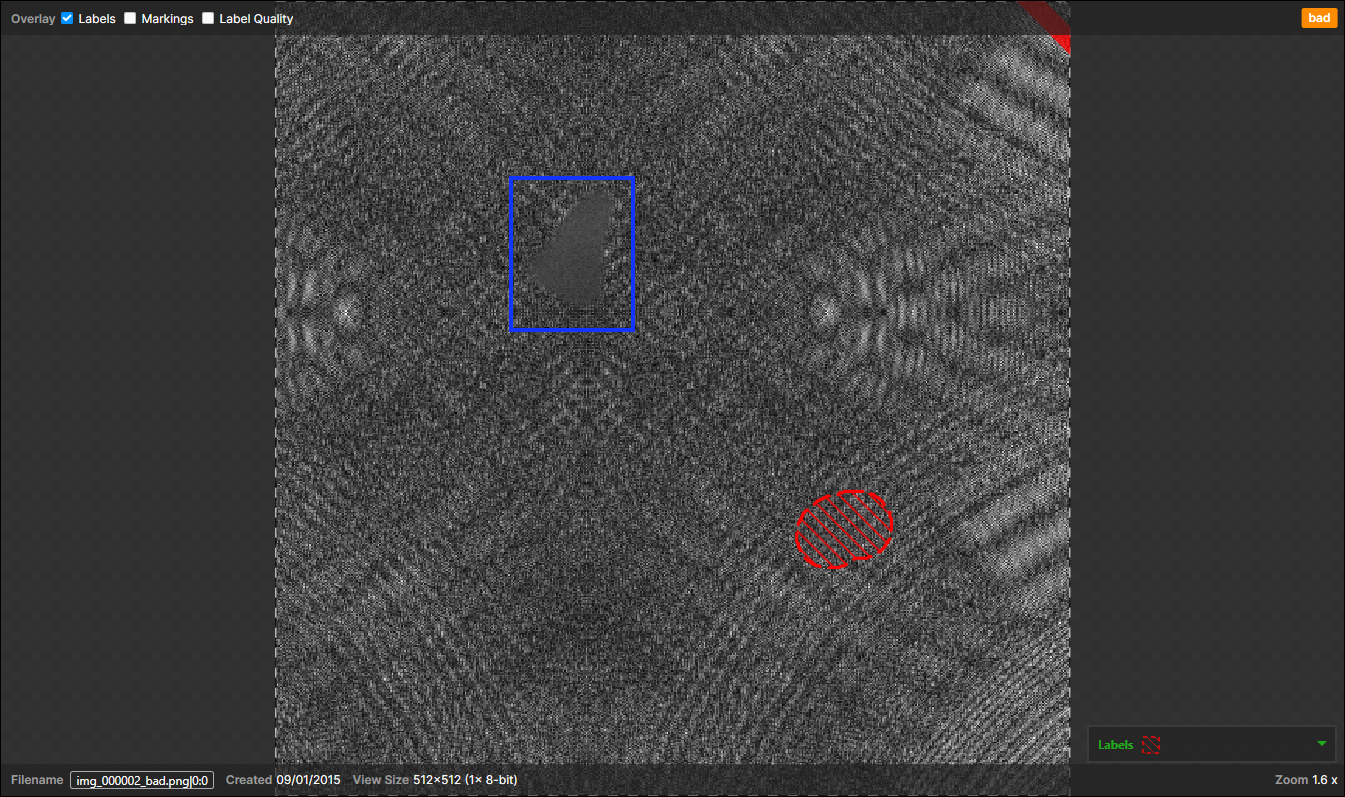
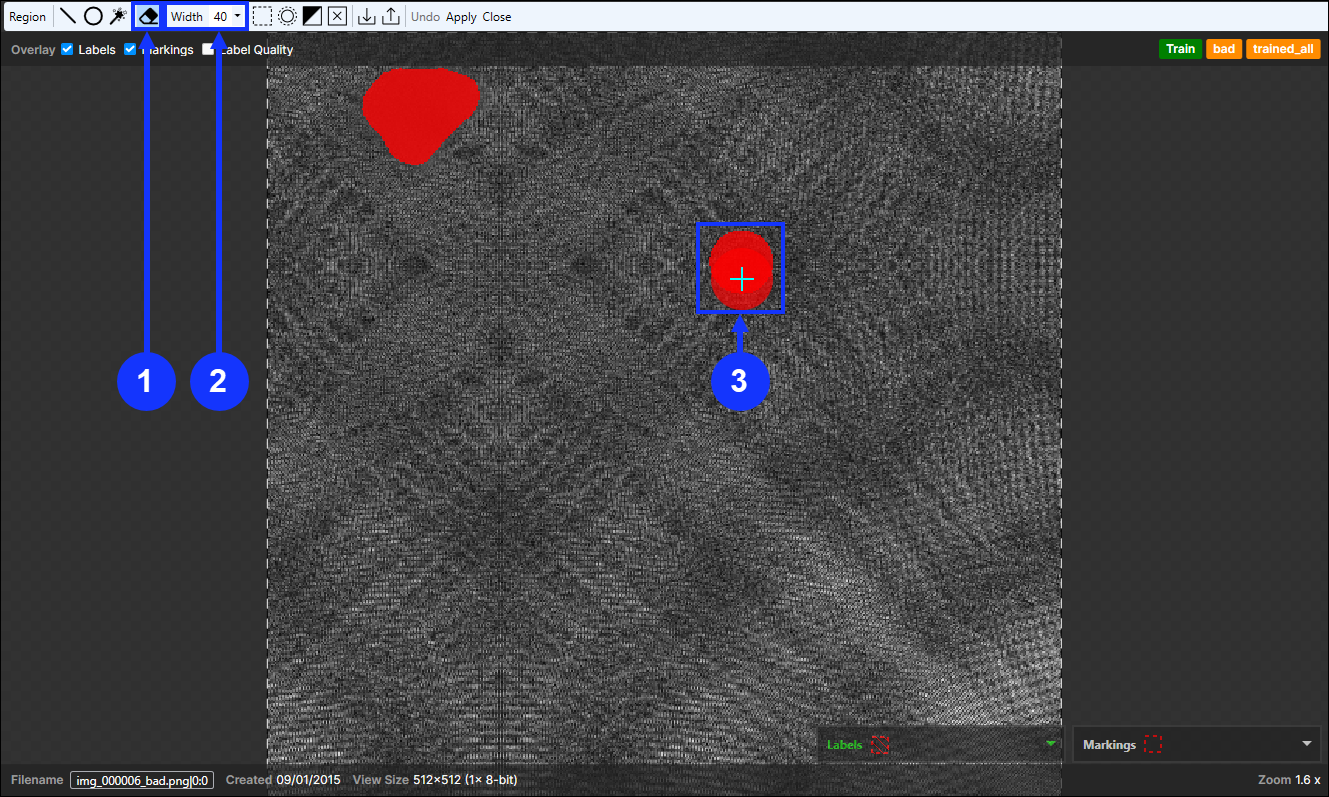
Modify the labels of the views with low quality values if required. To modify them, enable Label Quality on Overlay Checkbox to display the quality values of patches and go to View > Edit Regions.
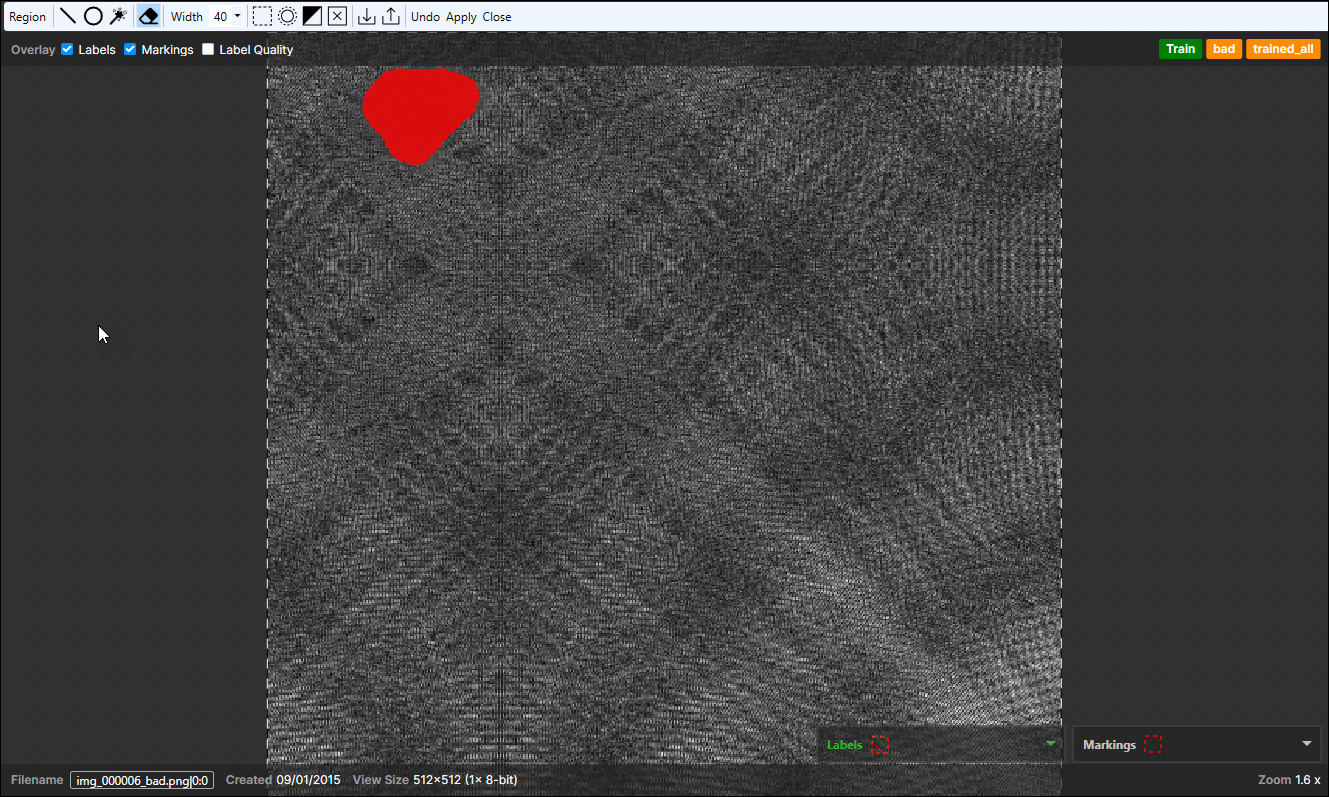
Note: For the more details of labeling, see Create Label (Labeling) for each tool type.Low Patch Quality Value When A Defect Region Is Painted on Background Pixels
Remove A Defect Region on Background Pixels to Correct Label
You can edit, add, or remove defect regions on a view by comparing them with the label quality values of each patch:
-
If a patch with a low label quality value involves some labeled defect regions, remove unnecessary defect regions on the background pixels (pixels with no defect) in the patch, or add more defect regions on the defect pixels in the patch.
-
If a patch with a low label quality value involves only the background pixels, add defect regions on the defect pixels in the patch.
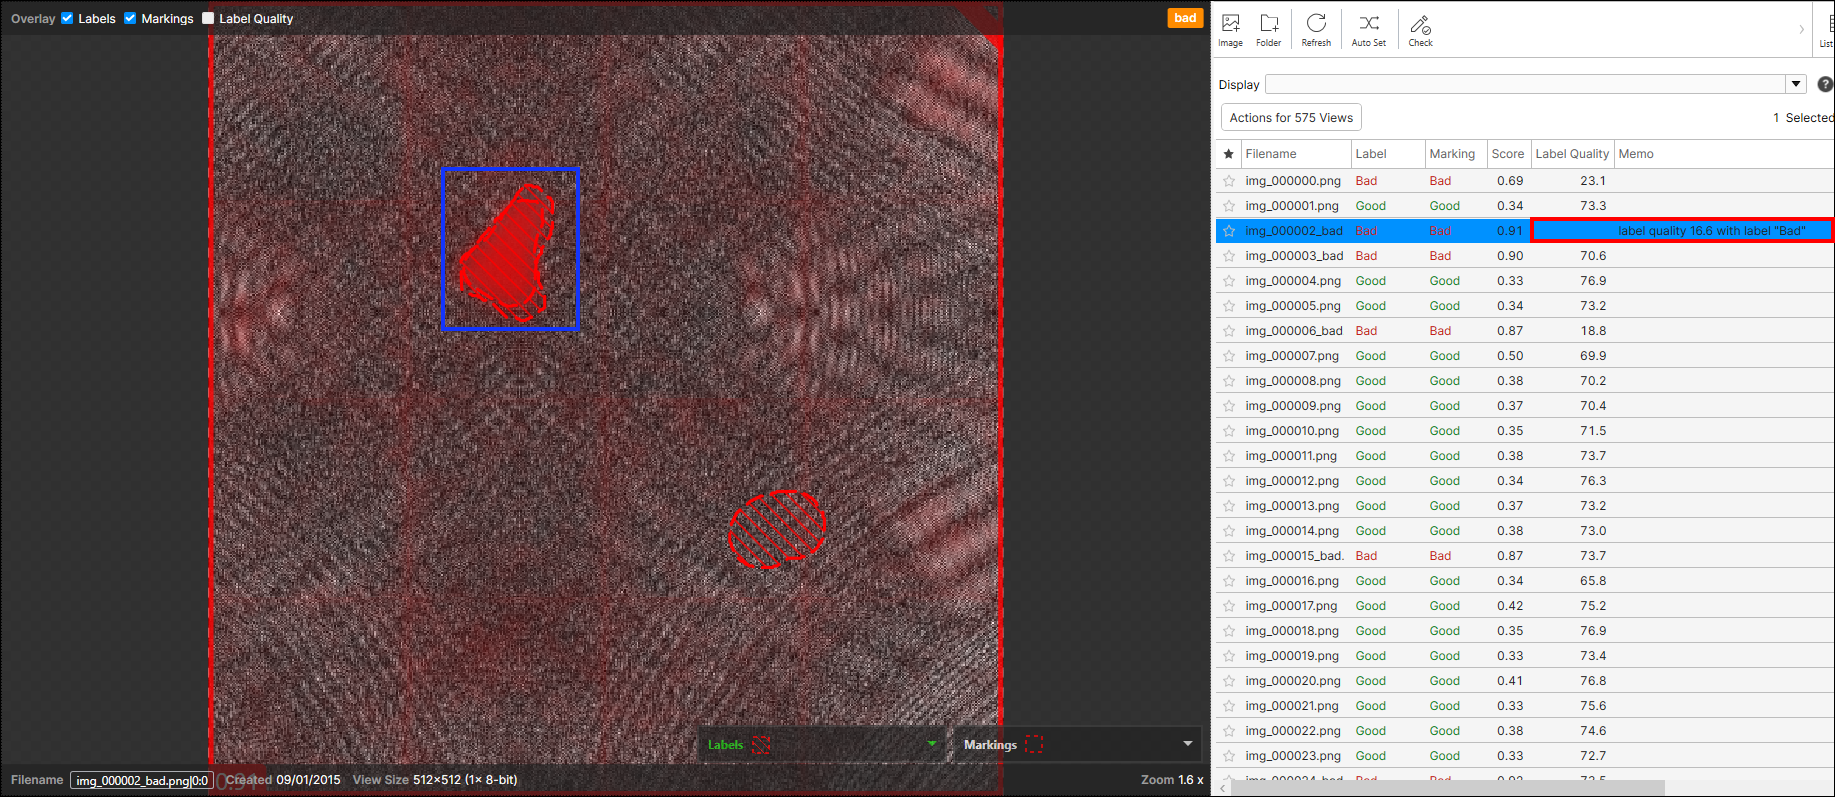
If a view's label or its defect regions are modified or deleted after the successful completion of the quality check, the value in the Label Quality column for this view is removed and displayed on the Memo column instead, following the ‘Label Quality QUALITY_VALUE with label LABEL_NAME’ format.
Note: Double-click a memo cell to edit or remove a memo.Paint A Defect Region to Change Label


Quality Value Deleted and Moved to Memo
-
-
Train and process the current Red Analyze tool and check the improvement of the results.
Before Correcting Labels After Correcting Labels via Label Check