Define Region of Interest (ROI) and Mask to Construct View
Define Region of Interest (ROI)
After adding a tool to process the images, they will be blurred and indicate that they need to be segmented by the message, "No ROI (Region of Interest) defined." In order to make these images available to the current tool, you have to segment them by clicking the tool's process button - the Scissor icon.
The default segmentation provides the tool with the complete image. Alternatively, you can manually adjust the ROI (right-click within the image and select Edit ROI) to configure the extracted view in terms of its size, position and orientation. In many cases, you need to adjust the Region of Interest (ROI) to define the view that the tool will operate within. You can adjust the size and placement of the ROI using the graphic handles in the image. This allows you to re-size the ROI, and to move it within the image.
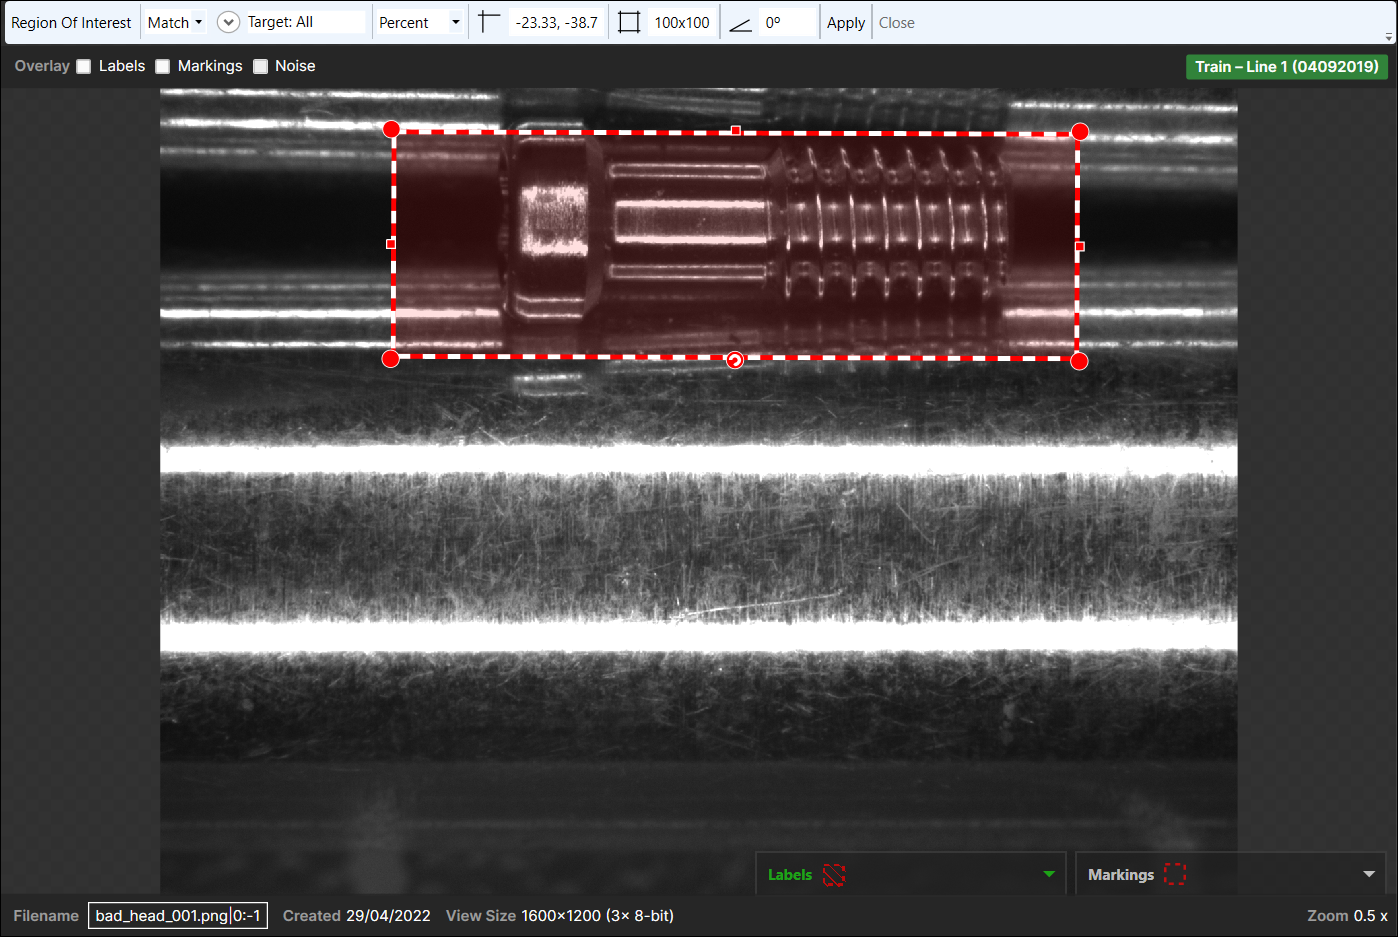
Edit ROI
When the first tool is added, the default Region of Interest toolbar will appear at the top of the image (you can also open it by selecting Edit ROI from the right-click menu).

Expert Mode version:

| Setting | Description |
|---|---|
|
Percent/Pixel |
Specifies if the ROI will be constructed as a percentage of the width and height of the image, or in the pixel dimensions. Note: If the preceding tool is a Blue Locate tool, the percentage will be based on the width and height of the feature or node model that is defining the view.
|
|
Offset |
Specifies an offset of the upper left corner of the ROI from the origin. The setting is either a percentage or in pixels, depending on the Percent/Pixel setting. |
|
ROI Size |
Specifies the size of the ROI, either as a percentage or in pixels, depending on the Percent/Pixel setting. |
|
Angle |
Specifies an angular orientation, from the origin, of the ROI. |
|
Grid |
Specifies that the image will be divided into smaller views, based on the grid settings. This is useful when you are working on large images that may contain a large number of features and/or regions, and dividing the image into multiple, smaller views will make it easier to visualize and label. Allowing the Deep Learning application to divide the image versus altering the image in another photo editing program also prevents artificial artifacts from being introduced, because within Deep Learning, the image just continues. Also, when processing images during runtime, the Grid setting can be reset to the default (1 x 1), and the entire image will be processed at once. For example, if you had a large image, which contained 10,000 small items that will be labeled and identified by a Blue Locate tool. By dividing the image into a 10 x 10 grid, you would only need to identify and label 100 features per image, versus 10,000 in one image. Note: This option is only available in Expert Mode.
|
|
External |
Specifies that the ROI will be oriented by an external source Note: This option is only available in Expert Mode.
|
Define Mask (Optional)
All of the Cognex Deep Learning Tools support the ability to exclude parts of the image from training by creating and applying masks.
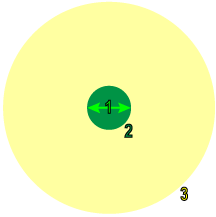
During training and processing, the Deep Learning tools work by sampling the image, with the Feature Size being the nominal span of the Sampling Region, in pixels. During sampling, a significant amount of context information (aka the Context Region) from around the Sample Region is also considered.
|
|
|
|
1 |
Feature Size |
|
2 |
Sampling Region |
|
3 |
Context Region |
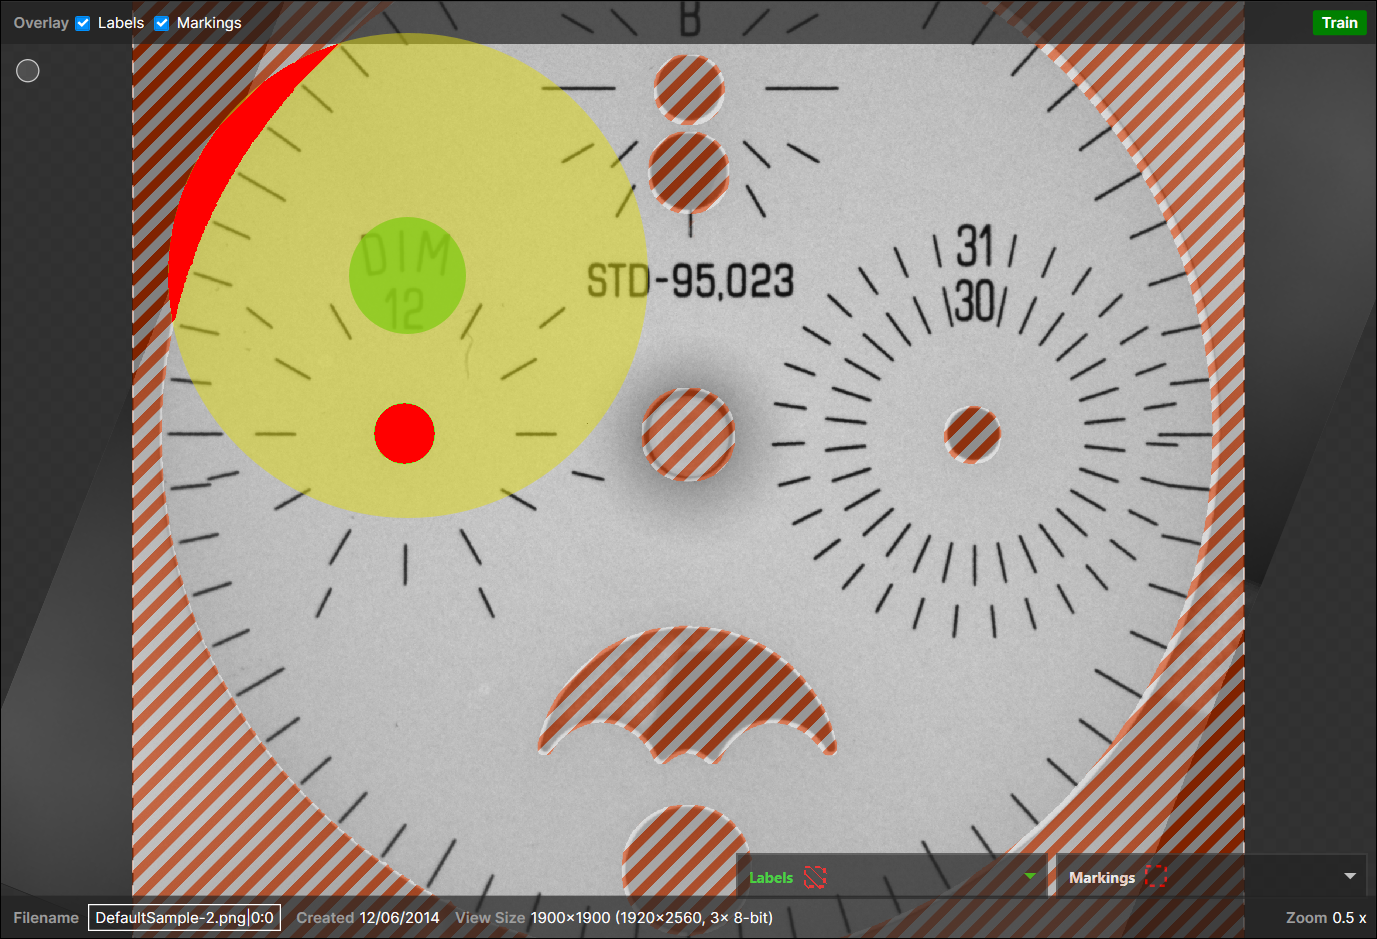
When a mask is applied to an image, the pixels within the Sampling Region that are masked are always discarded. However, how the mask is applied to the Context Region is determined by the Masking Mode parameter.
Consider the following masked image, with the hypothetical Sampling and Context Regions:
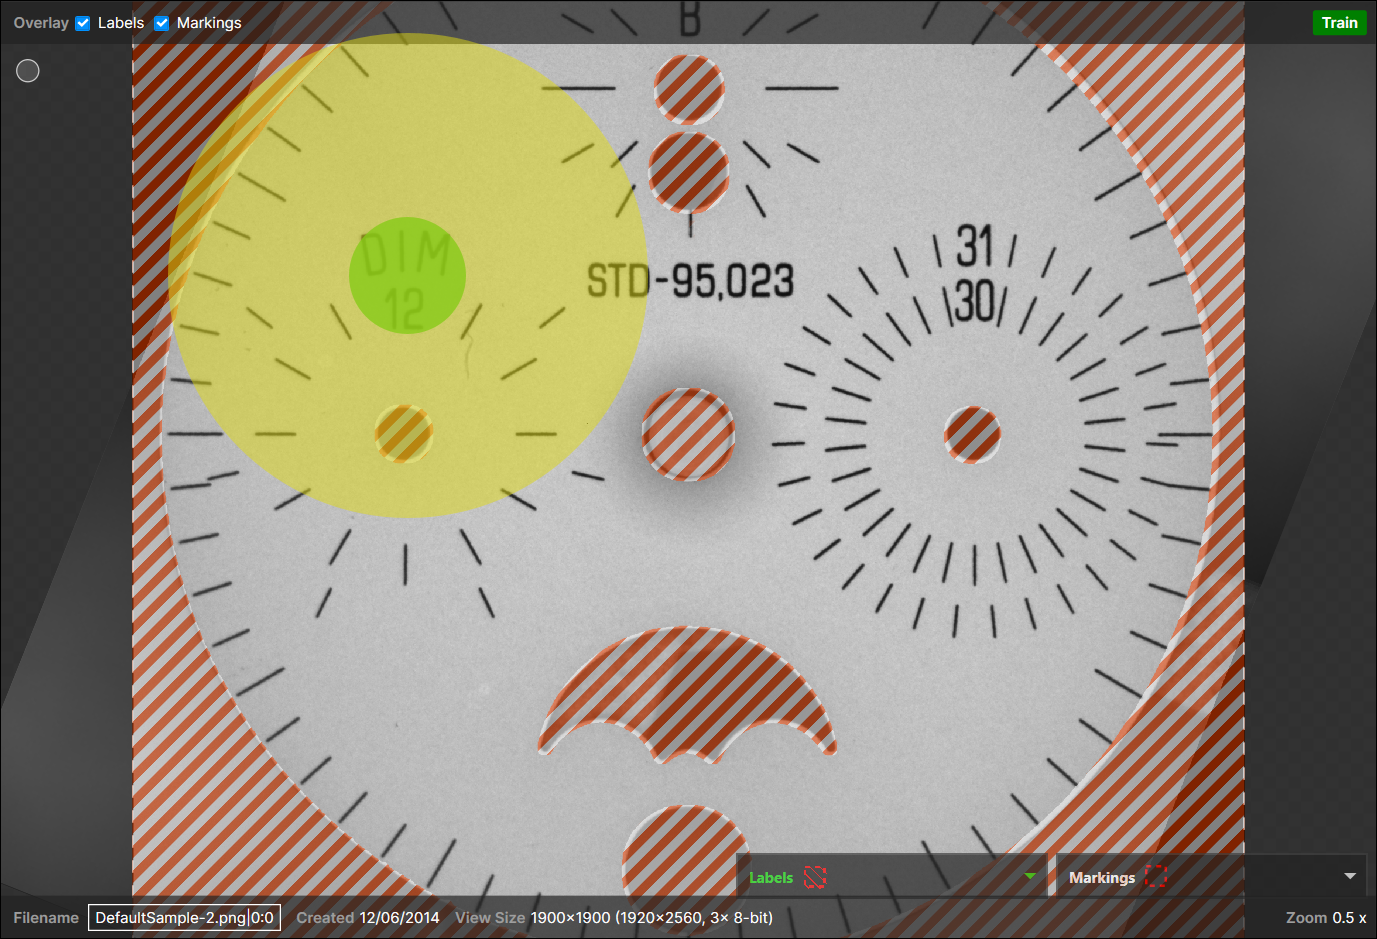
When the Masking Mode parameter is set to the default setting of Transparent, samples are only collected within the unmasked parts of the image. However, context information is still collected from masked areas, signified by the bright green areas within the Context Region.
![]()
When the Masking Mode parameter is set to Mask, any masked pixels within the Context Region are discarded, signified by the bright red areas within the Context Region. This setting also effectively focuses the tool to emphasize the center of the ROI during sampling.
Edit Mask (Optional)
The Mask toolbar is launched by right-clicking in an image, and selecting Edit Mask from the menu. After you have applied the mask to one image, click the Apply button so the mask will be used by all the images in your training image set. Press the Close button to return to the process of constructing your Deep Learning application.

| Setting | Description |
|---|---|
|
Drawing Tools |
There are three drawing tools, and they can be used in conjunction. The size of the area drawn is defined by the Width value.
Note: The Eraser tool can be used to trim and/or remove extraneous drawings on the image.
|
|
Width |
Defines the pixel width of the mask drawing tools, border mask and the grow area. The Width should be set prior to applying the mask. While editing your mask, either with a drawing tool, border mask or area growth, if you adjust the Width value, the new value will only be applied to the next mask you create (it will not change previously created masks, even in the same editing session). |
|
Border Mask |
Creates a mask around the border of the image, based on the Width value. Applying a mask to the border of the image is helpful when you have images that arbitrarily cut off an object, such as a piece of fabric or a textile, because the field of view of the camera acquiring the image crops the object. |
|
Grow Area |
Expands the area of the mask by the Width value. |
|
Invert |
Inverts the mask, in other words, the area that is masked will be unmasked, and the area that did not contain a mask will be masked. |
|
Clear |
Removes the mask from the image. |
|
Import/Export |
The import and export buttons launch an Import Mask-Image and Export Mask-Image dialog for importing or exporting a mask image, as a .PNG file. A mask image is a two-dimensional array of pixels that has the same size as the view in which the mask resides. The pixel values in the mask image determine whether or not the corresponding pixels in the view are used for training or runtime processing. The import/export options allow you to either import a previously created mask image, or export one that was just created. |
|
Undo/Apply/Close/Apply All |
Options to control the application of the mask.
|
Construct Views
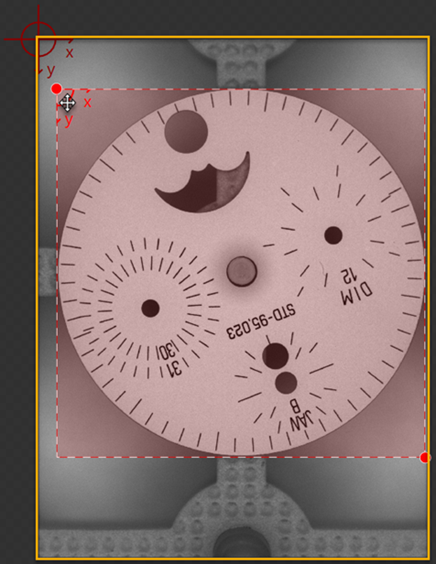
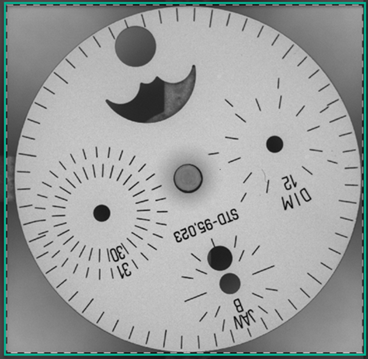
The VisionPro Deep Learning tools operate on an area of the image called a View. A view in VisionPro Deep Learning is slightly different from an image file. A view can be the entire image, a smaller user defined rectangular area of the image, or the output of a tool, depending on the tool and use. The initial View is constructed after the Region of Interest (ROI) of the first tool has been defined. The ROI is defined by an affine transformation from the original image (position, angle, stretch and skew), and the ROI instructs the tool where it will operate within the image. The process of selecting a View from an image is called Segmentation. The first tool added will use manual Segmentation, in other words, defining the ROI to create the View.
-
The orange outline encompasses the entire image, and the red-dashed rectangle is the ROI that is being defined.
-
The green outline encompasses the View.
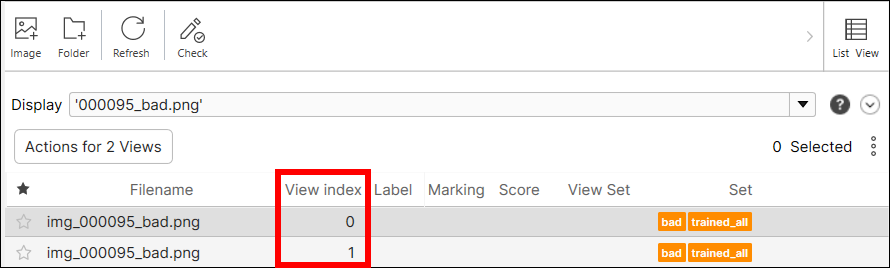
ROI and View Index
Many different ROIs can be generated from a single image file, and so can the views. As many different views can be generated from the same single image file, a view's index works as a unique identifier for each view. To put it simply, if 3 views are generated from the same image file, their indices will be 0, 1, and 2.
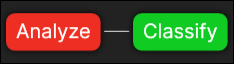
For another example, if you use a Red Analyze parent tool (preceding tool) in a tool chain, its child tool can have many views when it uses the parent tool's defect regions as its ROIs by Extract Regions as Individual ROIs feature.
A Red Analyze - Green Classify Tool Chain
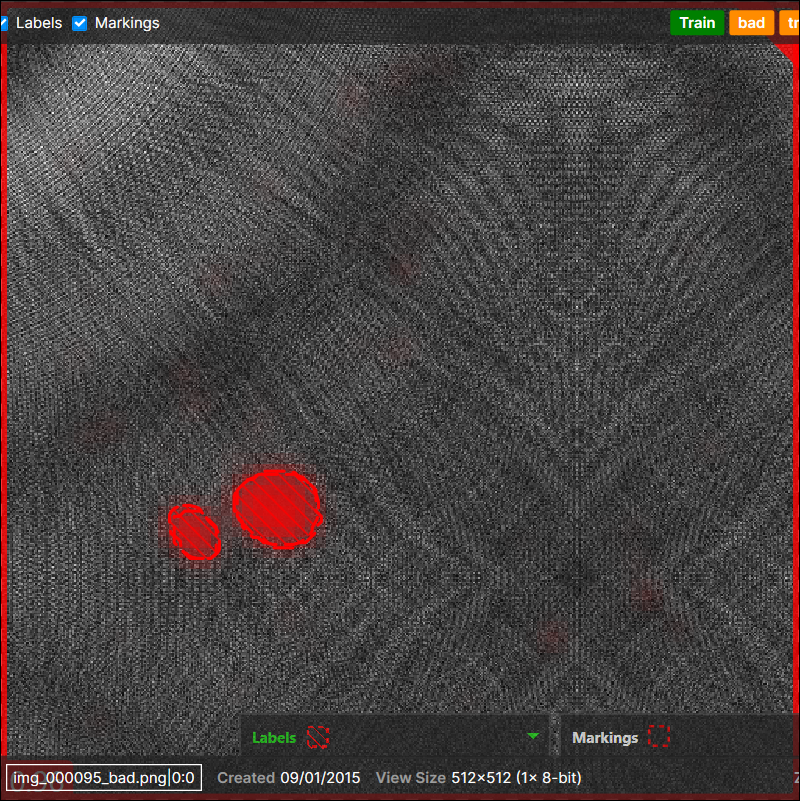
2 Defects on a View (Image File) in the Red Analyze Parent Tool
Set ROI for the Green Classify Child Tool: Extract Regions as Individual ROIs


2 Views are Generated from 1 Image File, One View for One Defect
 , open Edit Column, enable View Index checkbox and select Apply.
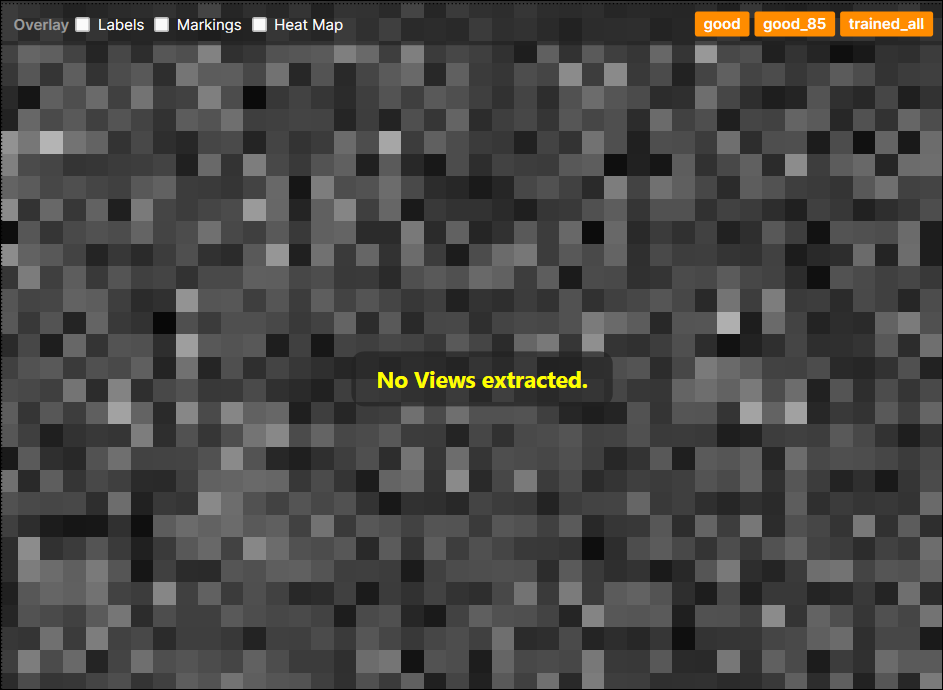
The view index of a view without ROI configured is -1. For example in the case above, if a view in the Red Analyze parent tool has no defect regions, the child tool cannot extract any ROI from this view and thus this view has no ROI and has the view index of -1. In addition, a yellow warning sign is displayed at the end of the Filename when there is no ROI for a view.

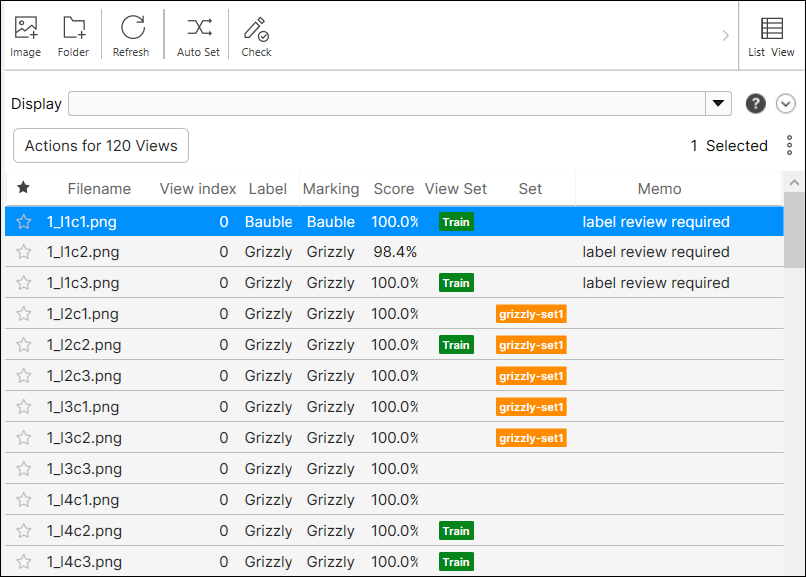
Check on View's Status
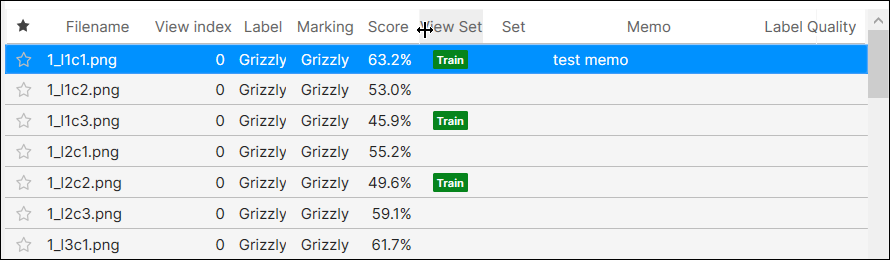
The status details of each view are described in the view information table on View Browser list mode. The status information of each view differs by the tool type.
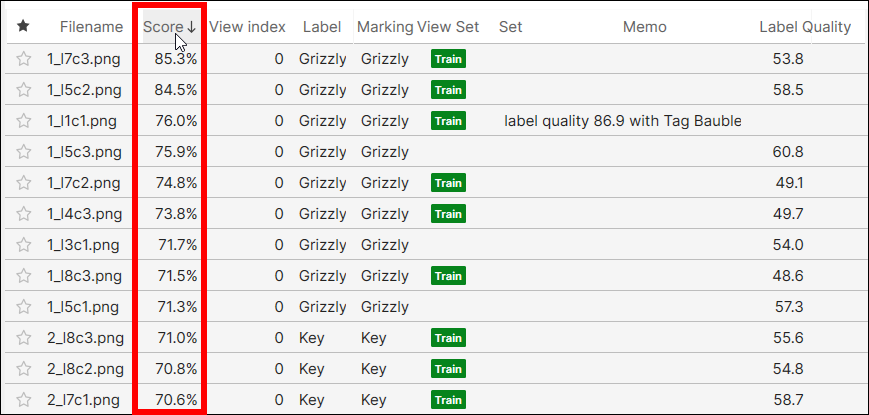
| Column | Description |
| Filename | The view's image file name loaded in the current stream. If many different views are generated from a single image file, those views have the same Filename. |
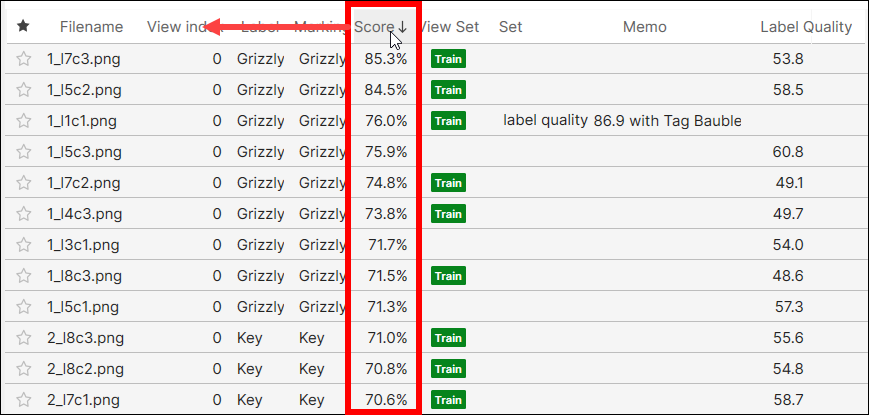
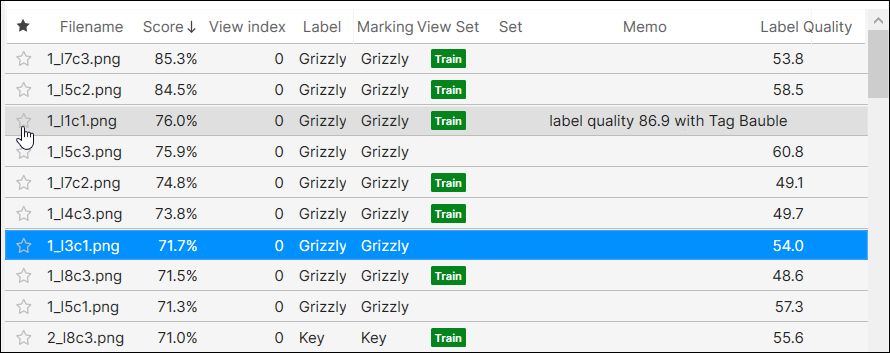
| View Index | The index of the view. If many different views are generated from a single image file, View Index is used as the unique identifier for each view. For example, if 3 views are generated from the same image file, their Filenames will be the same and their View Index will be 0, 1, and 2. Note that View Index is hidden by default in View Browser list mode. To show View Index, select , open Edit Column, enable View Index checkbox and select Apply. |
| Frame Index |
The index of a frame. Multiple images can be grouped into a single frame, and Frame Index is the unique identifier for each frame. |
| Label | The label of the view. See Create Label (Labeling) for more details. |
| Marking | The marking of the view. See Create Label (Labeling) for more details. |
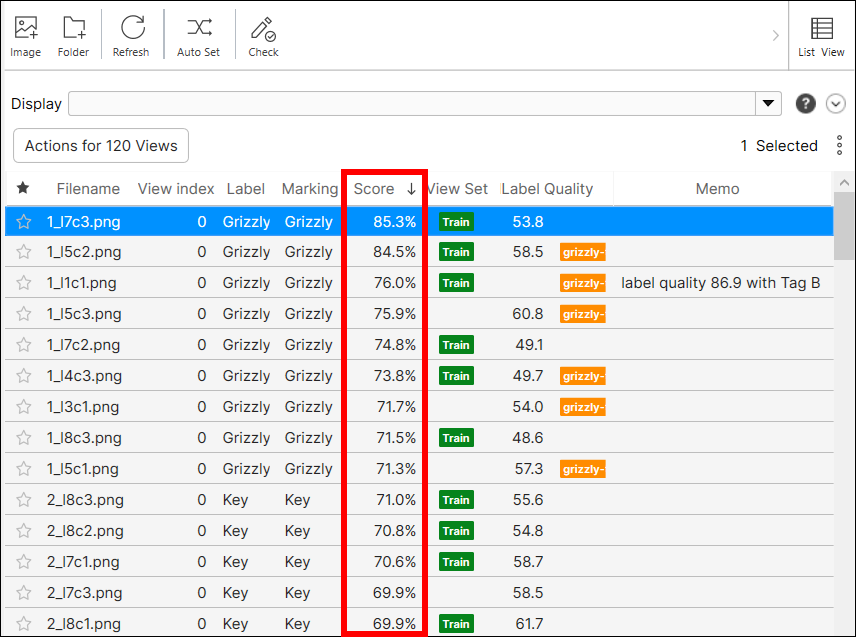
| Score | The score of the view. See Interpret Results for more details. |
| View Set | The mark of inclusion in the training set or validation (High Detail) set. If the view is in the test set, there will be no mark. |
| Set | The mark of inclusion in the custom set made by you. See Create and Edit Sets for more details. |
| Memo | The custom memo written or edited by you. |
| Label Quality | The quality value of the view's label calculated after the completion of label quality check. See Optimize Labeling with Label Check for more details. |
Control Views on View Browser List Mode
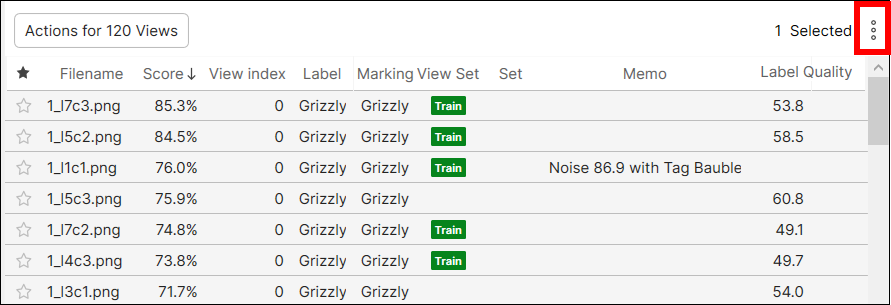
On the list mode, you can also add new images to the current VisionPro Deep Learning workspace, add images to training set, apply filters to the views displayed, sort the displayed views, or do other operations for each view.
Manipulate Information Table
Sort the contents of the information table by clicking each column header.
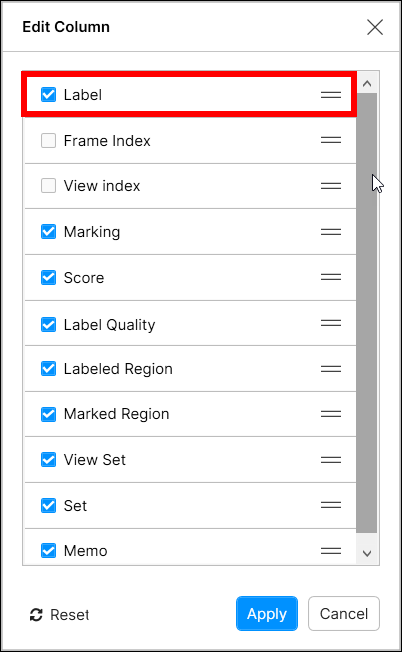
Change the column order displayed by simply dragging a column header and dropping it at the place you want.
Edit the list of columns displayed by clicking button.
On Edit Column dialog, enable or disable the checks to show or hide a column. Select Reset to set the list of columns to be exposed and column order to the default.
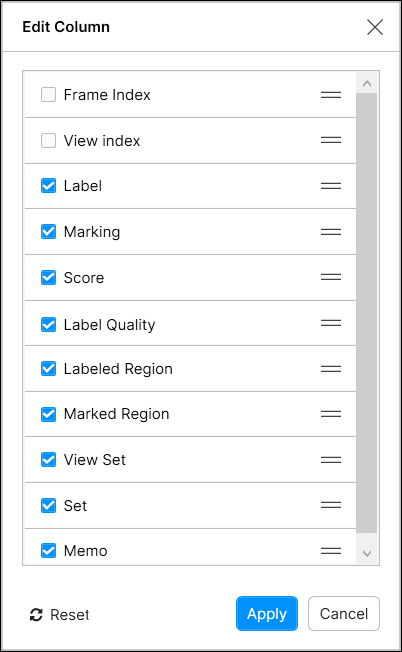
You can also change the column display order by dragging and dropping  icon for each column.
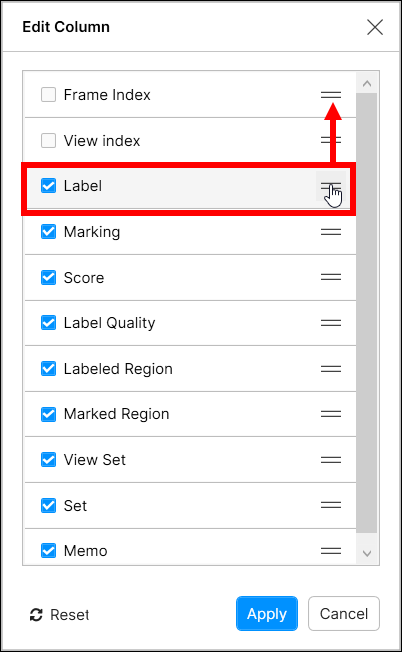
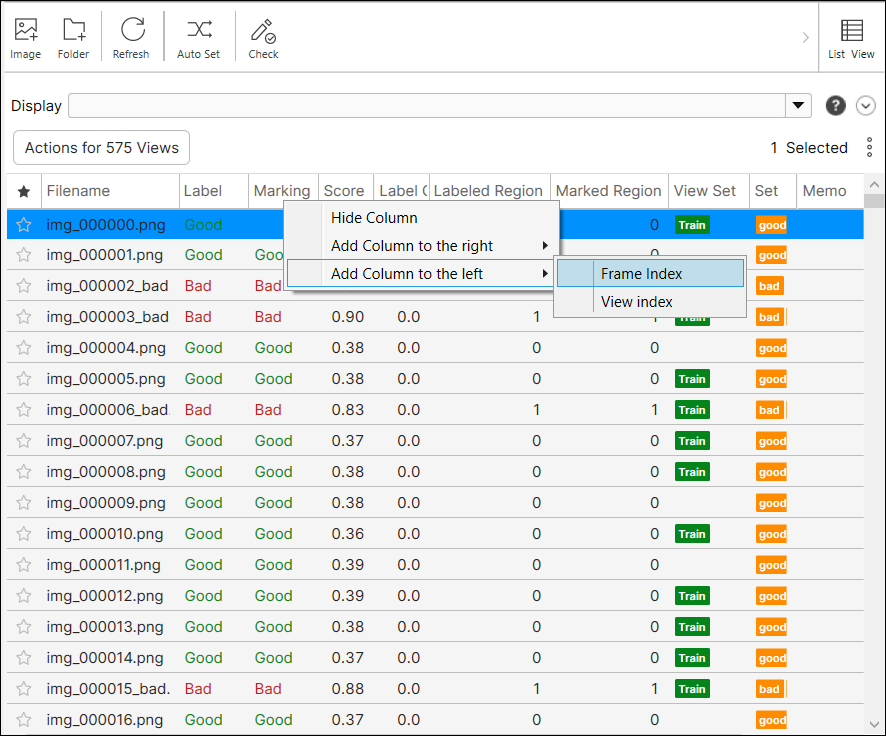
Also, right-click column headers to hide or add columns directly.
Star Views
You can star a view to create a bookmark for it if a view is important or it requires frequent visits.
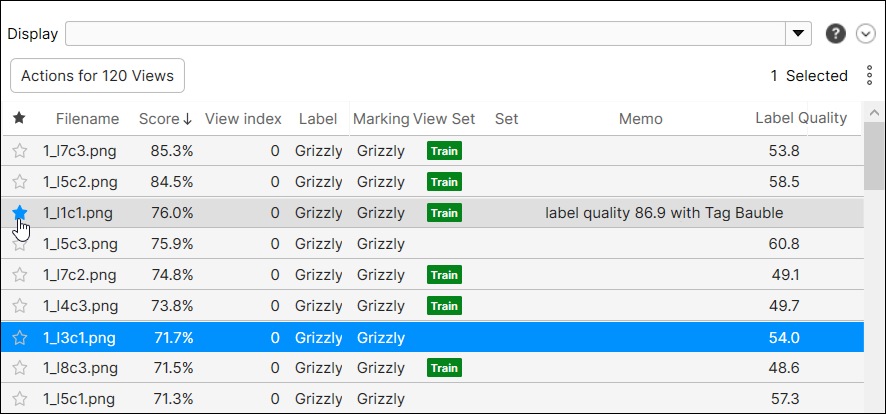
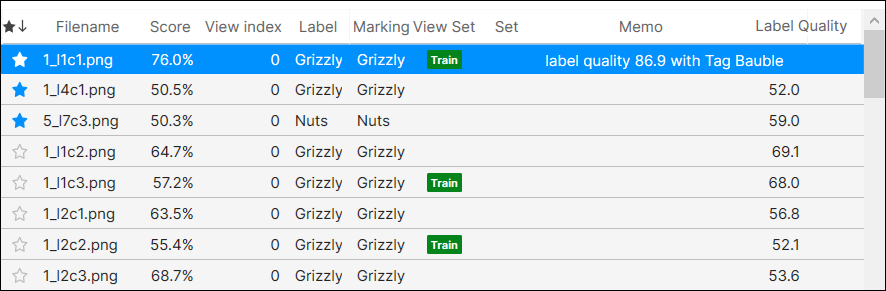
Starring is only applied on the view in the current tool, not on the same view in other tools. If you use a tool chain, a starred view in a parent tool (upstream tool) does not remain starred in the child tool (downstream tool), and vice versa. But, if you star a view and clone the current tool, the same view in the cloned tool remains starred.
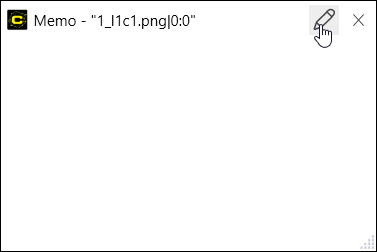
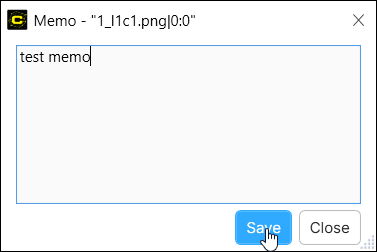
Posting Memo
You can put on and edit a memo for each view. Double-click Memo to write or edit a memo for each view.
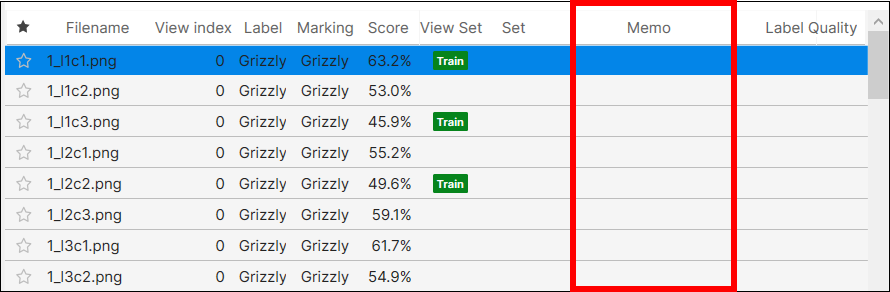
Posting a memo is only applied on the view in the current tool, not on the same view in other tools. If you use a tool chain, the memo of a view in a parent tool (upstream tool) is not preserved for the same view in the child tool (downstream tool), and vice versa. But, if you put a memo on a view and clone the current tool, the memo is preserved for the same view in the cloned tool.