Green Classify High Detail Quick
Overview of Green Classify Architectures
There are 3 types of architecture in Green Classify Tool: Focused, High Detail, and High Detail Quick.
-
The Green Classify Focused is used to classify an object or a complete scene. Be it the identification of products based on their packaging, the classification of welding seams or the separation of acceptable or unacceptable defects; the Focused mode learns to separate different classes based on a collection of labeled images. To train the Focused mode, all you need to provide are images assigned and labeled the different classes.
-
The Green Classify High Detail is similar with Focused Green Classify Tool, but uses a different architecture. The High Detail mode learns to separate different classes based on a collection of labeled images. To train the High Detail mode, all you need to provide are images assigned and labeled the different classes.
-
The Green Classify High Detail Quick is the modification of Green Classify High Detail mode, hiking up its training speed dramatically with some decrease in detection accuracy. It was forged to import the state-of-the-art training algorithms to guarantee robust and still performing results though its accuracy level is slightly lower than that of Green Classify High Detail. It also requires few Tool Parameters thus offers easy and quick training. The other details including its step-by-step usage are not much different from Green Classify High Detail.
About Green Classify High Detail Quick
Green Classify High Detail Quick is the speed-optimized version of Green Classify High Detail, sacrificing a little classification accuracy for much faster training speed. To extract the most speed available, it skips calculating the validation loss and picks the best neural network model using the results of the last epoch during training. Instead of using the validation set and the validation loss, it uses state-of-the-art learning algorithms to guarantee robust and decent results, which are a bit less accurate than Green Classify High Detail.
One another big difference between Green Classify High Detail and Green Classify High Detail Quick is the number of supported tool parameters. Green Classify High Detail Quick requires only a handful of tool parameters that will reduce the effort for parameter tuning. Other than the number of available tool parameters, the use of validation set, and the speed-accuracy tradeoff, most of Green Classify High Detail Quick use flows are similar to those of Green Classify High Detail.
High Detail Quick mode uses an architecture which is different with Focused mode. Due to the architecture, High Detail Quick mode can get you more accurate results. The way you create a model in High Detail Quick mode is basically same with Focused mode but High Detail Quick mode requires much less number of tool parameters to be tuned by hand. Also, you cannot assign multiple tags per view in High Detail Quick mode. Each view has only a single corresponding tag and it means that non-exclusive mode is not supported.
Architectures: Green Classify High Detail Quick vs Green Classify Focused
Green Classify High Detail Quick mode uses an architecture which is different from that of Focused mode. Due to its architectural difference, it doesn't have Sampling Parameters in Tool Parameters pane as it samples from the entire view. The way you label images and create a neural network model in Green Classify High Detail Quick is basically the same as Focused mode, but it requires almost no parameters compared to Green Classify Focused.
Architectures: Green Classify High Detail Quick vs Green Classify High Detail
High Detail Quick is different from High Detail mode as it adopted a different training algorithm, a one-of-kind one. Due to this backbone change, it became dramatically faster in training while keeping its classification accuracy only a little behind that of Green Classify High Detail. It does not use the validation set in training anymore and it does not require as many tool parameters as High Detail requires. Everything else is just the same as High Detail mode. Note that if the tool parameters are properly tuned, the accuracy of High Detail modes are higher than that of High Detail Quick modes on average.
| High Detail Quick mode | High Detail mode | |
|---|---|---|
| Speed | Fast | Slow |
| Accuracy | Accurate | More Accurate |
| Number of Parameters |
Almost None |
Many |
| Image Dataset Composition | Training Set, Test Set | Training Set, Validation Set, Test Set |
Supported Features vs Architectures
|
Features |
Green Classify Focused | Green Classify High Detail | Green Classify High Detail Quick |
| View Inspector | Supported without heat map | Supported with heat map | Supported with heat map |
| Loss Inspector | Not supported | Supported | Not supported |
| Validation Set | Not used in training | Used in training | Not used in training |
| VisionPro Deep Learning Tool Parameters | Less parameters |
More parameters for control*, |
Almost no parameters |
| Multi-class Classification (Non-Exclusive/Exclusive Mode) |
Supported | Not supported | Not supported |
| Resize Mode | Not supported | Supported | Not Supported |
Training Workflow for Green Classify High Detail Quick
When a Green Classify tool is in Green Classify High Detail Quick mode, the training workflow of the tool is:
- Launch VisionPro Deep Learning.
- Create a new workspace or import an existing one into VisionPro Deep Learning.
- Collect images and load them into VisionPro Deep Learning.
- Define ROI (Region of Interest) to construct Views.
- If a pose from a Blue Locate tool is being used to transform the orientation of the View being used as an input to the Green Classify tool, process the images (press the Scissors icon) before opening the Green Classify tool. For more details, see ROI Options Following a Blue Locate Tool.
If necessary, adjust the Region of Interest (ROI). Within the Display Area, right-click and select Edit ROI from the menu.

- After adjusting the ROI, press the Apply button and the adjusted ROI will be applied to all of the images.
- Press the Close button on the toolbar to continue.
- If there is extraneous information in the image, add appropriate masks to exclude those areas of the image. Within the Display Area, right-click and select Edit Mask from the menu.
From the Mask toolbar, select and edit the appropriate masks.

After adding the necessary mask(s), press the Apply button and the mask will be applied to the current image.
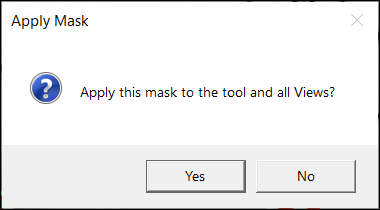
If you click Apply All and click Yes button on the ensuing Apply Mask dialog after adding the necessary masks, the same mask will be applied on all the images. If you click No on the dialog, the mask will not be applied and you go back to the Edit Mask window.
- Press the Close button on the toolbar to continue.
-
Go through all of the images and label the images with classification tags. See Create Label (Labeling) for the details of labeling.
Tip: It is recommended to annotate your image files with descriptive names or numbering schemes to help when labeling the images. -
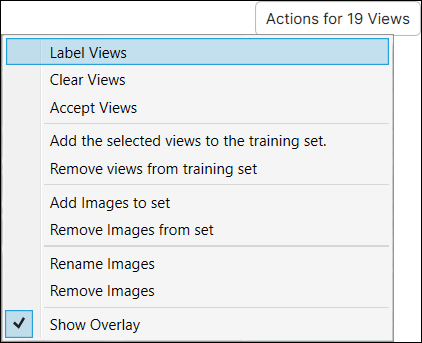
You can use the Label Views option in the View Browser.
-
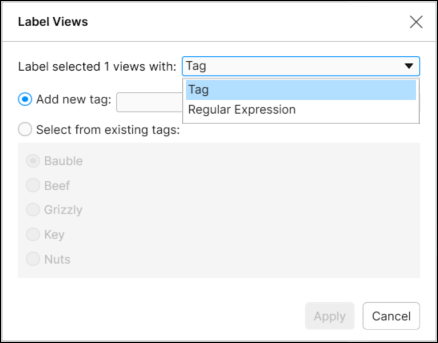
When labeling, you can either apply a tag or use regular expressions to apply the classification tag label.
- Make sure that all of the images have been labeled with a classification tag.
- Split the entire images into the training images and the test images. Utilize image sets to properly divide them into the training and test group. Add images to the training set.
- Select the images in the View Browser, and on the right-click pop-up menu click Add views to training set. To select multiple images in the View Browser, use the Shift + Left Mouse Button.
- Or, use Display Filters to show the desired images for the training only and add them to the training set by clicking Actions for ... views → Add views to training set.
- Prior to training, you need to set parameters in Tool Parameters. You can configure Training and Processing parameters or just use the default values of these. See Configure Tool Parameters for the details of the supported parameters.
- Green Classify High Detail Quick doesn't have Sampling parameters as it doesn't use feature-based sampler but it samples from the entire pixel of each view.
- If you want to apply filter on the results from Database Overview, turn on Expert Mode on Help menu to initialize filter bar on Database Overview.
- Train the tool by pressing the Brain
 icon.
icon.- If you stop training in the middle of it by pressing the Stop
 icon, you can stop training with saving the current tool so far trained. You can later load this tool and process images with it, but you cannot continue the training from where the last training was stopped.
- If you stop training in the middle of it by pressing the Stop
-
After training, review the results. Open Database Overview panel and review the Confusion Matrix and Precision, Recall, F-Score for each class (tag) to understand the results. See Interpret Results for the details of interpreting results.
- After reviewing the results, go through all of the images and see how the tool correctly or incorrectly marked the tags for each image.
- If the tool has correctly marked the images with the appropriate tag, right-click the image and select Accept View.
- If the tool has incorrectly marked the images with incorrect tags:
- Right-click the image again and select Clear Markings and Labels.
Manually tag the image.
If you encountered the scenario in (a.), you are ready to use the tool. If you encountered the scenario in (b.), you will need to retrain the tool and repeat the steps 9 ~ 12.
The details of each step are explained in each subsection of Training Green Classify High Detail Quick.