Edit VisionPro Tools Through the WebHMI
Cognex Designer supports editing certain VisionPro vision tools through the WebHMI while the project is in Test Mode or deployed. This allows you to adjust and/or fine-tune the vision tools of the project during runtime, even remotely, by using a web browser. Currently, this feature supports 10 vision tools: see the Vision Tools Supported for Editing in the WebHMI topic for more information on the supported operations and potential limitations.
Typically, you can prepare the WebHMI for editing a supported vision tool during runtime by configuring the Edit Graphic button click command property for a Web Page Control (typically a Button) that will be used to interact with that specific vision tool. If you already have your vision tools and a WebPage with a Display element (showing the tools' output image) configured in the project, you can do this as follows:
-
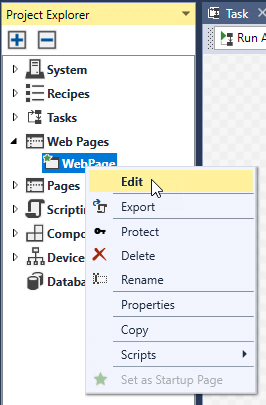
Open the WebPage you are editing with the Web Page Editor, if it is not already open. To do that, look for the Web Pages node in the Project Explorer, then double-click the WebPage. Alternatively, right-click the Web Page and click Edit in the context menu, as shown below.
-
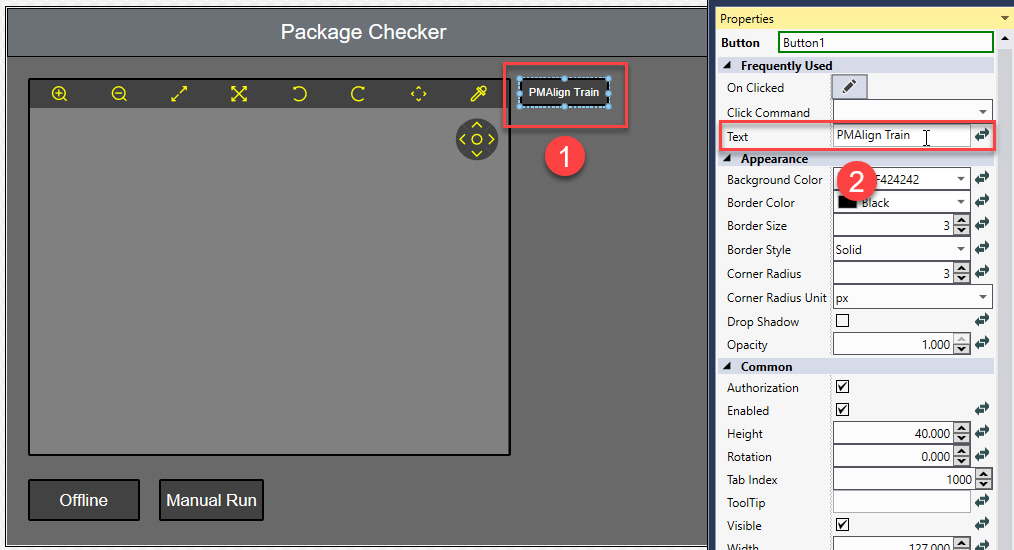
Add a new Button to the web page, or select an existing one by clicking on it (1). In this example, we configure a button that will be used to modify the Train Region of the CogPMAlignTool in runtime. Therefore, set the Text property of the Button to PMAlign Train in the Properties window (2) to properly label it.
-
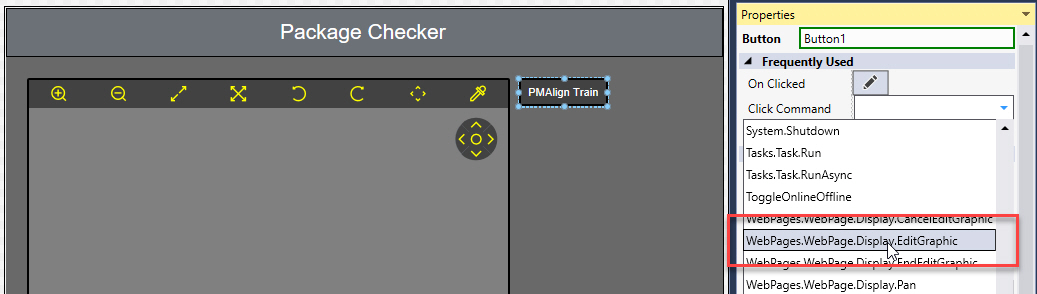
With the Button still selected, look for the Click Command attribute in the Properties window, and select WebPages.WebPage.Display.EditGraphic from its drop-down menu.
-
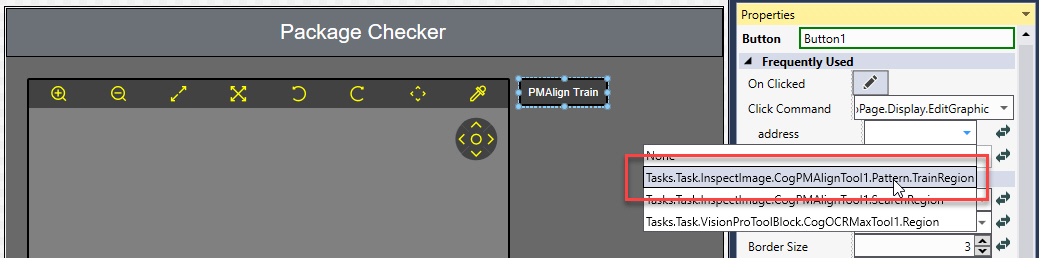
An Address property then appears below the Click Command property. Use its drop-down menu to select the appropriate tool address. Since we are preparing a Button now to modify the Train Region of the CogPMAlignTool, select Tasks.Task.TaskName.CogPMAlignTool1.Pattern.TrainRegion.
-
Save your project, then click the
 (Run) button or press F5 to put the project in Test Mode. You can use the PMAlign Train Button afterward to modify the Train Region of the tool in the Display Web Page element while the project is running
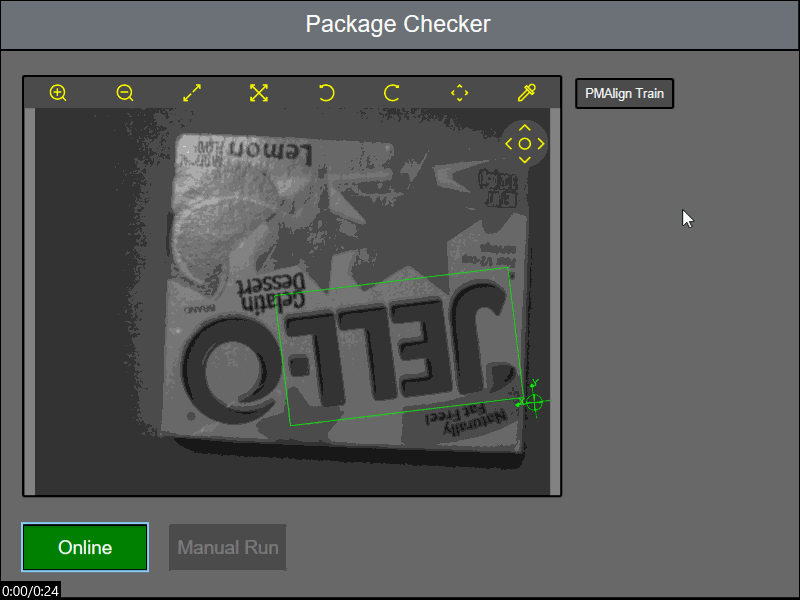
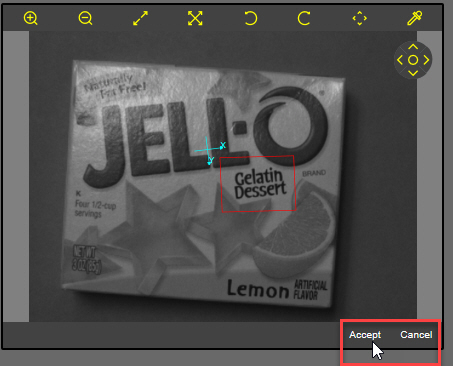
Use the Accept button at the bottom of the Display element to apply your changes made in runtime, or click Cancel to undo them.
-
The Accept and Cancel buttons appear only if the Show Edit Buttons property of the Display is checked (this is the default setting).
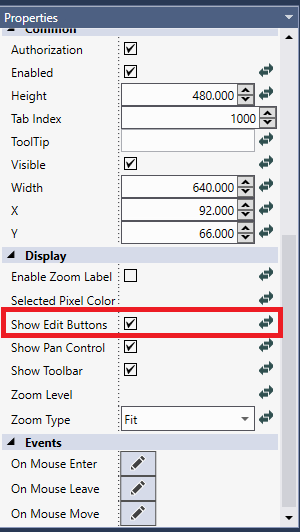
If this setting is unchecked, you can assign the WebPages.WebPage.Display.EndEditGraphic and WebPages.WebPage.Display.CancelEditGraphic button click commands to any Buttons on the web page (as done in Steps 3 and 4 above) to apply or cancel editing the tools, respectively. See the Button Click Command - WebPages topic for more information on the Edit Graphic, End Edit Graphic and Cancel Edit Graphic click commands.
- For more information on the supported vision tools, see the Vision Tools Supported for Editing in the WebHMI topic.